
Welcome back to Part 2 of my journey of remodeling my own kitchen. If you missed Part 1, you can find Part 1 here, but if you’ve already read up on it then you are here for the reveal!
As I stated before, it can be a challenge when a professional designer decides to work on their own space; after all, we are our own worst critic. Or, if you’re like me, you have many tastes and styles that you love to design with, so how do you choose the one that’s best for your own home? Seriously! If I had all the money in the world I would build a house with 4 kitchens just so I could have spaces with all the styles I love! But I only have one kitchen so I had to make it count during this journey.
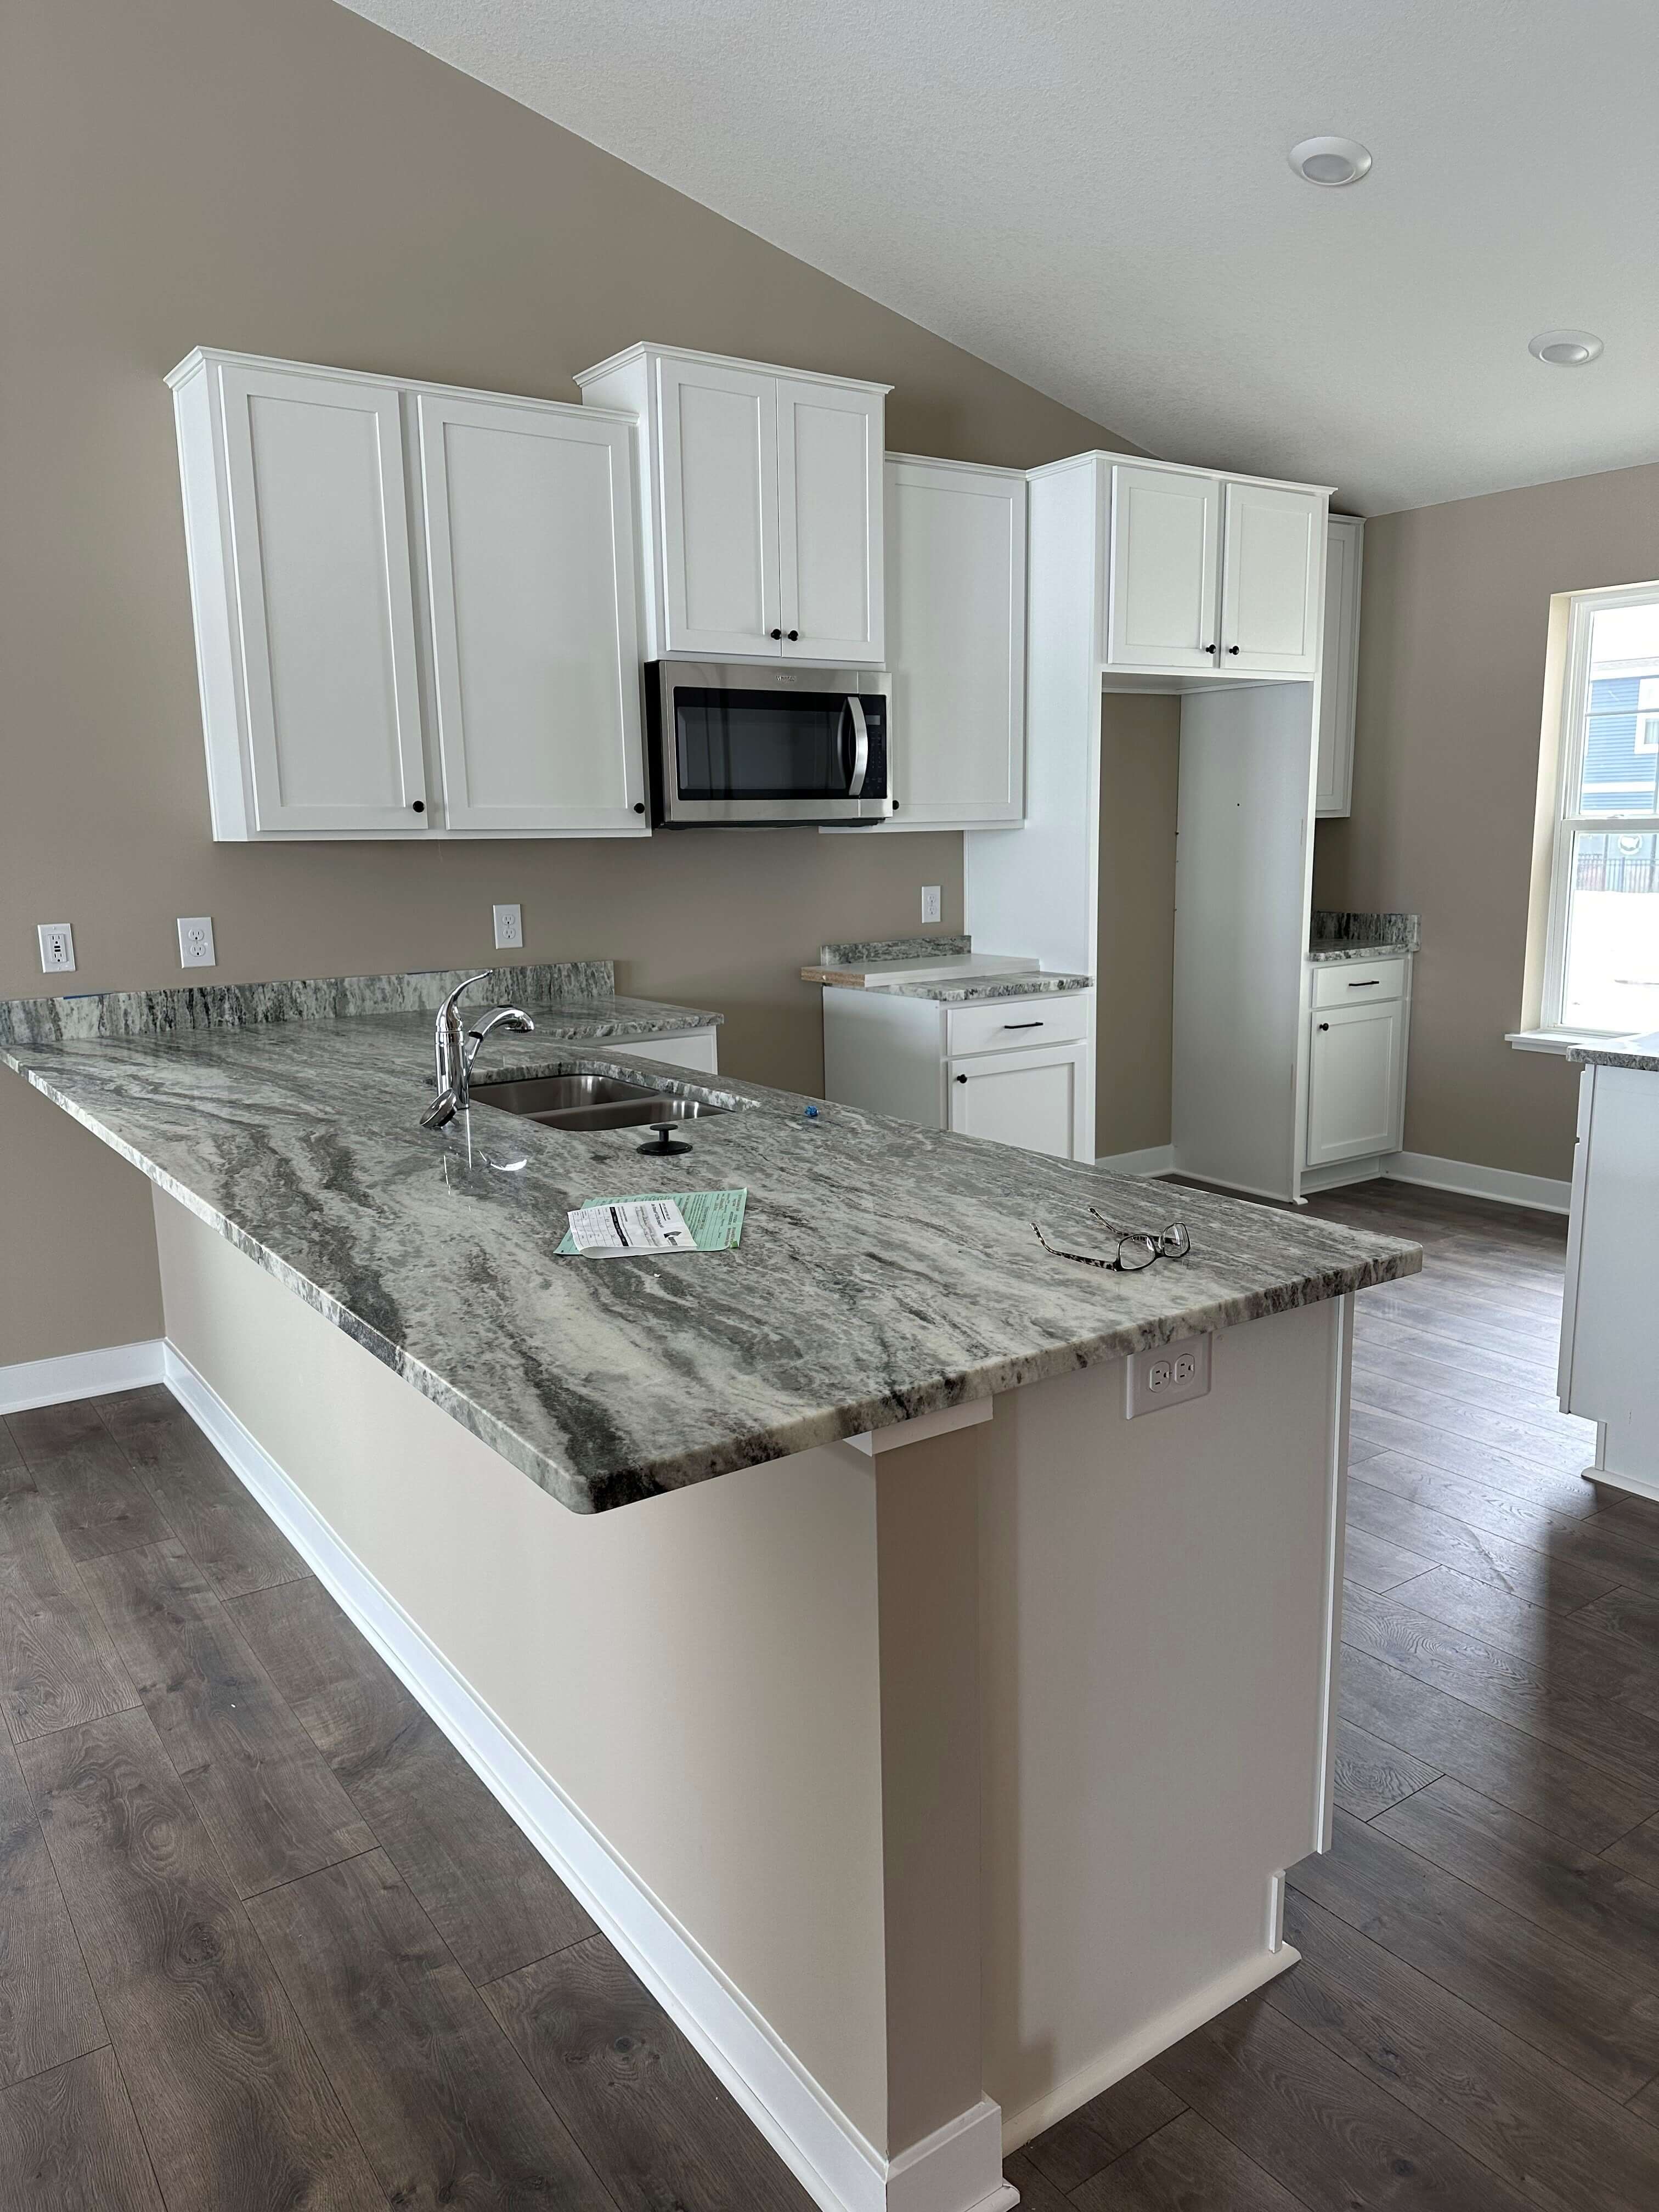
I moved into my new home a little over a year ago and knew right away I would be replacing the cabinets, even though it was a brand new house. I figured if I’m going to be in it for at least 10 years then I wanted to make it mine, and the builder-grade cabinets used had to go. Not only did I want the cabinets to reflect me and my style (or at least one of them!), I wanted to incorporate the conveniences that one looks for in a new kitchen. So with that, let’s journey through the new space and take a look at things that I would recommend to any designer or client. I’ll also share a couple of “ah ha” moments I had which will prove that no matter how long you are in the industry, there is always room to learn!
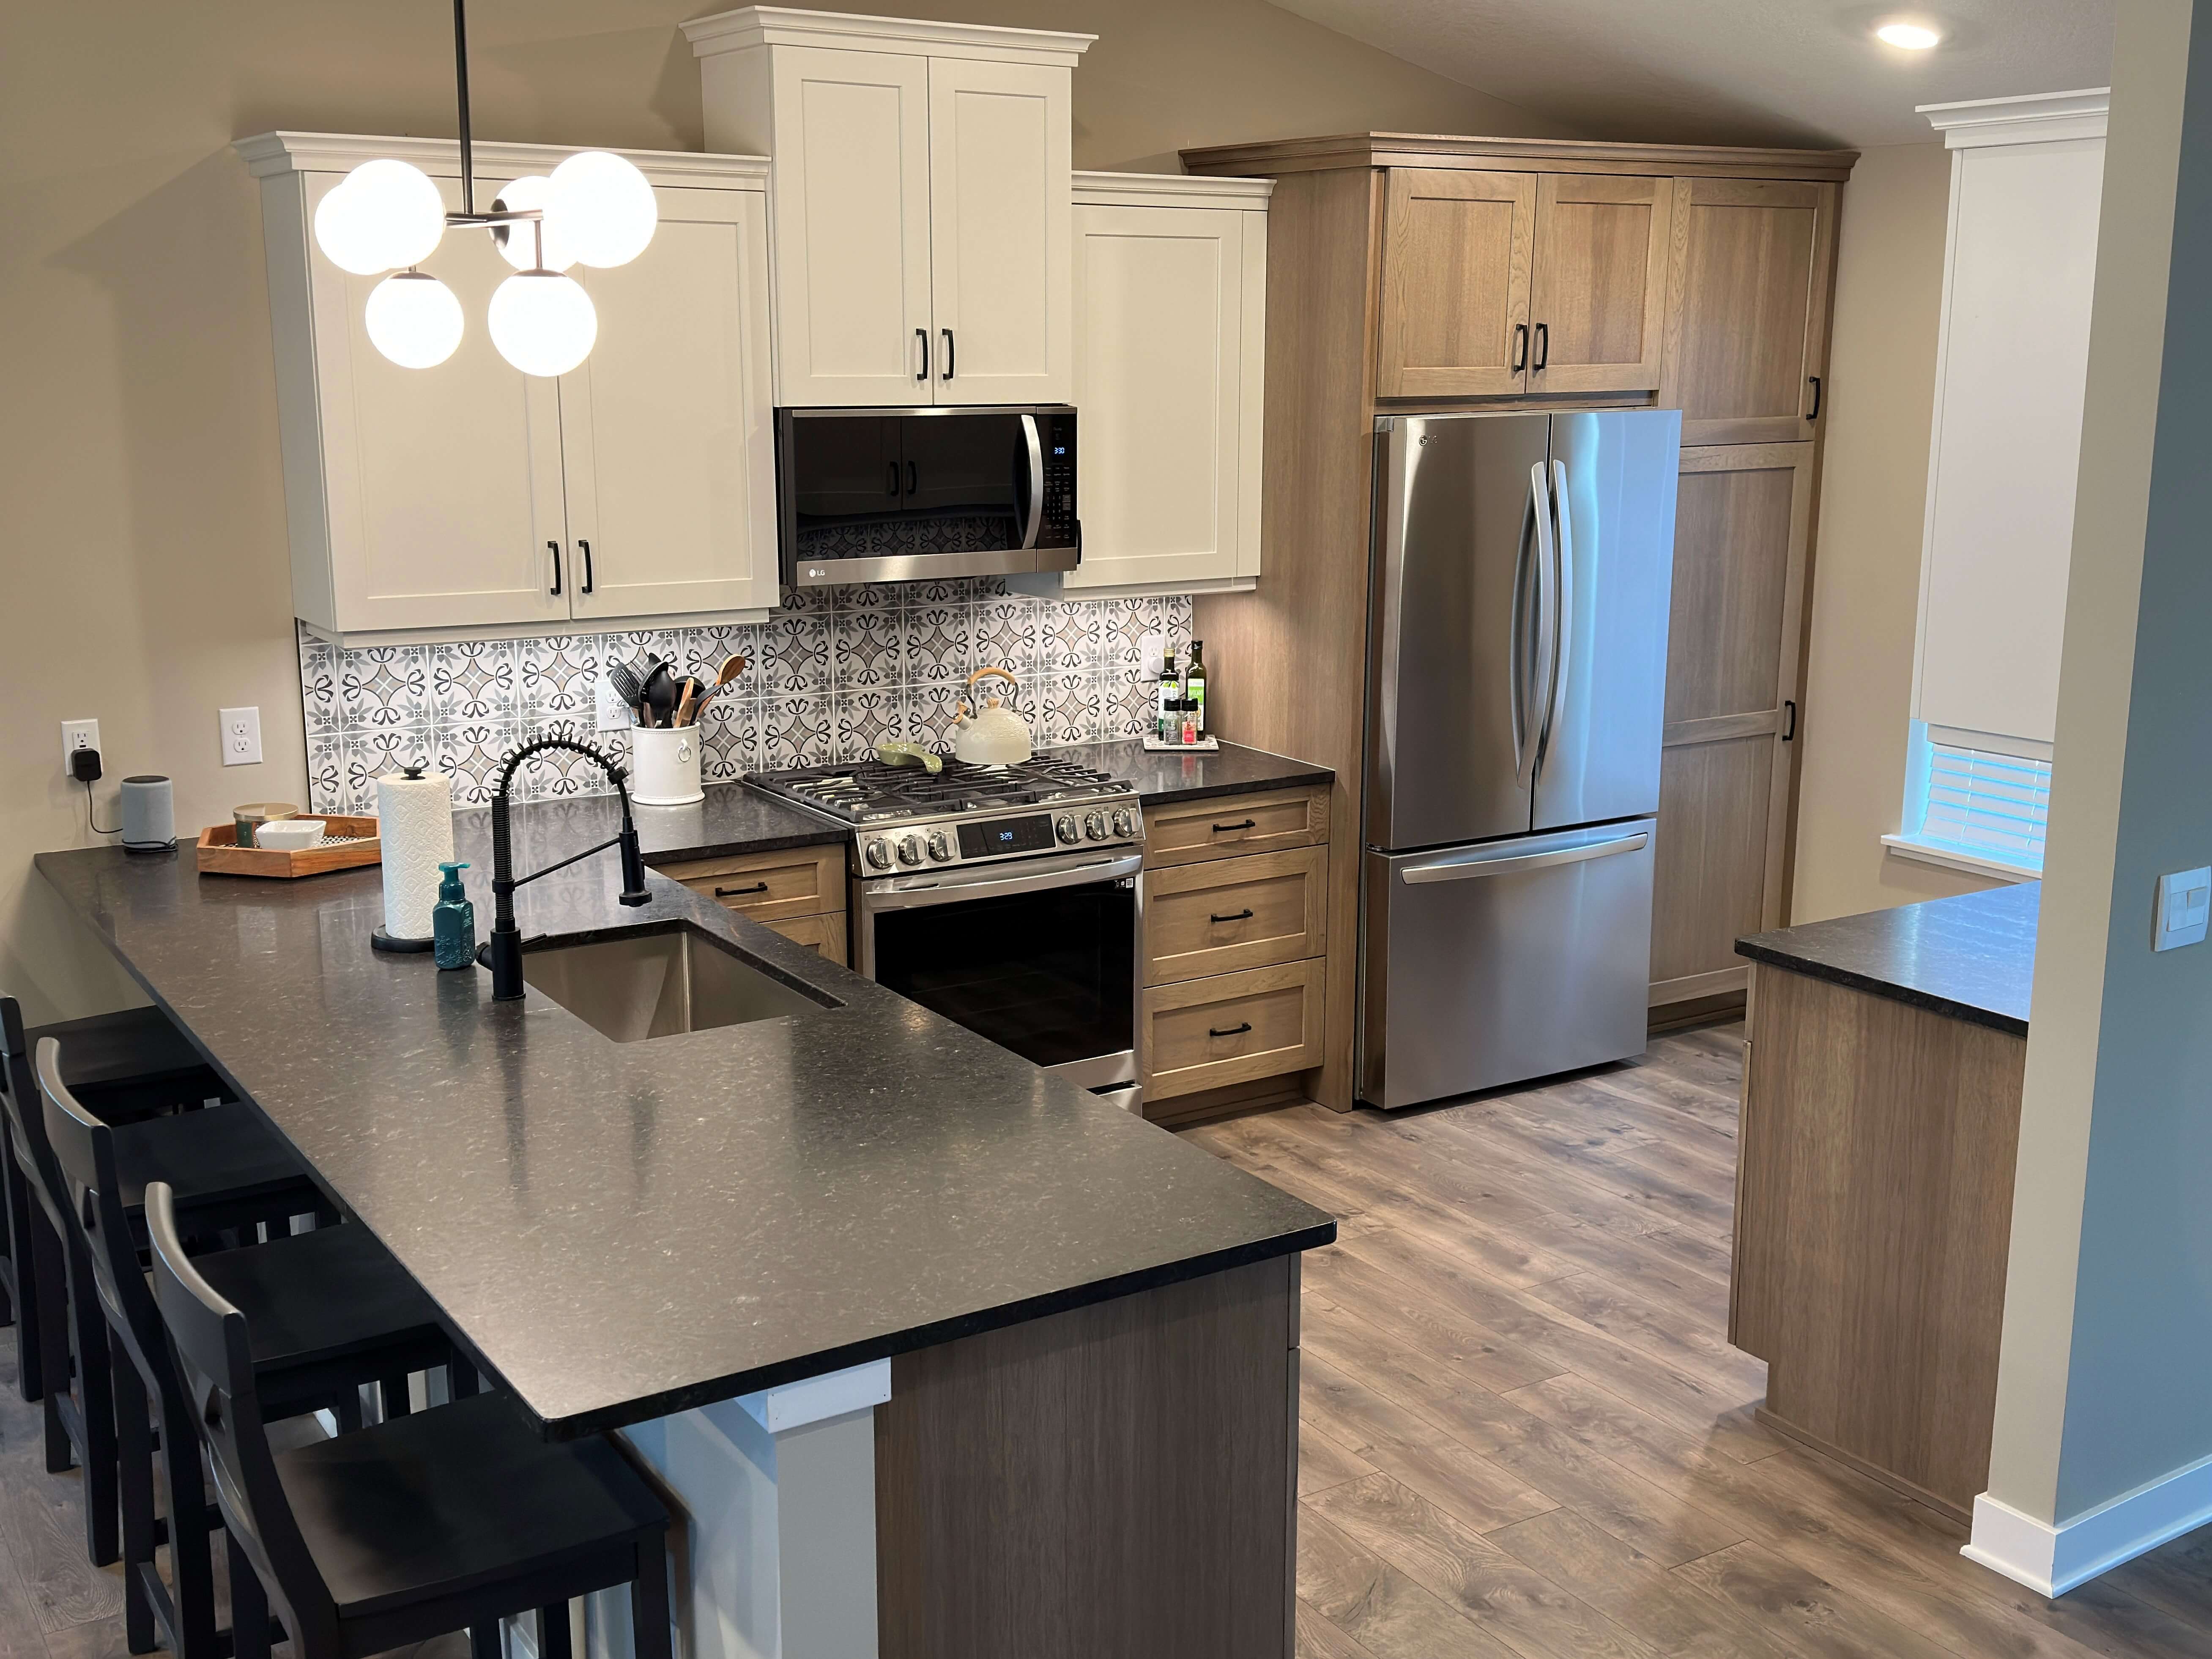
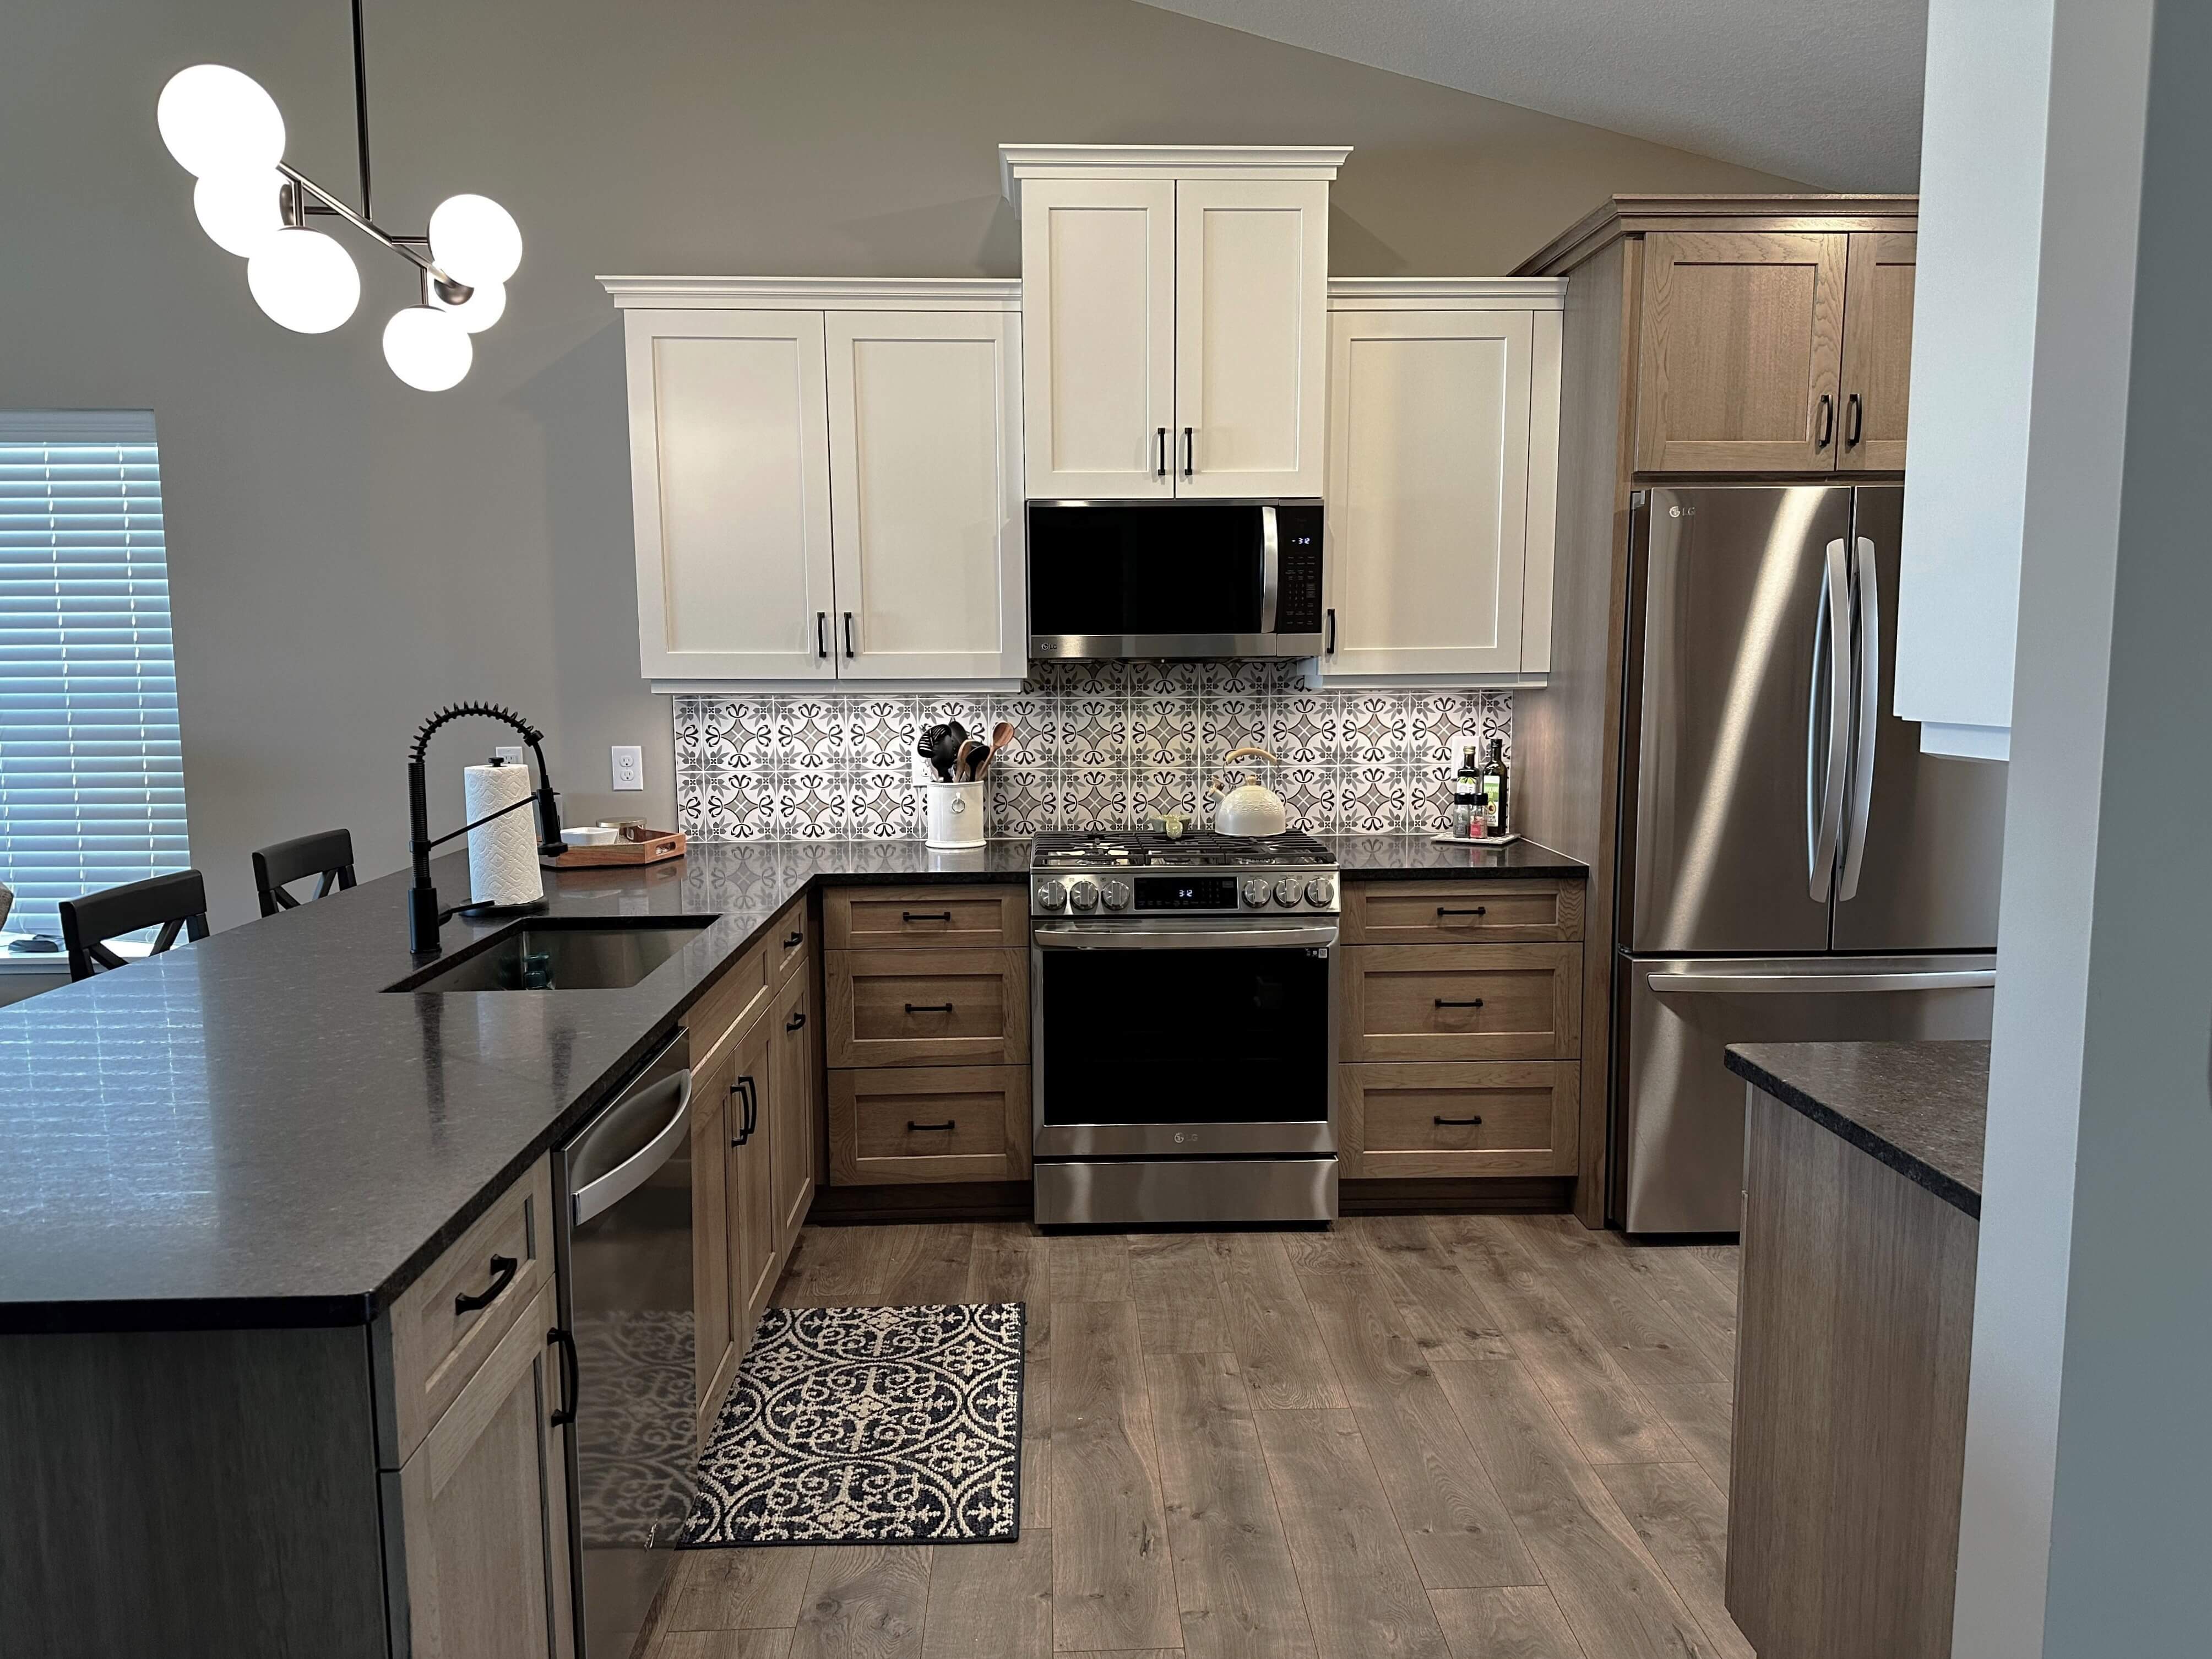
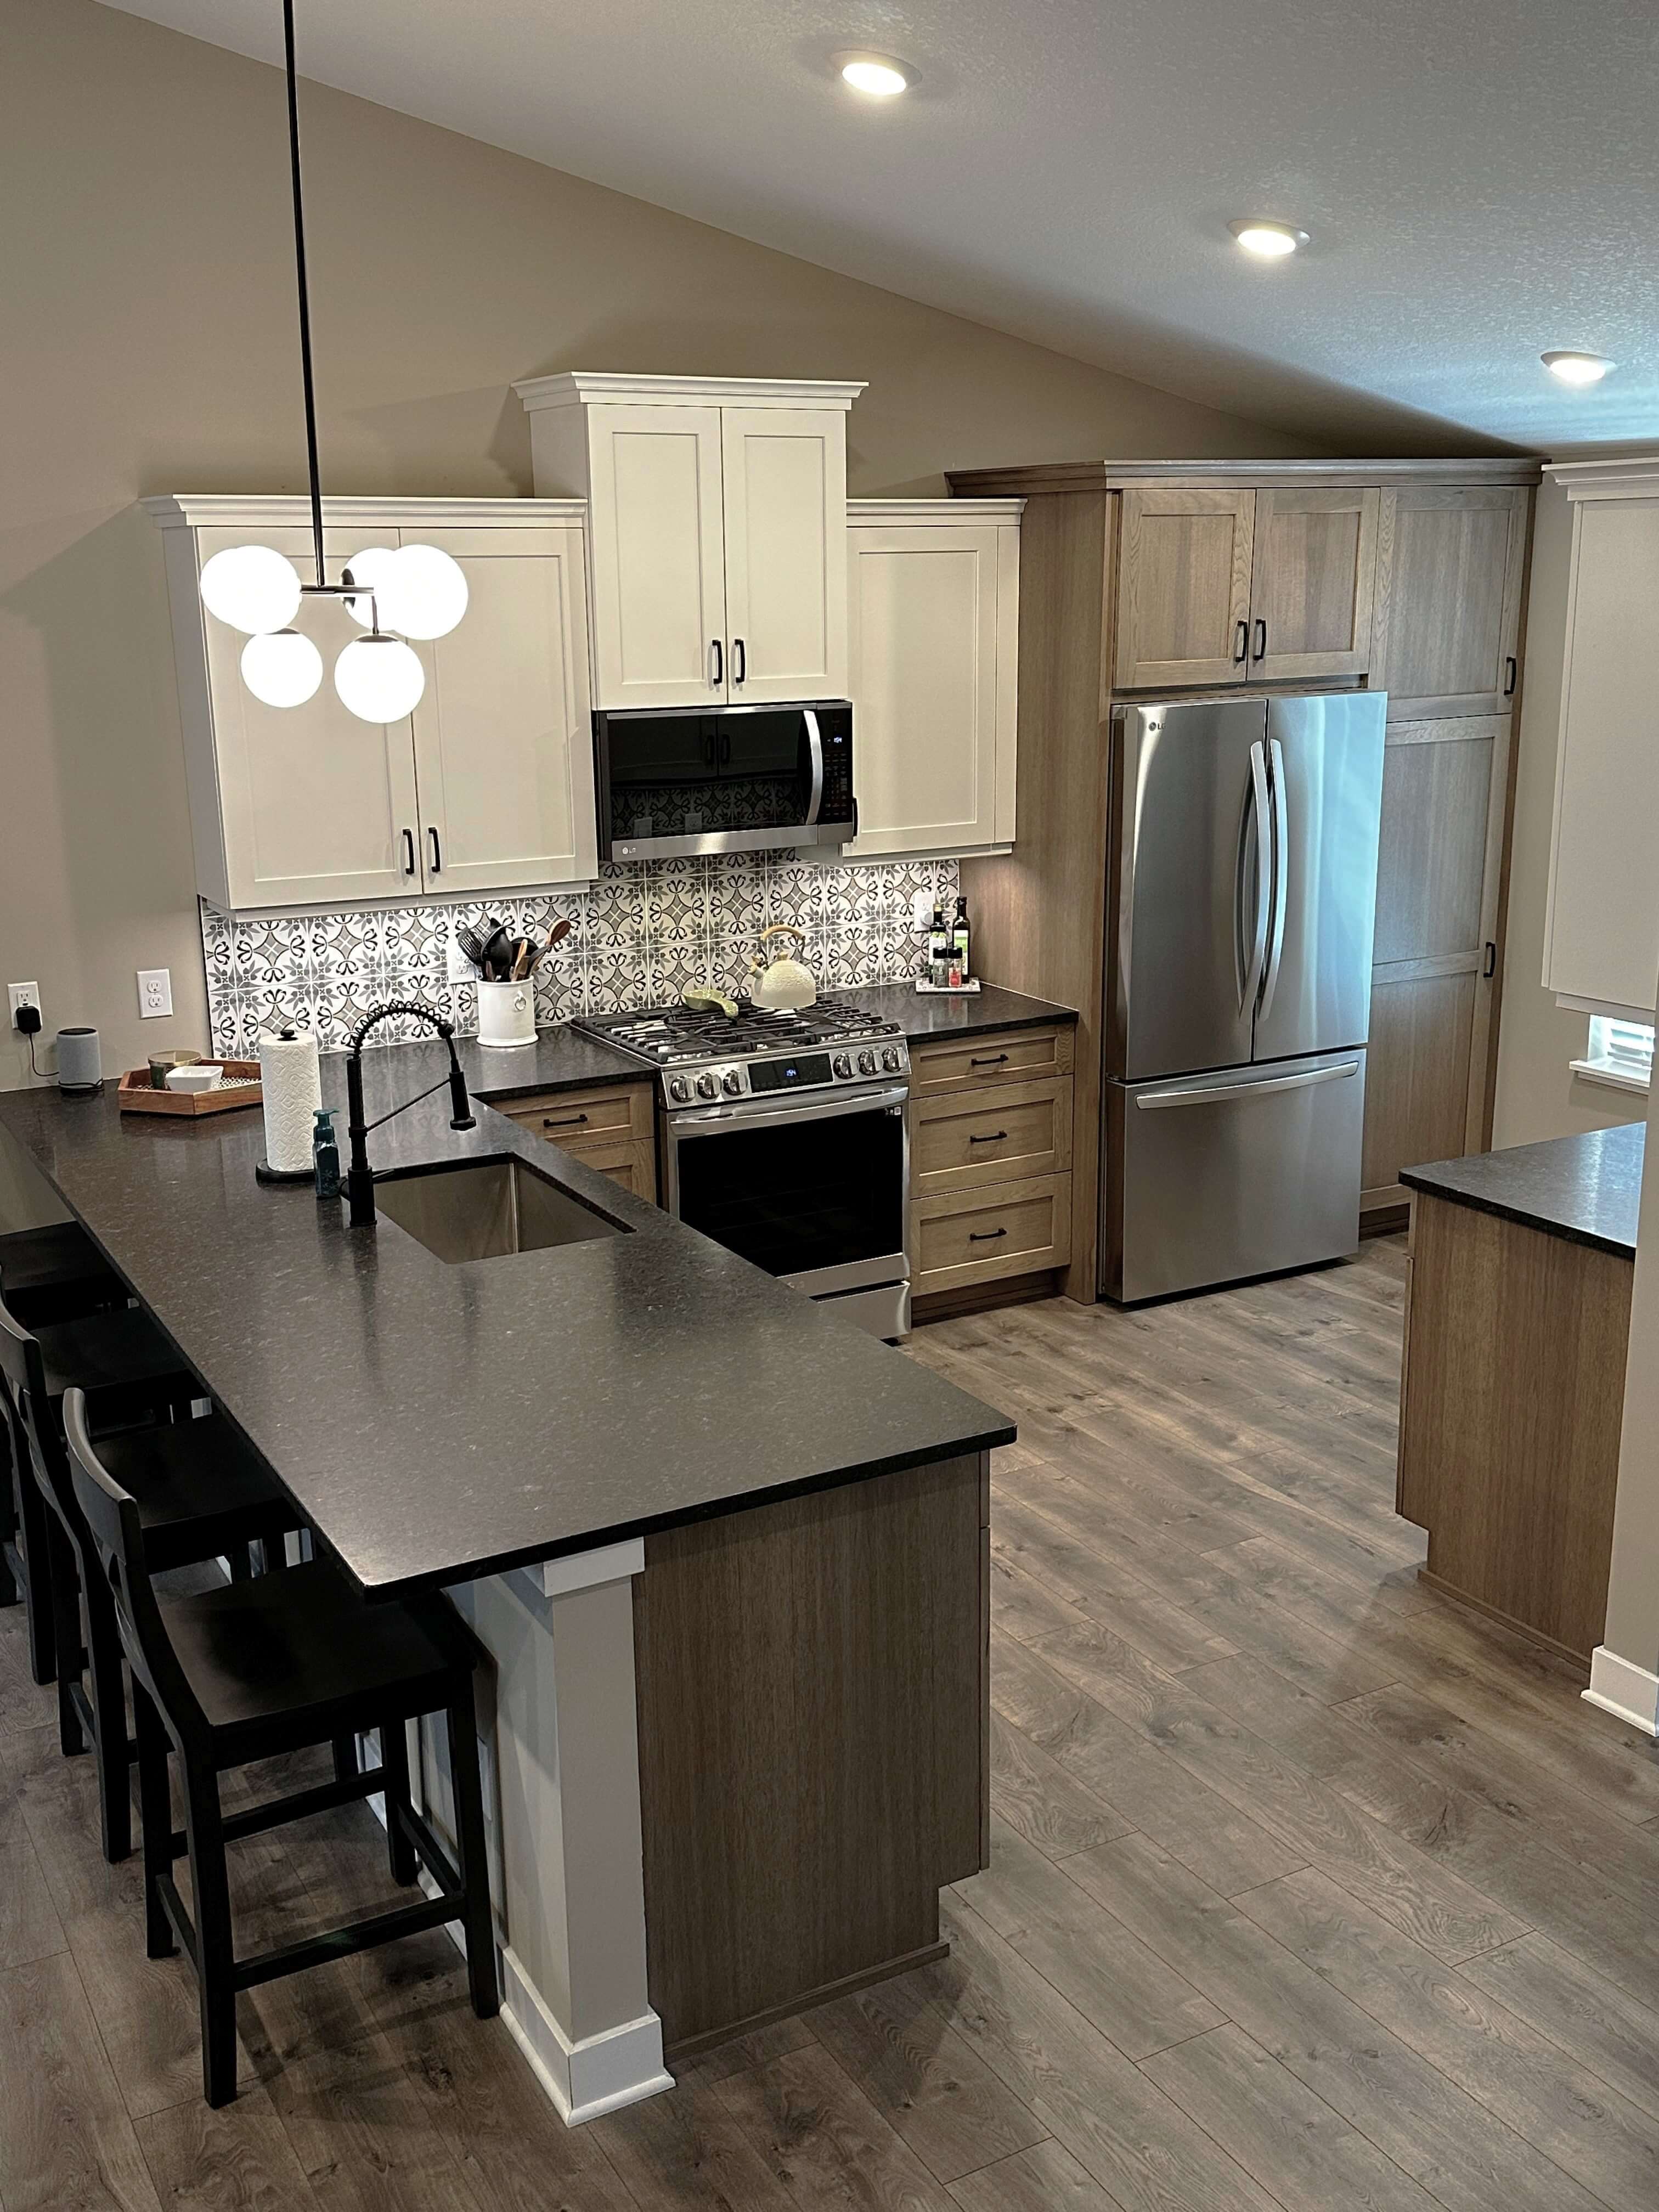
I designed with Bria frameless cabinets and used the Carson door style in Hickory with a Cashew stain and Dove paint for a soft two-tone look. I love the visual texture the hickory has and the Opalescence granite countertops contrast beautifully with the true brown tones of the Cashew stain. I was freaking out over those countertops for nothing!

Accessories + Storage
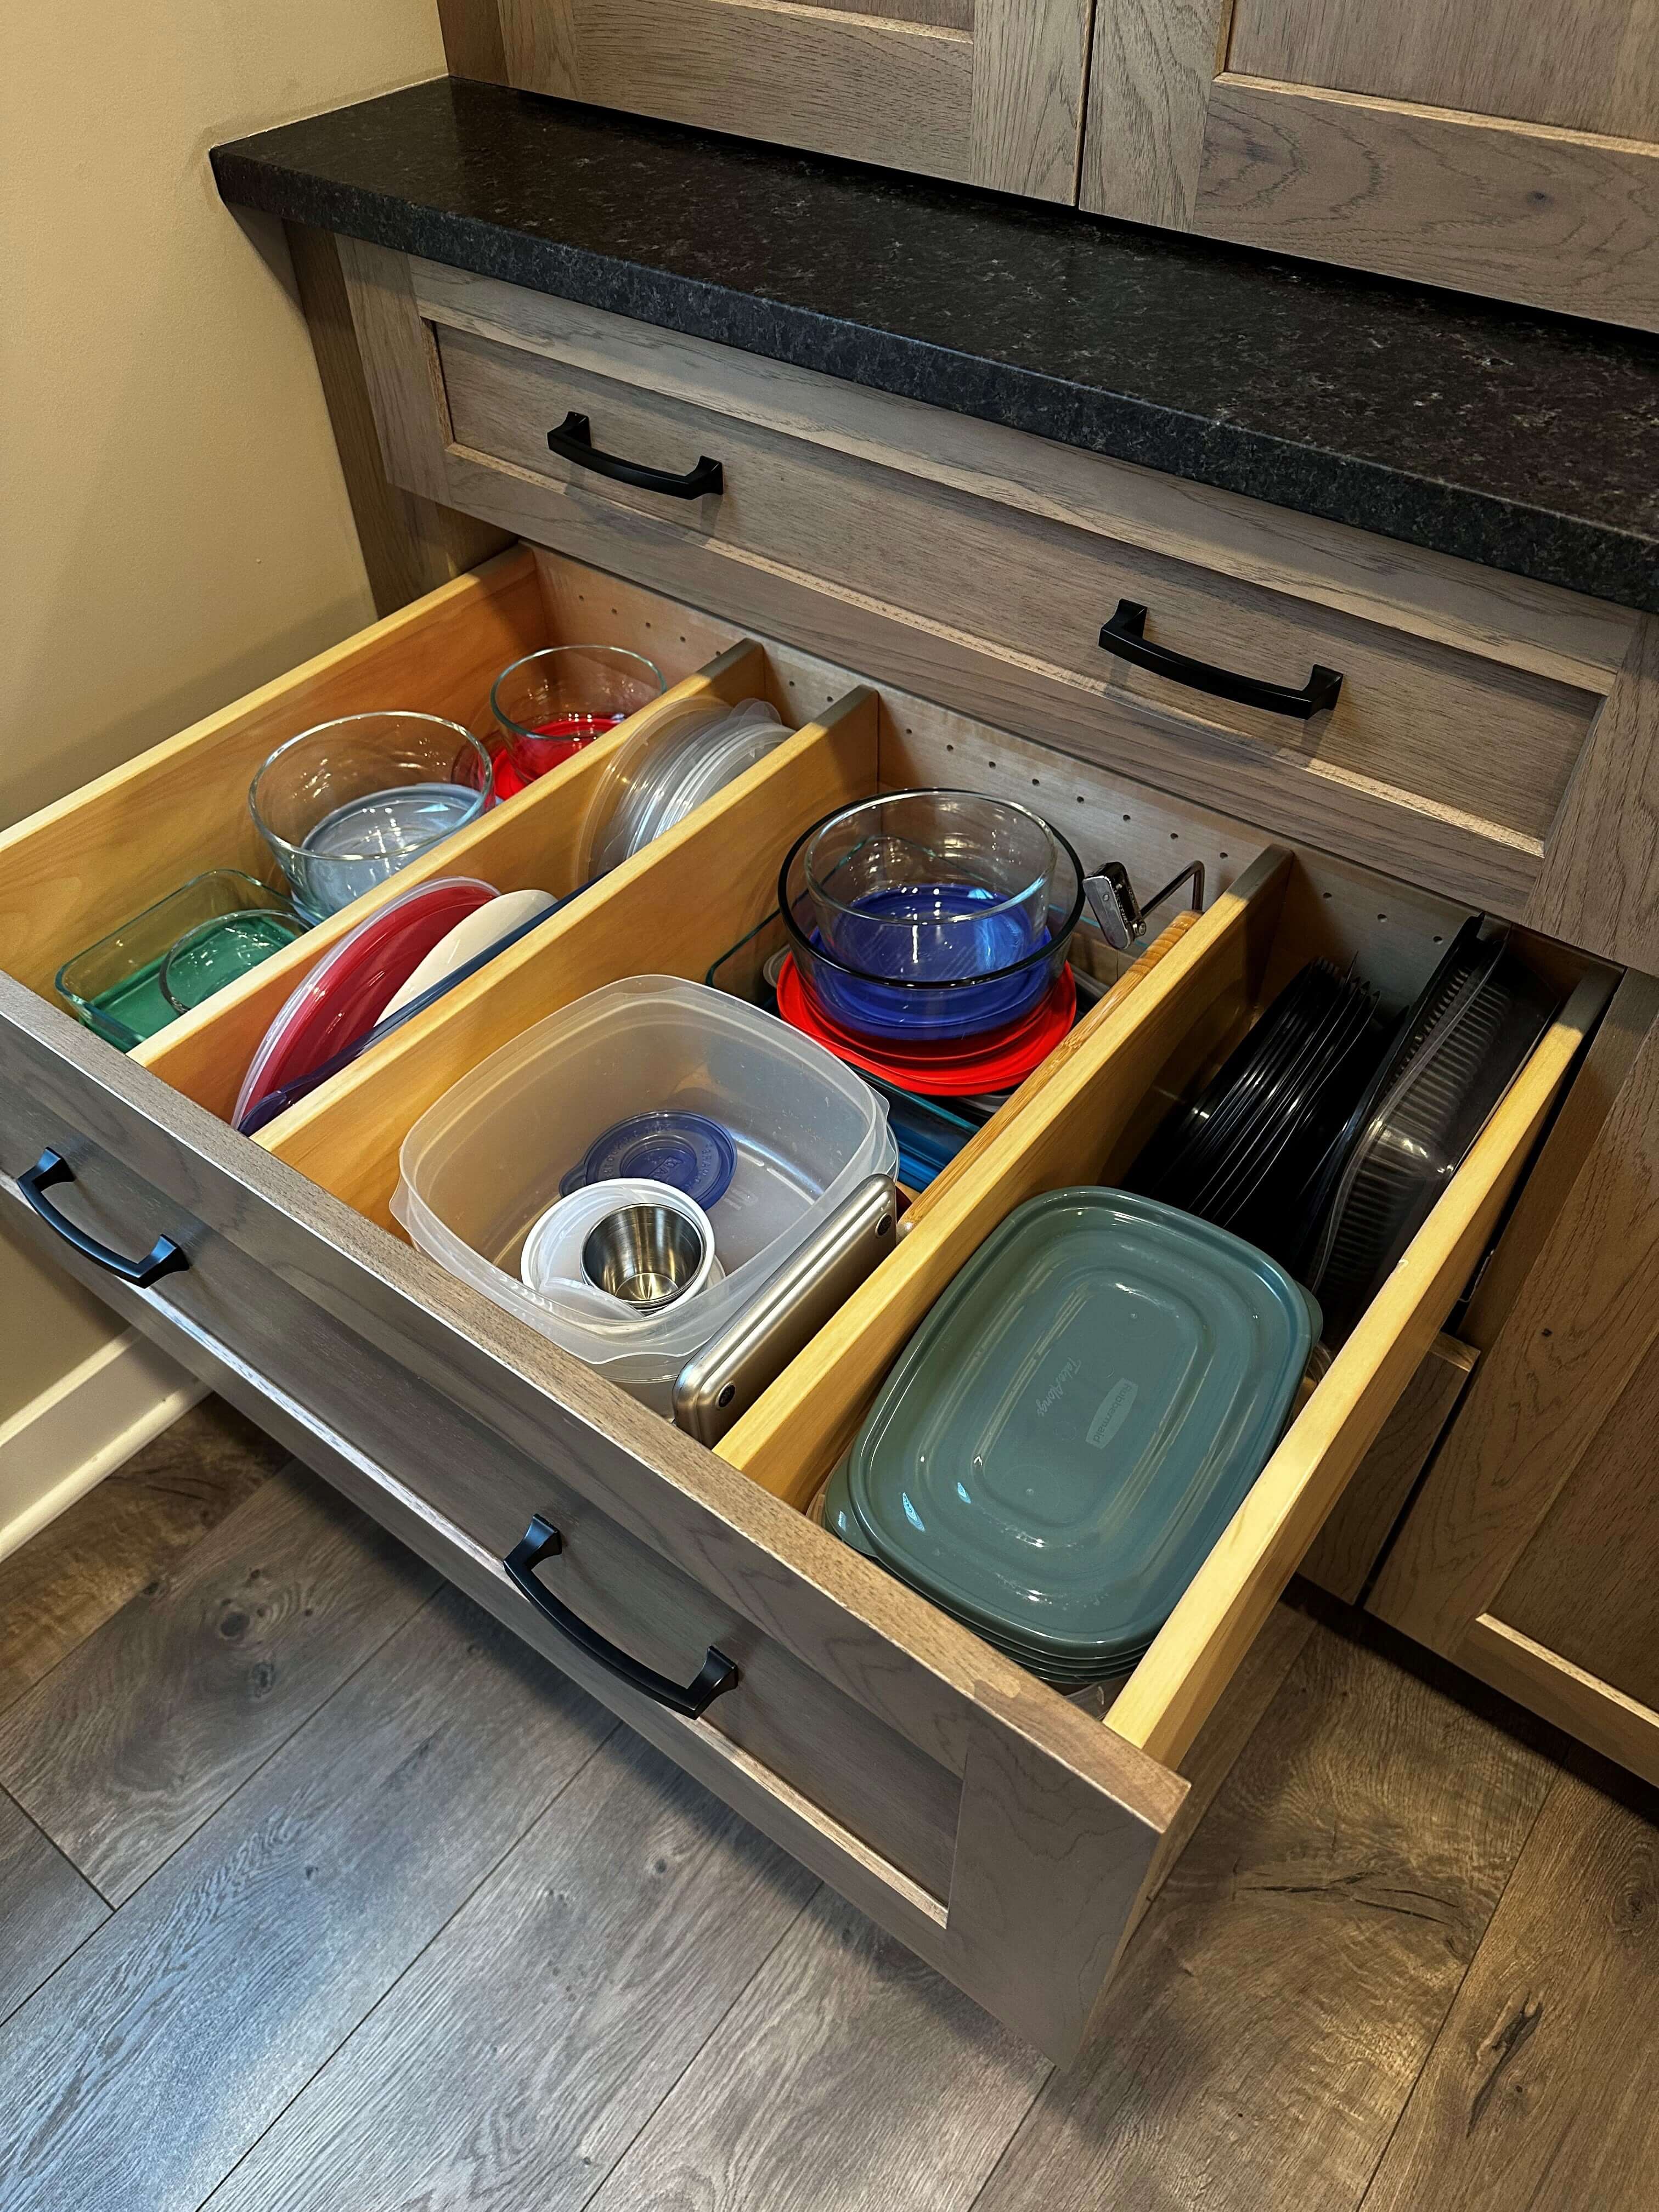
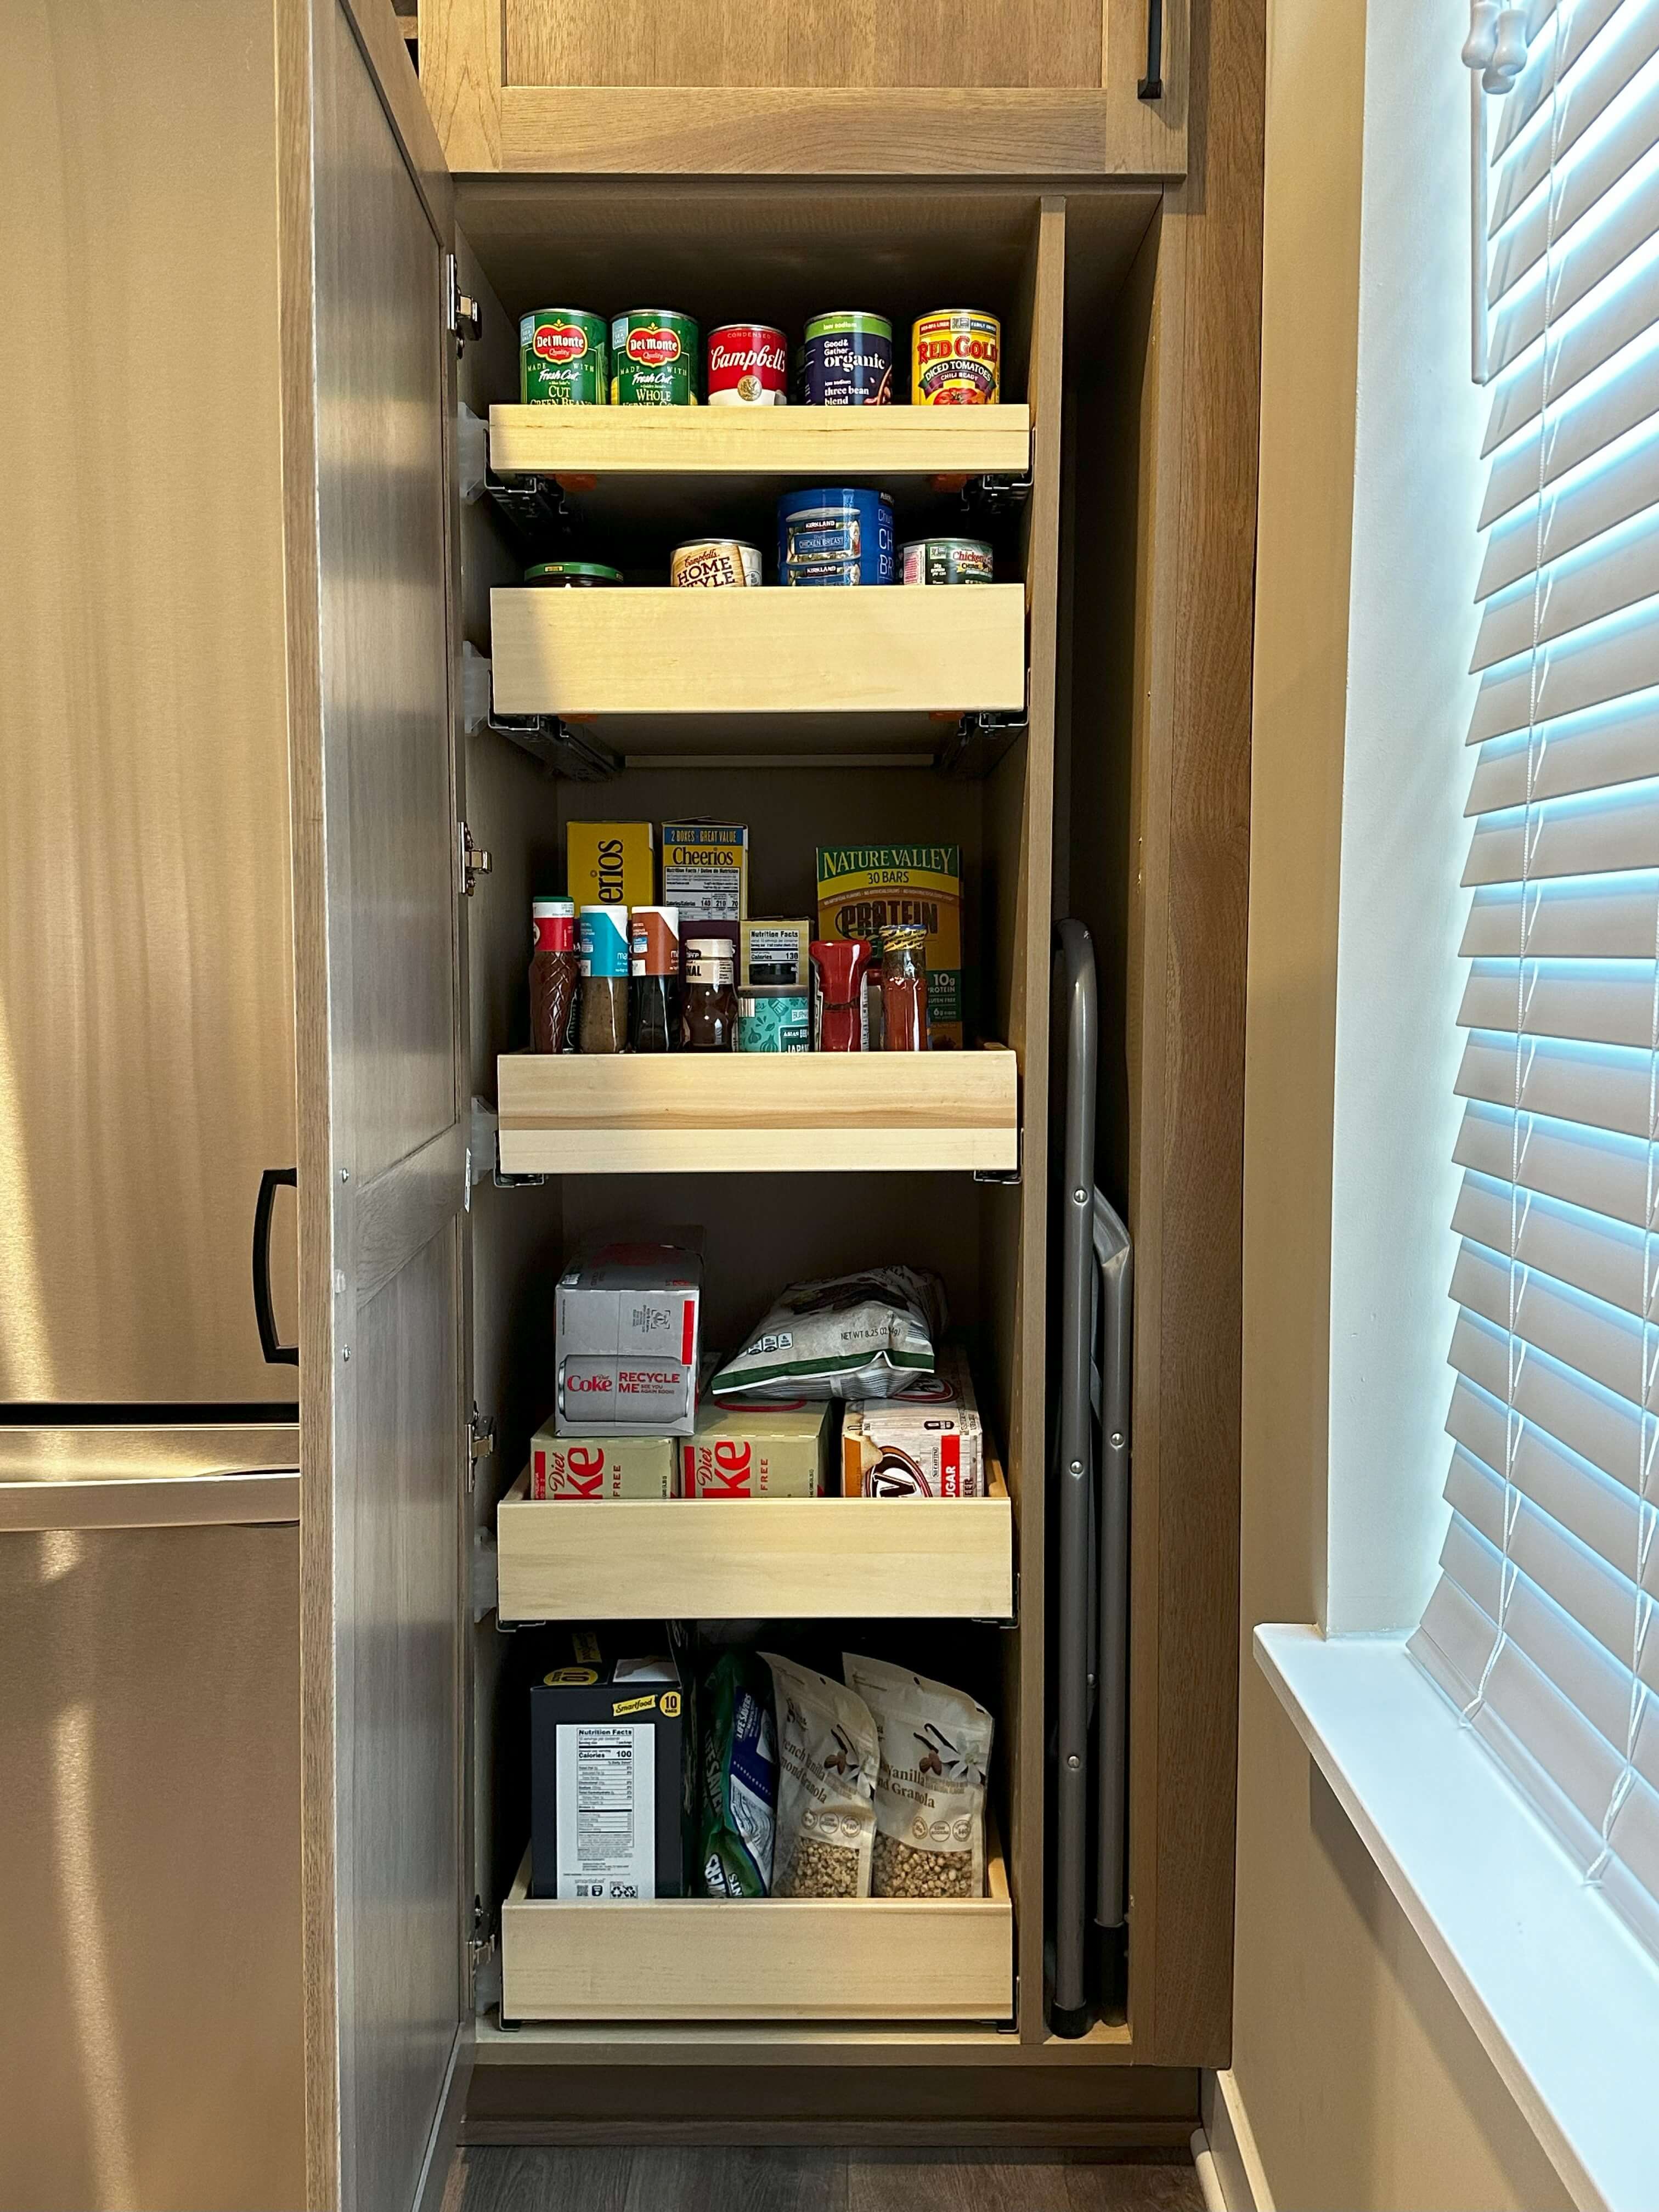
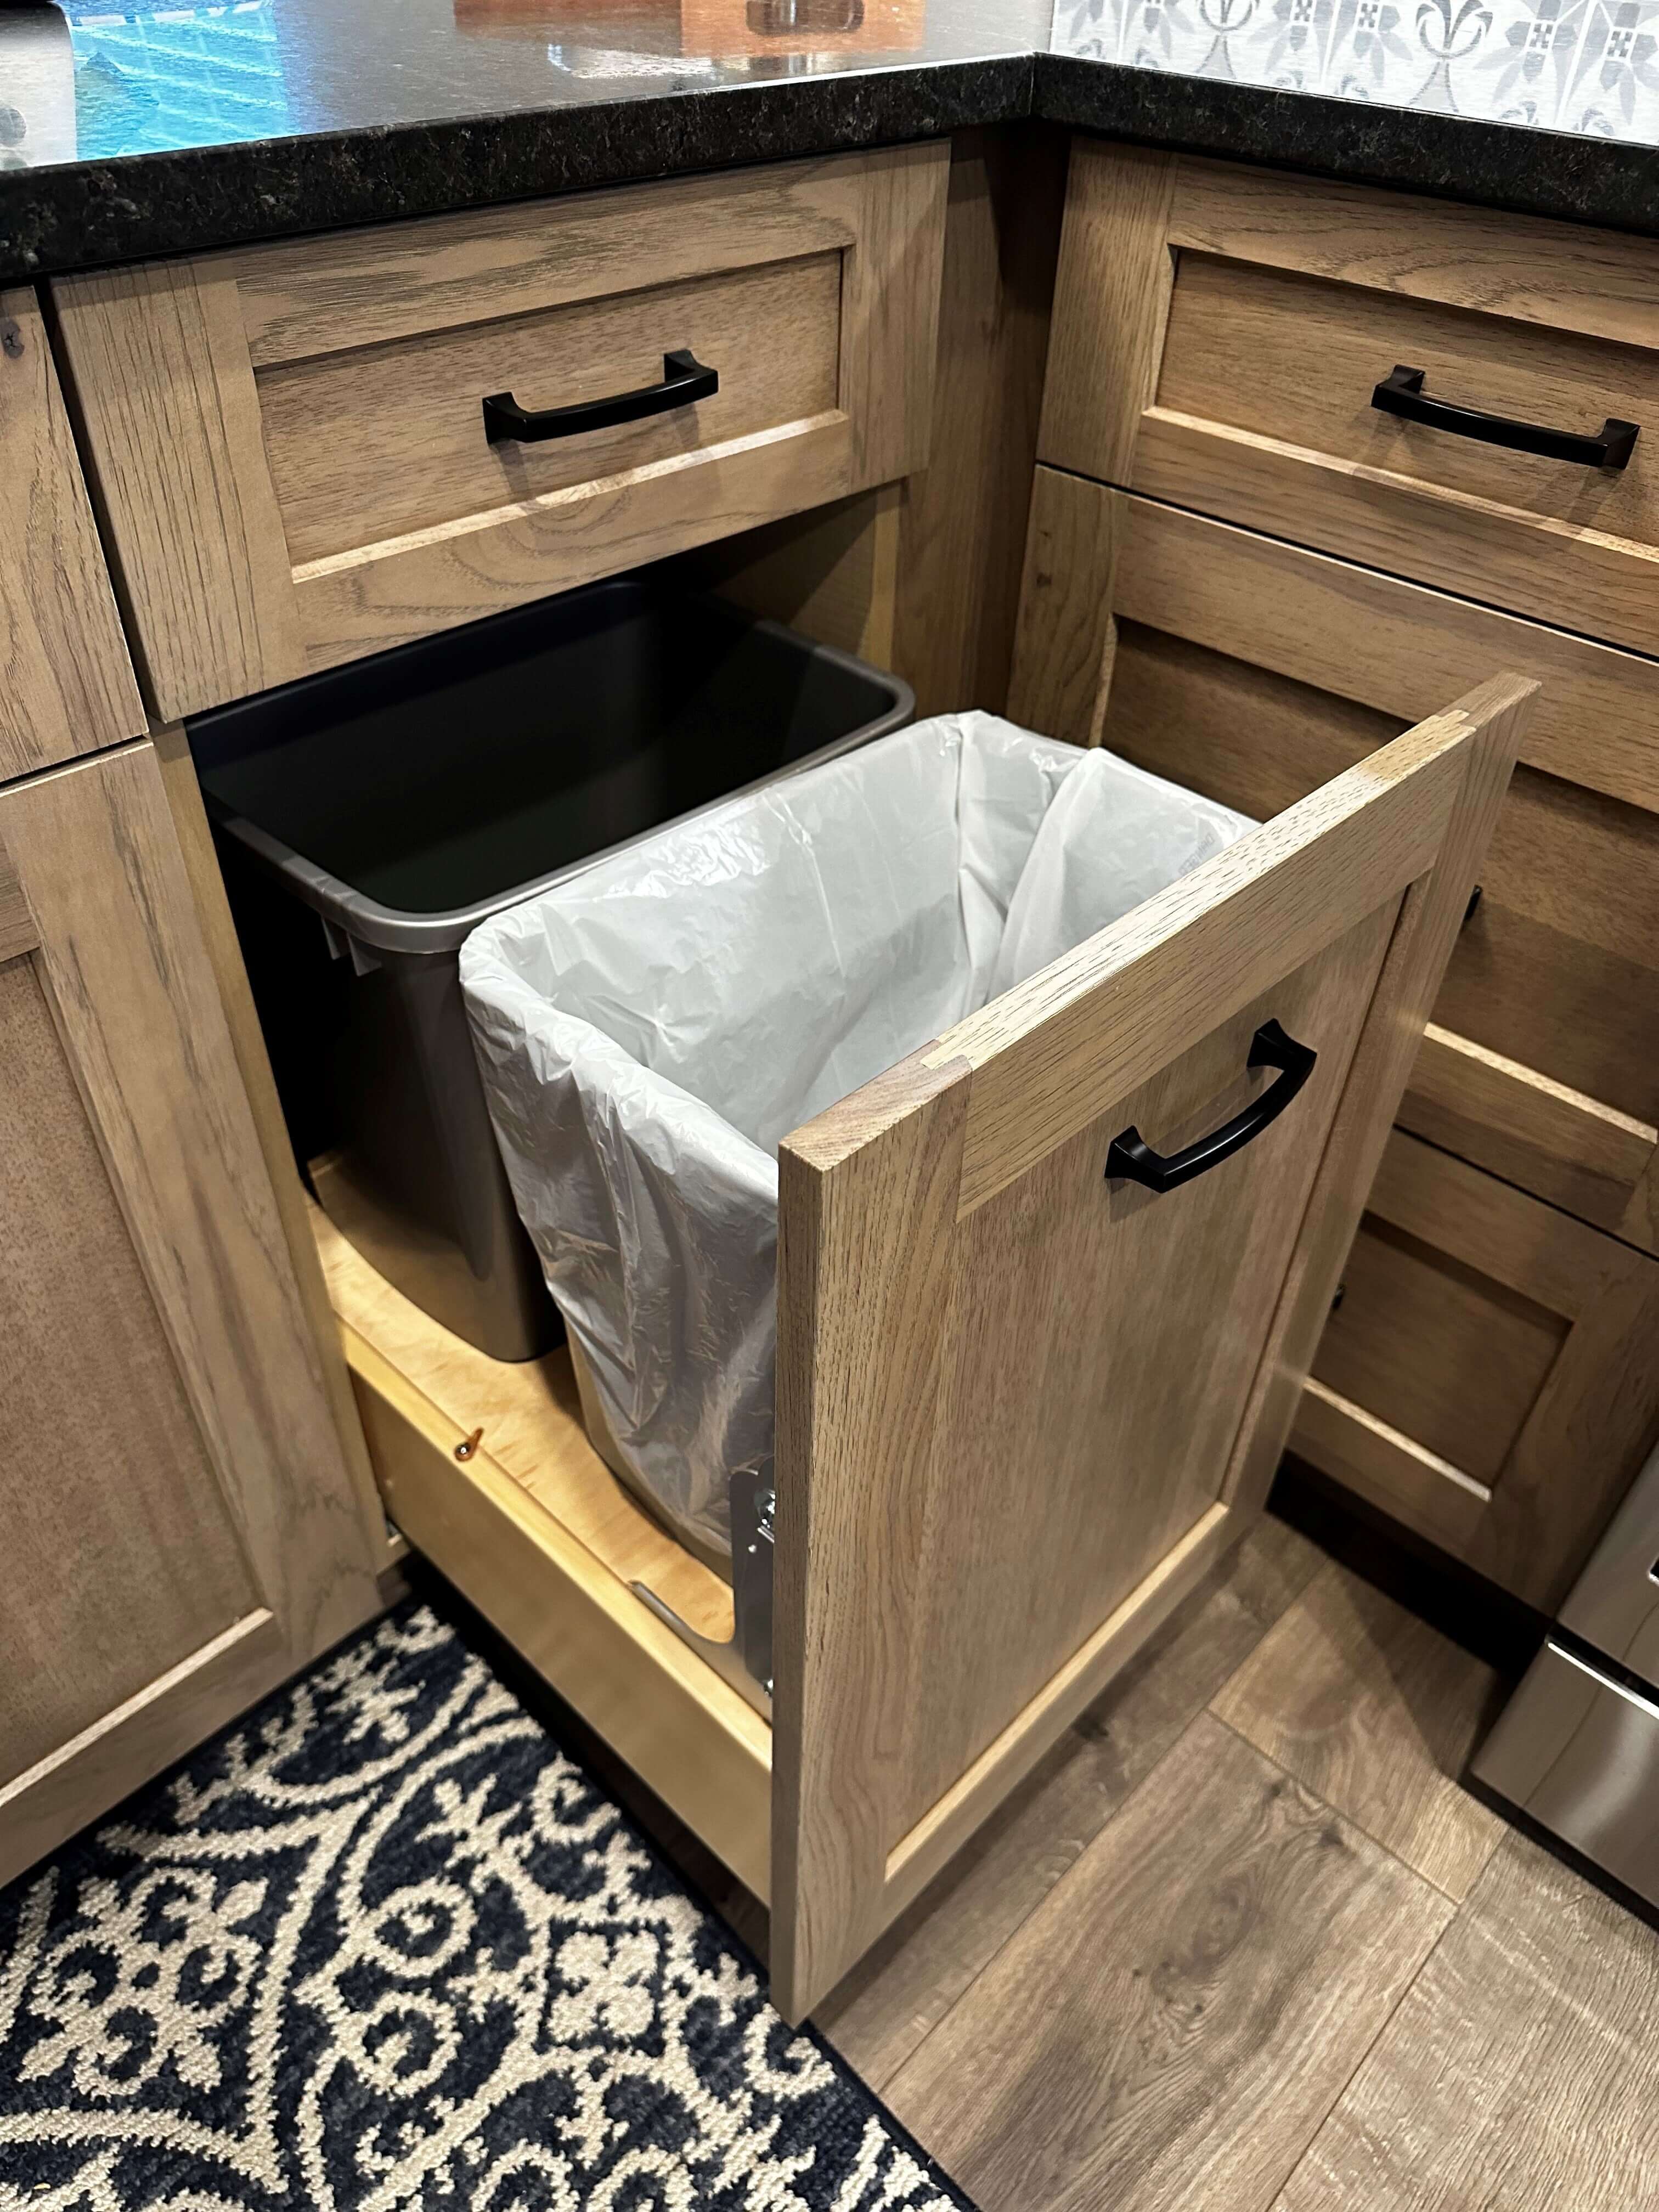
In-cabinet conveniences are one of the many reasons why people look to remodel their kitchens, and I am no exception. Having items like a pull-out trash over a free-standing container sitting in the corner of the room helps keep things tidy. Organization is key to using these elements and you can scroll through the photos below to see what storage solutions I incorporated in my own kitchen remodel.
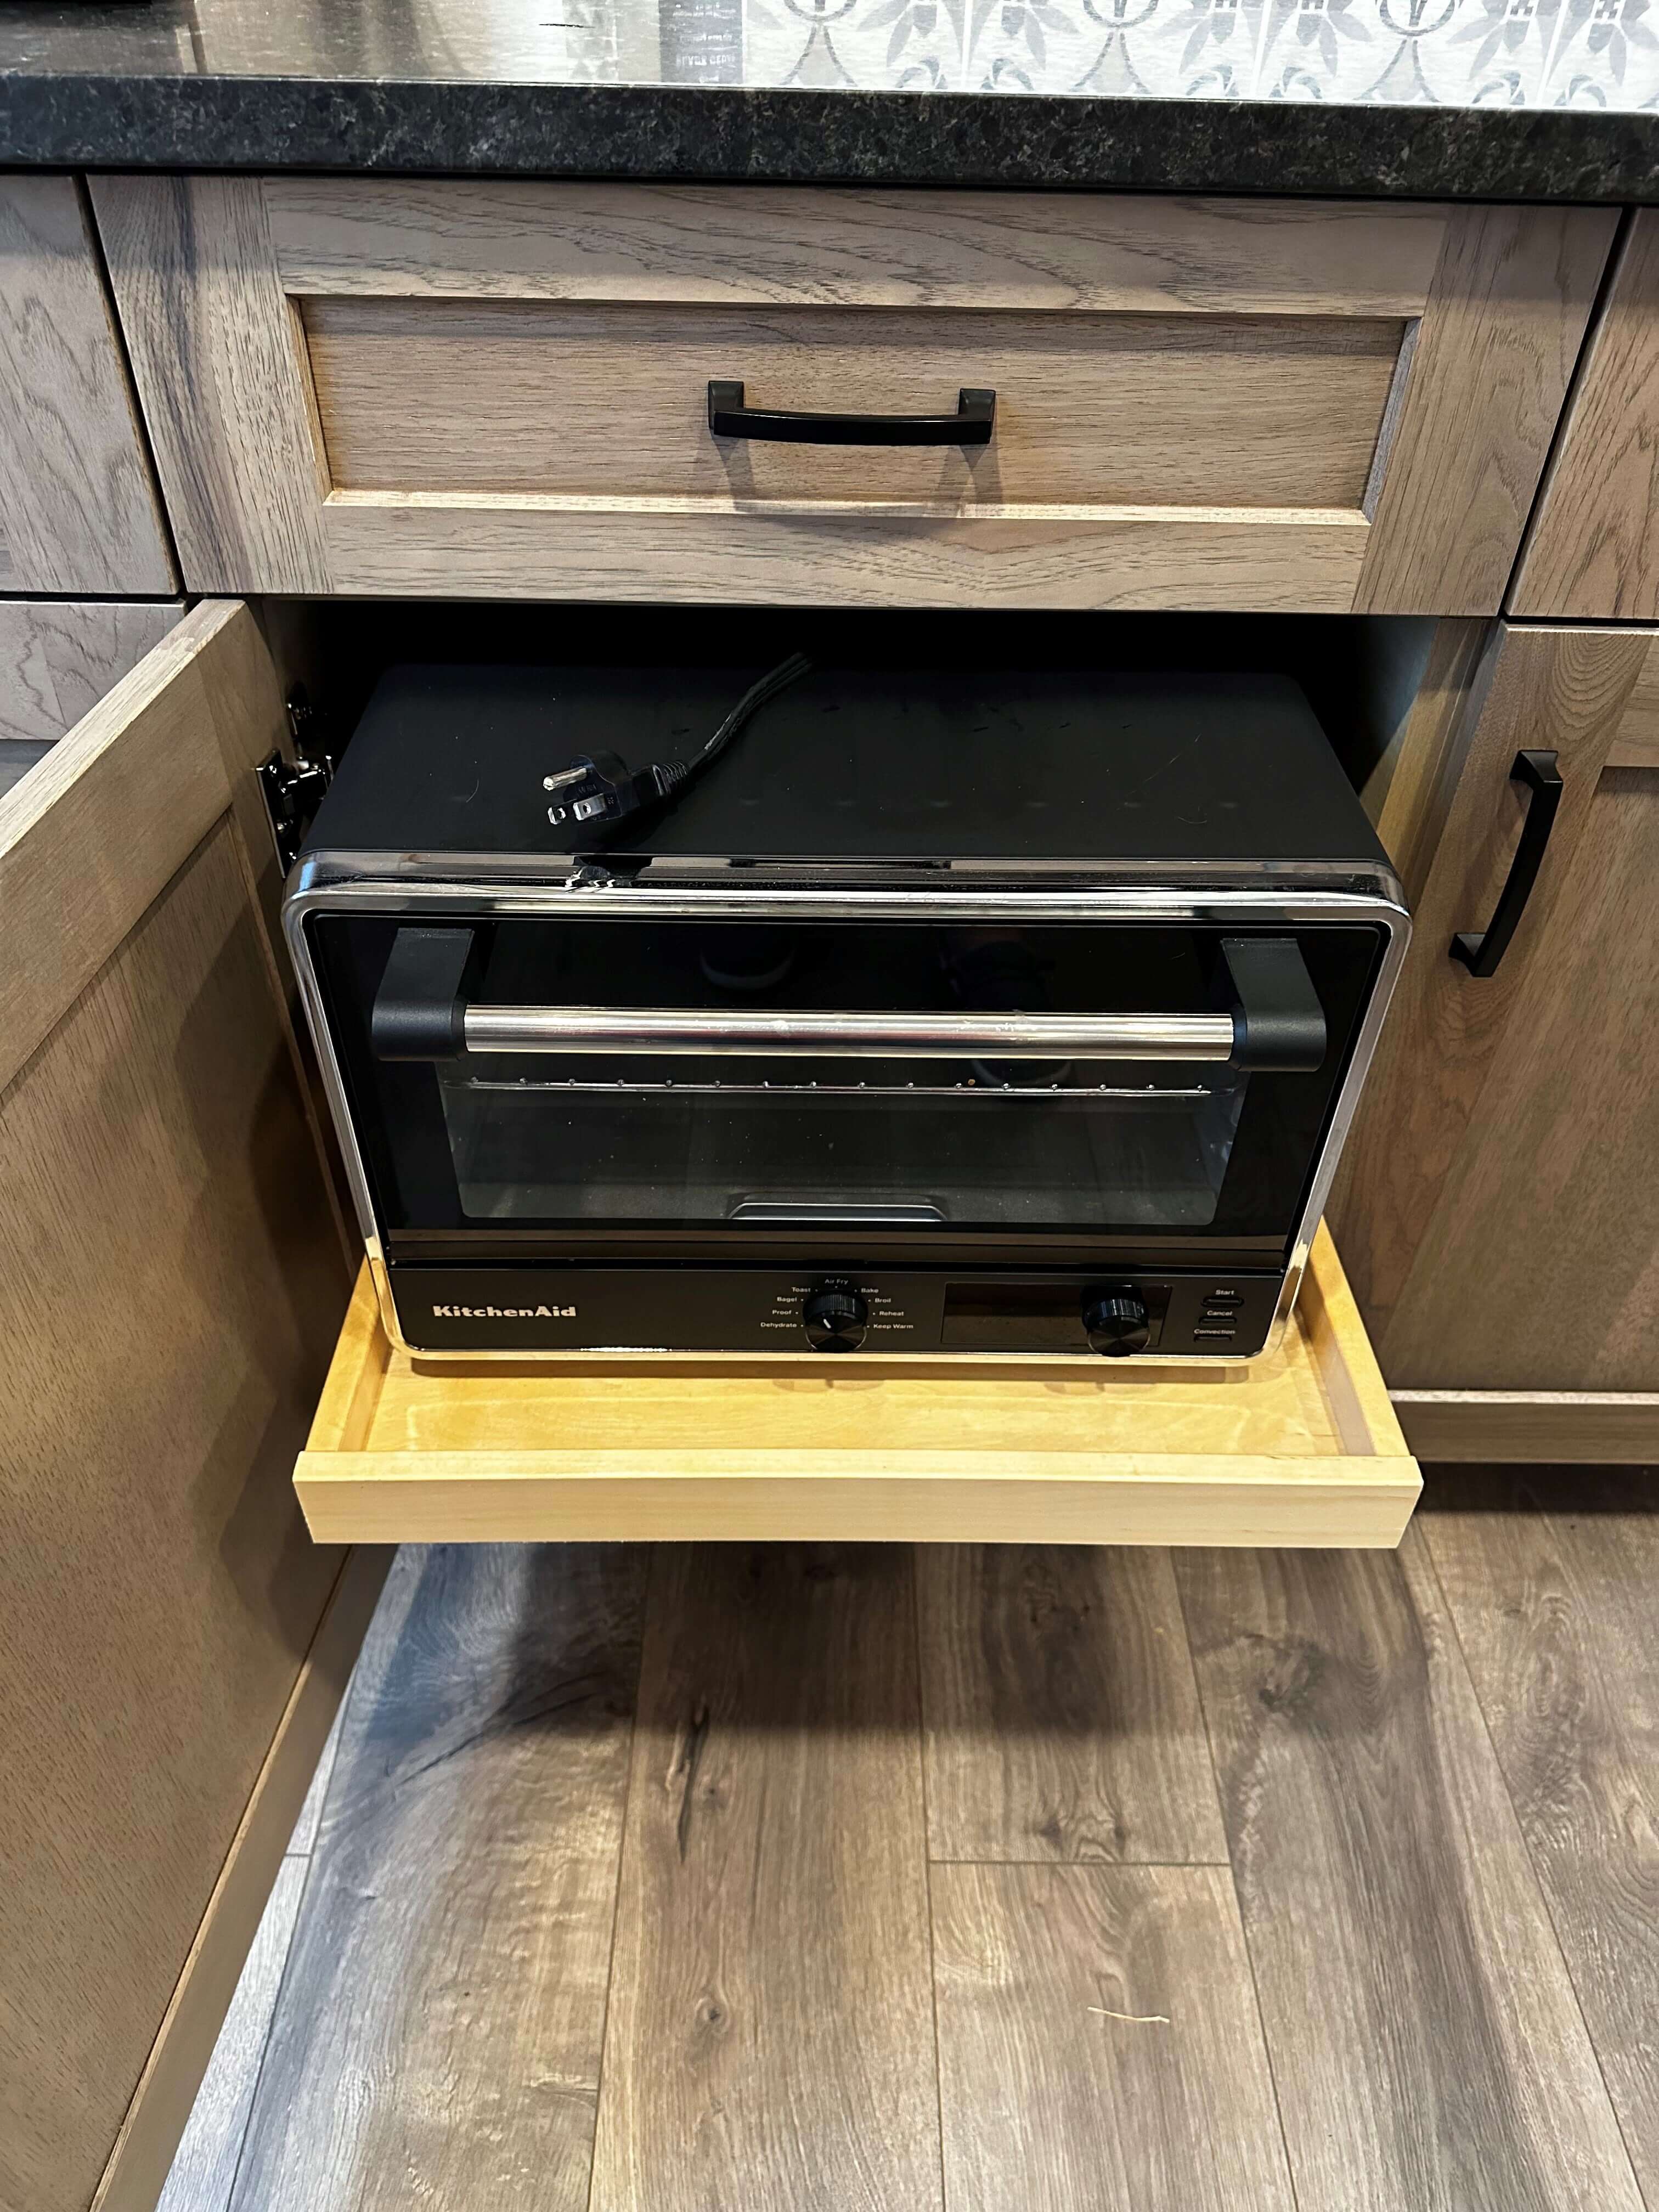

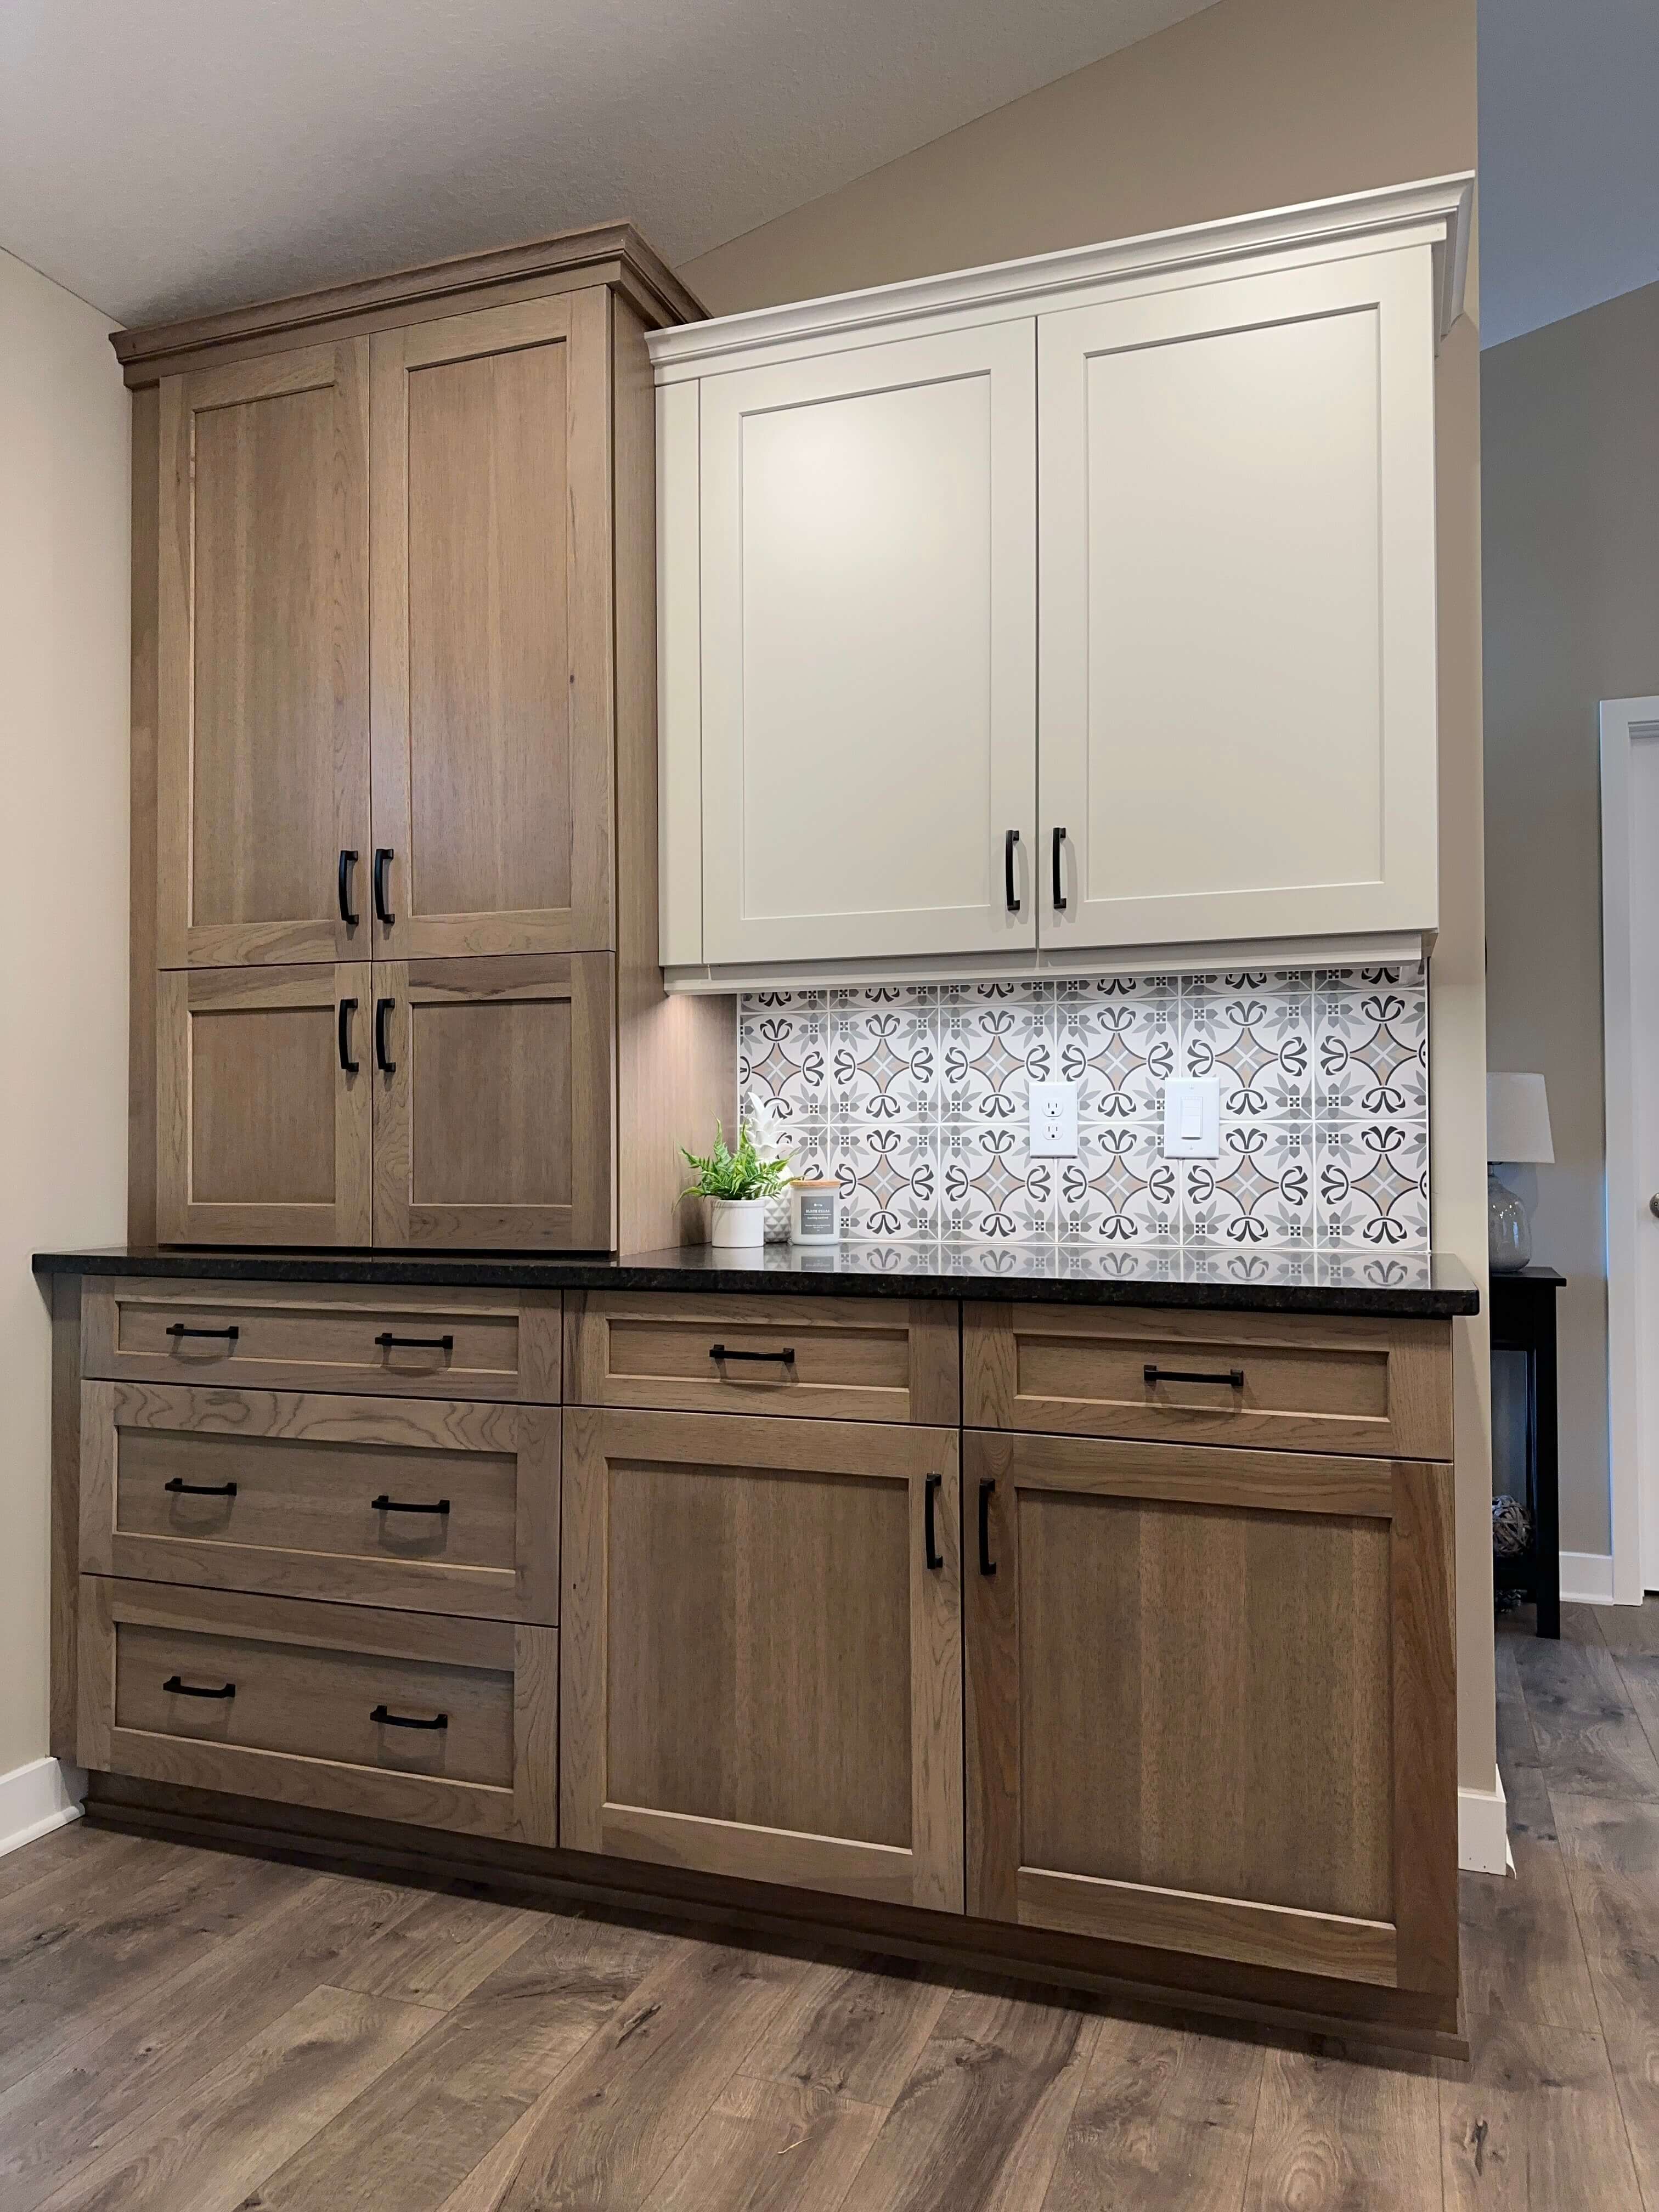
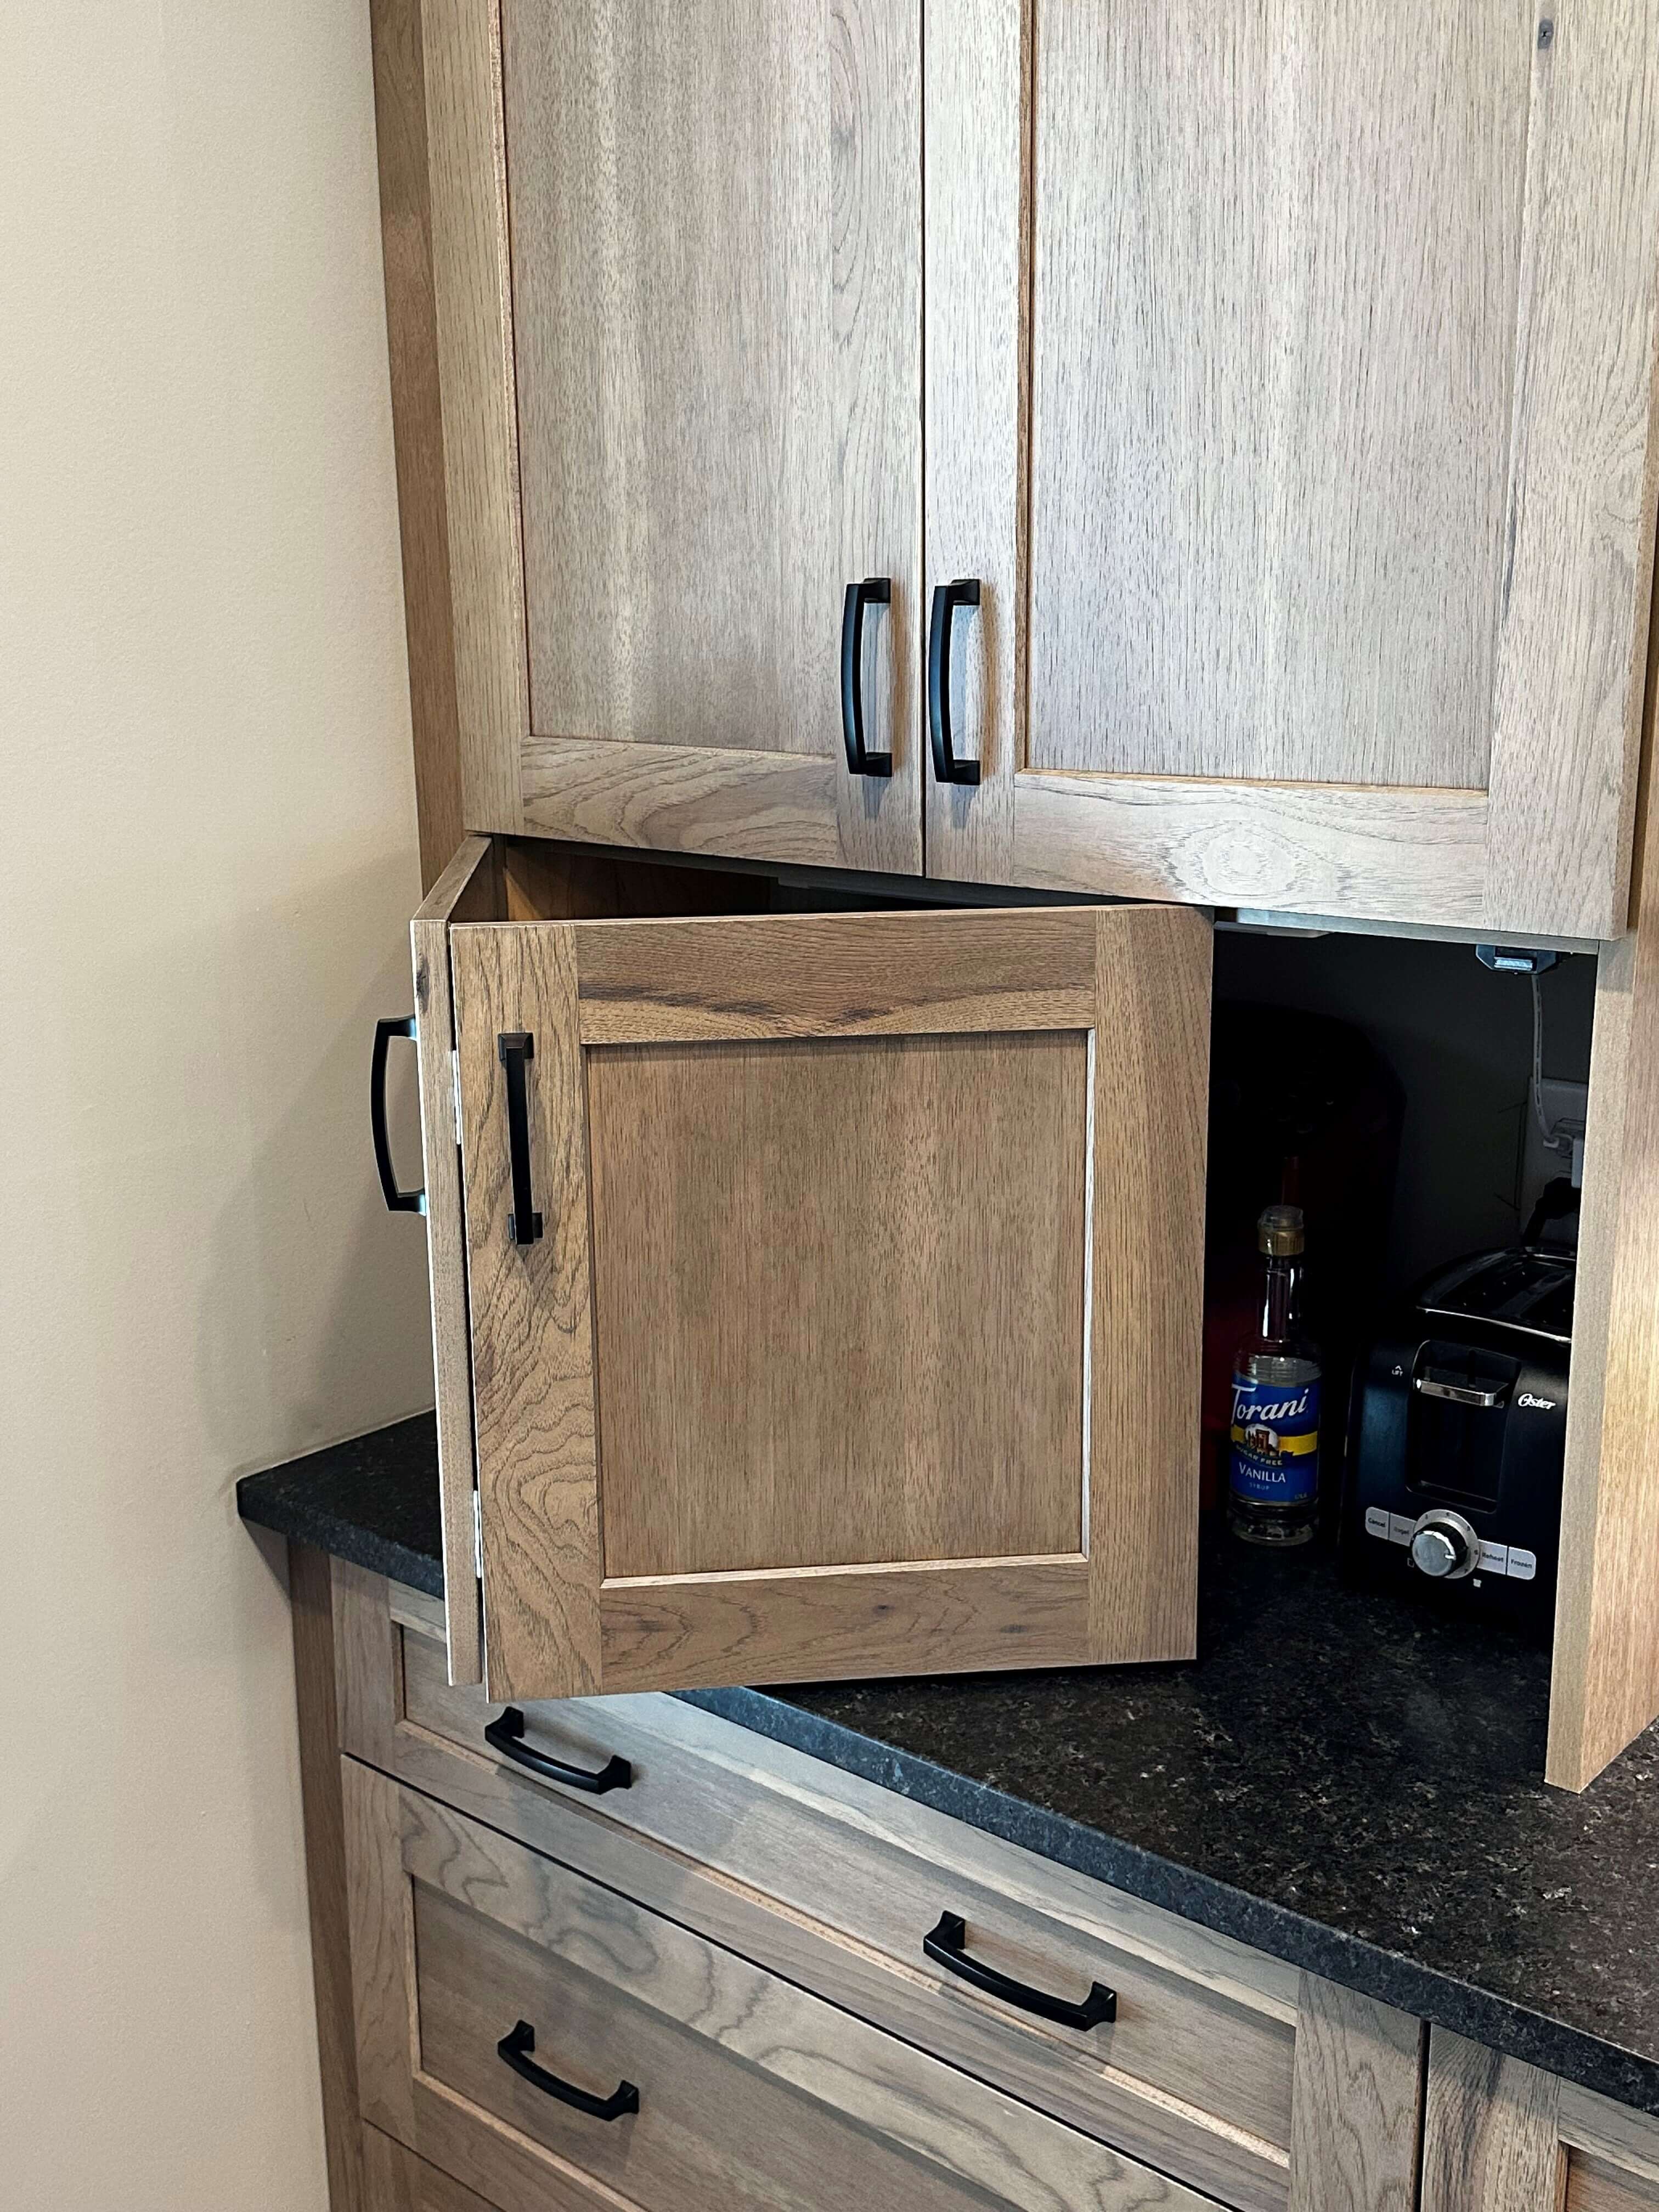
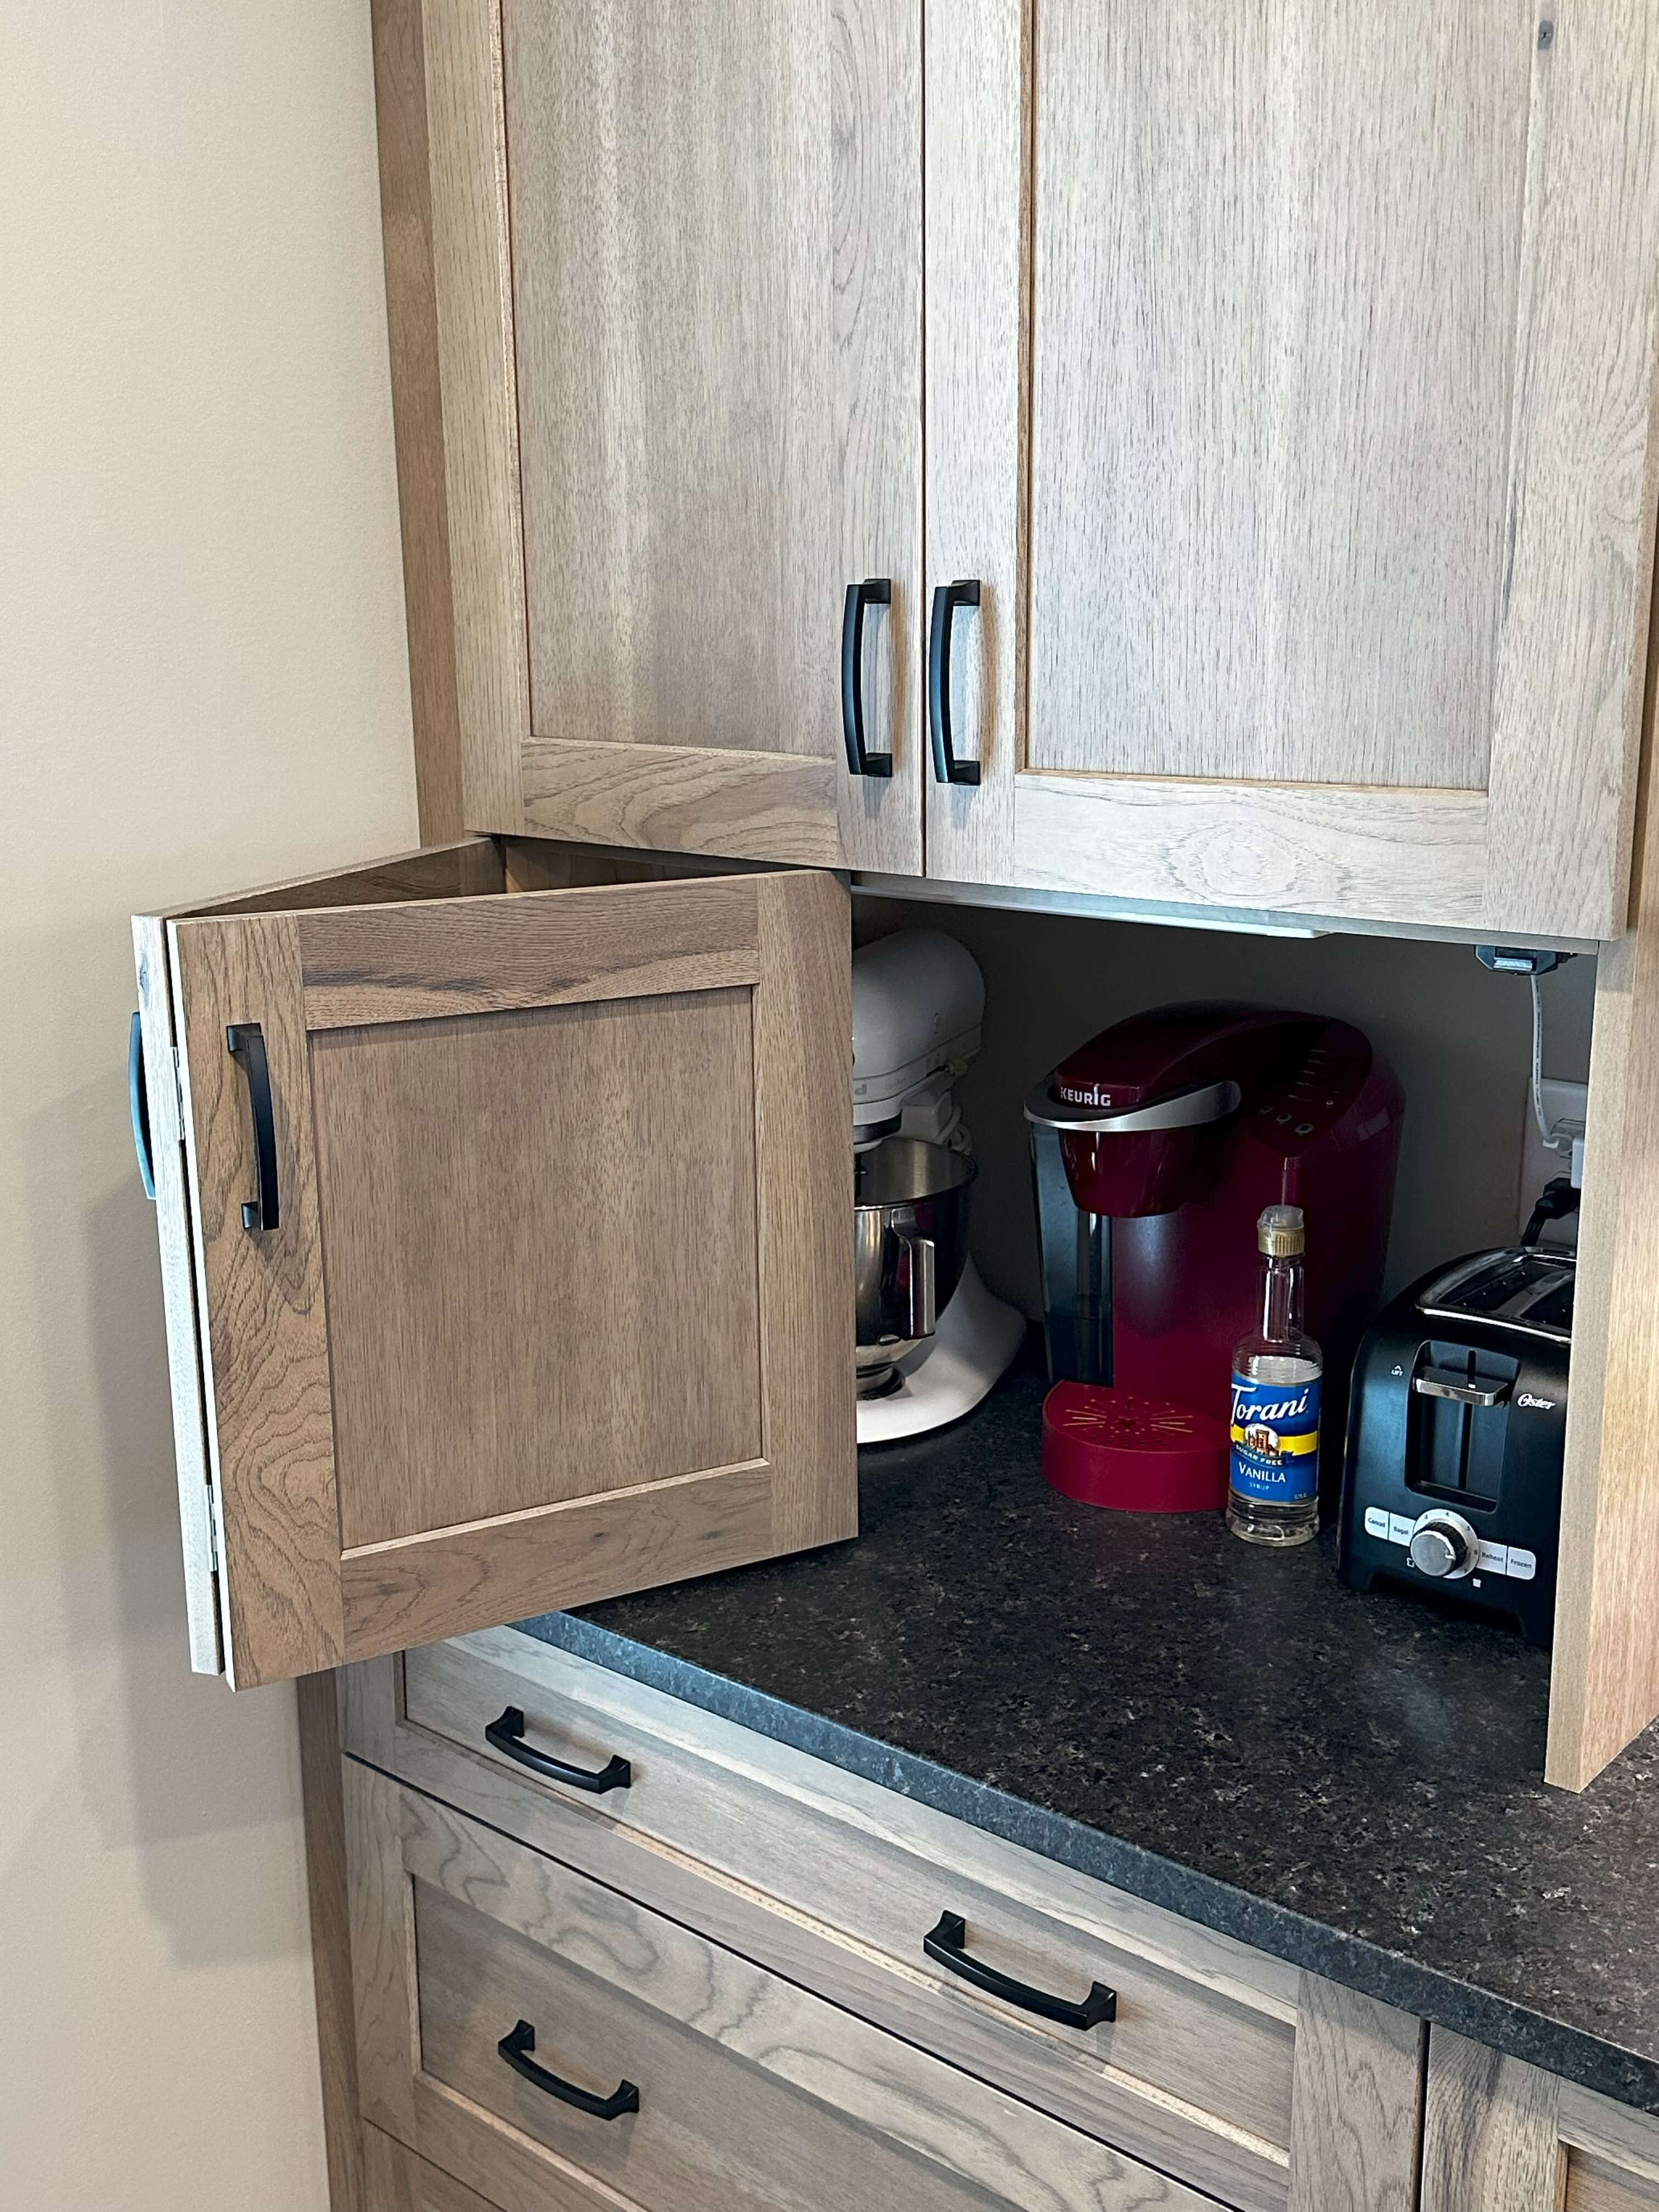
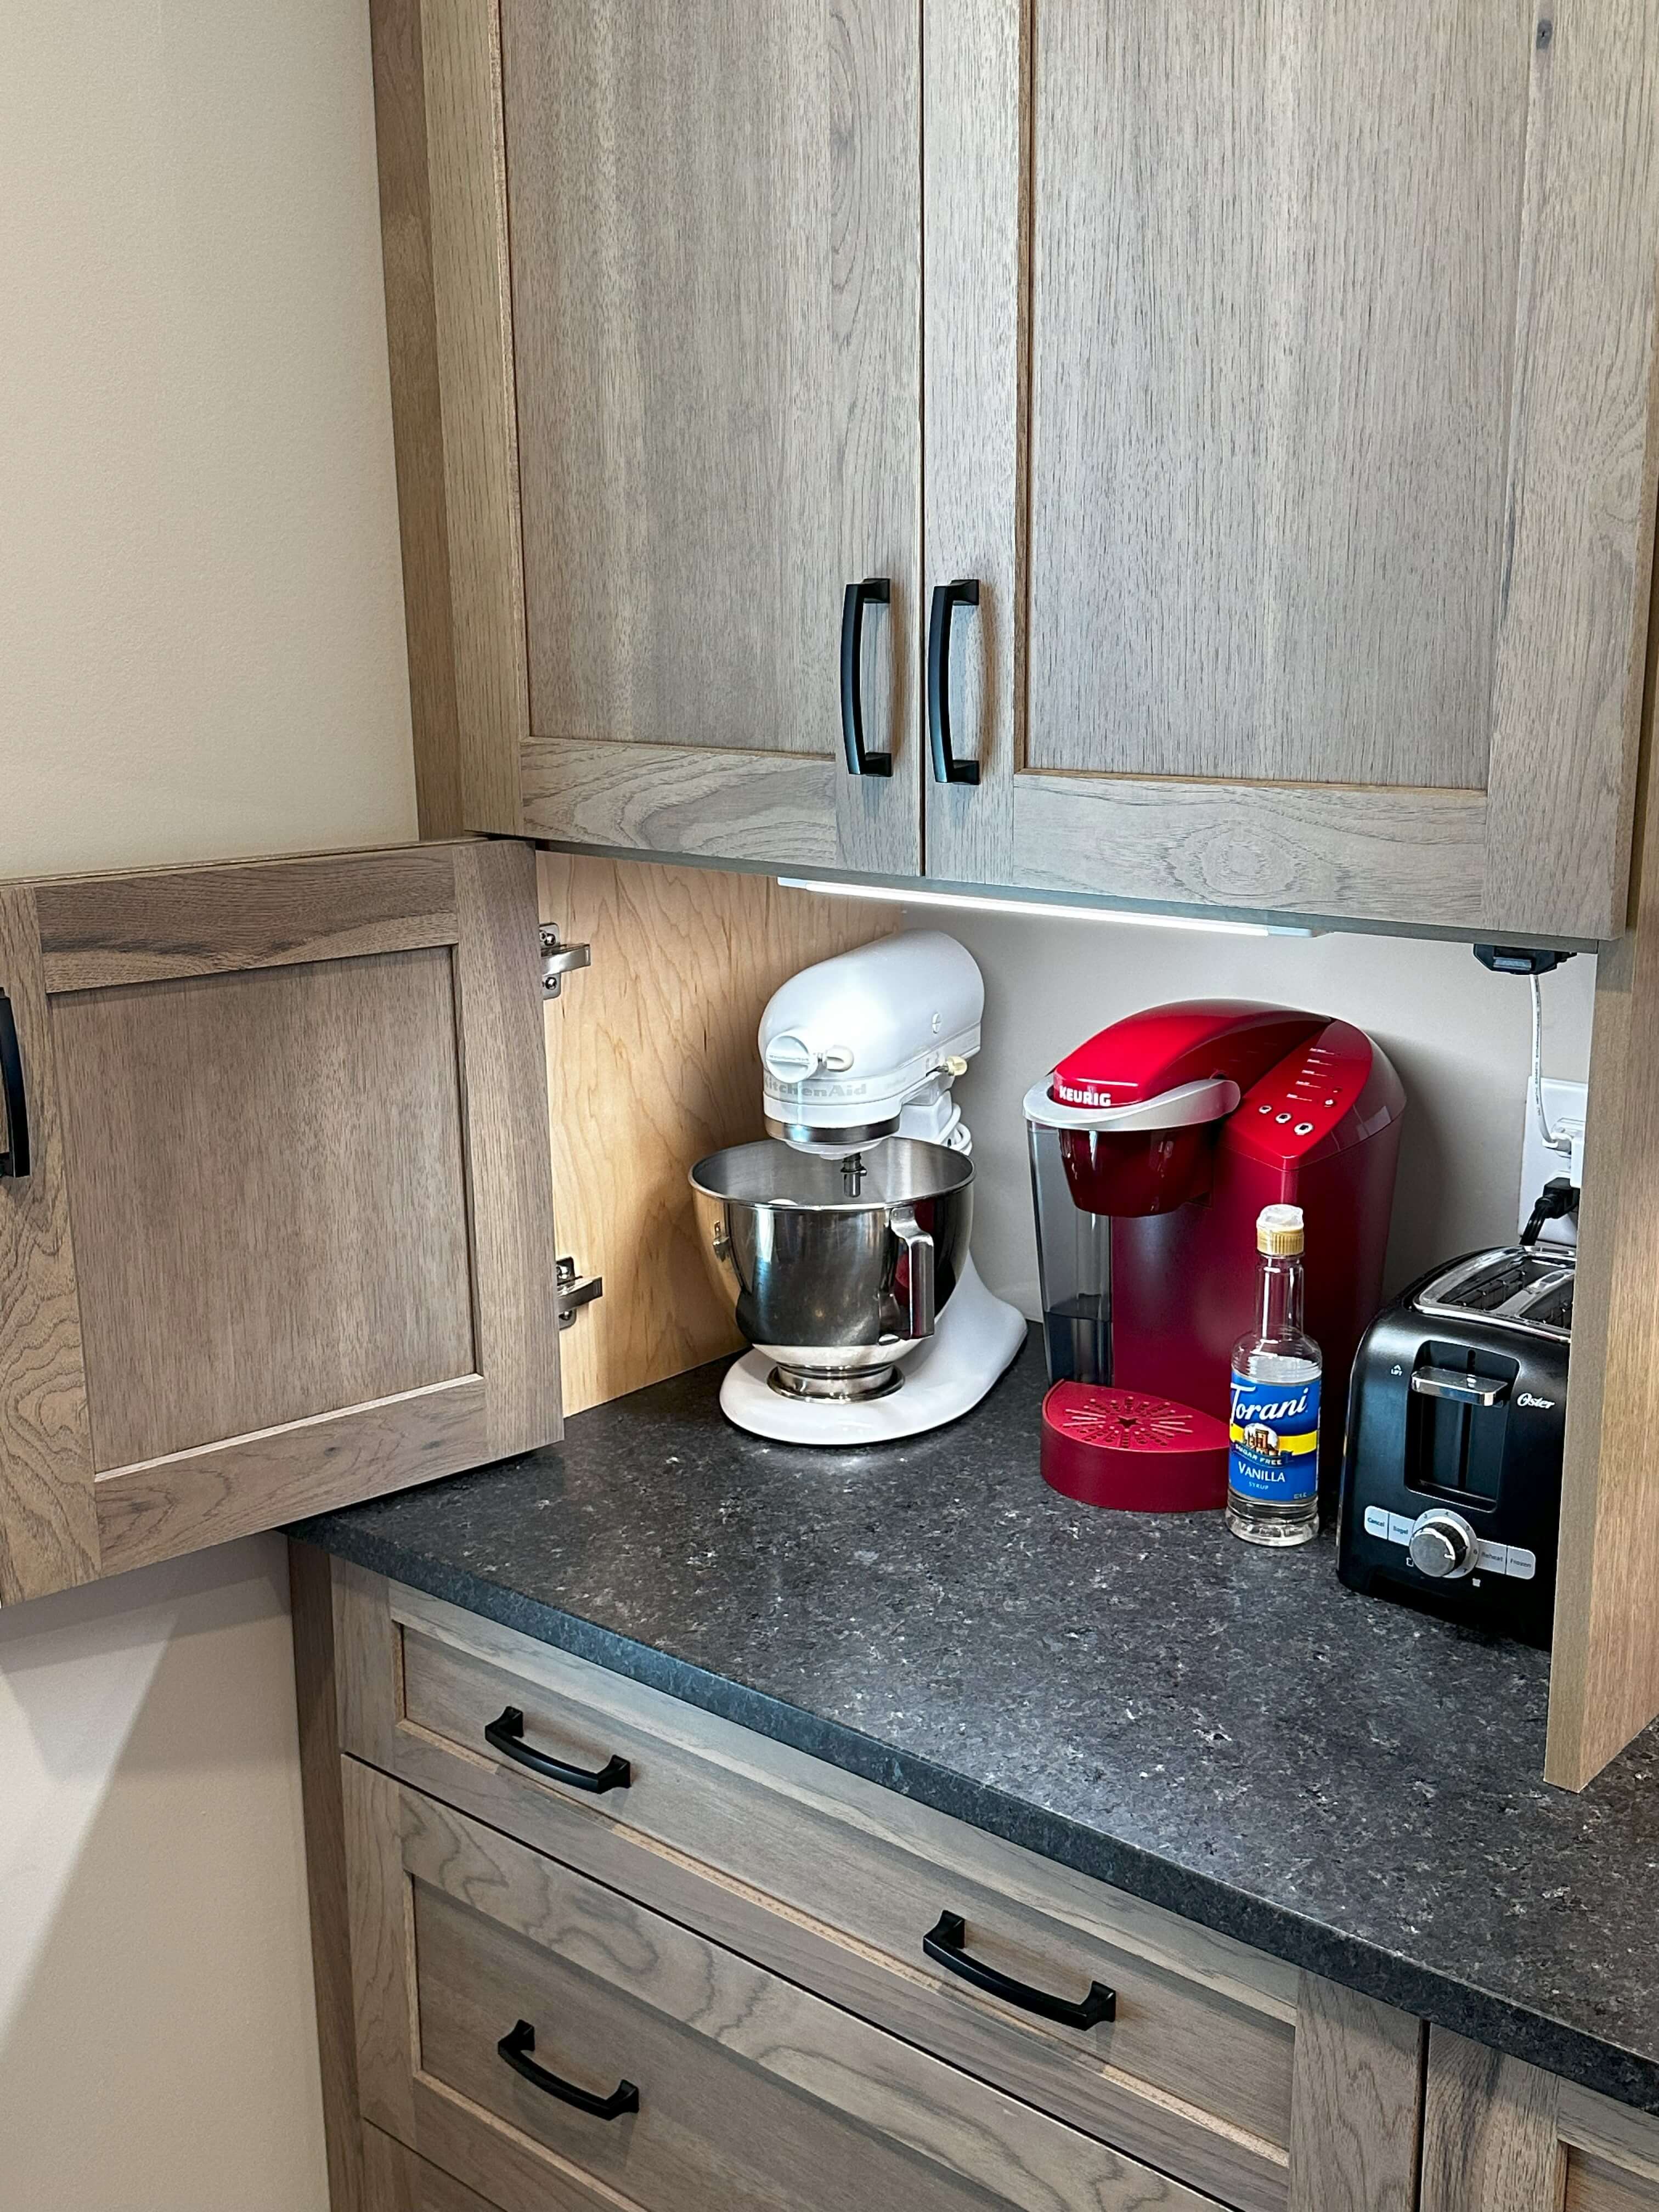
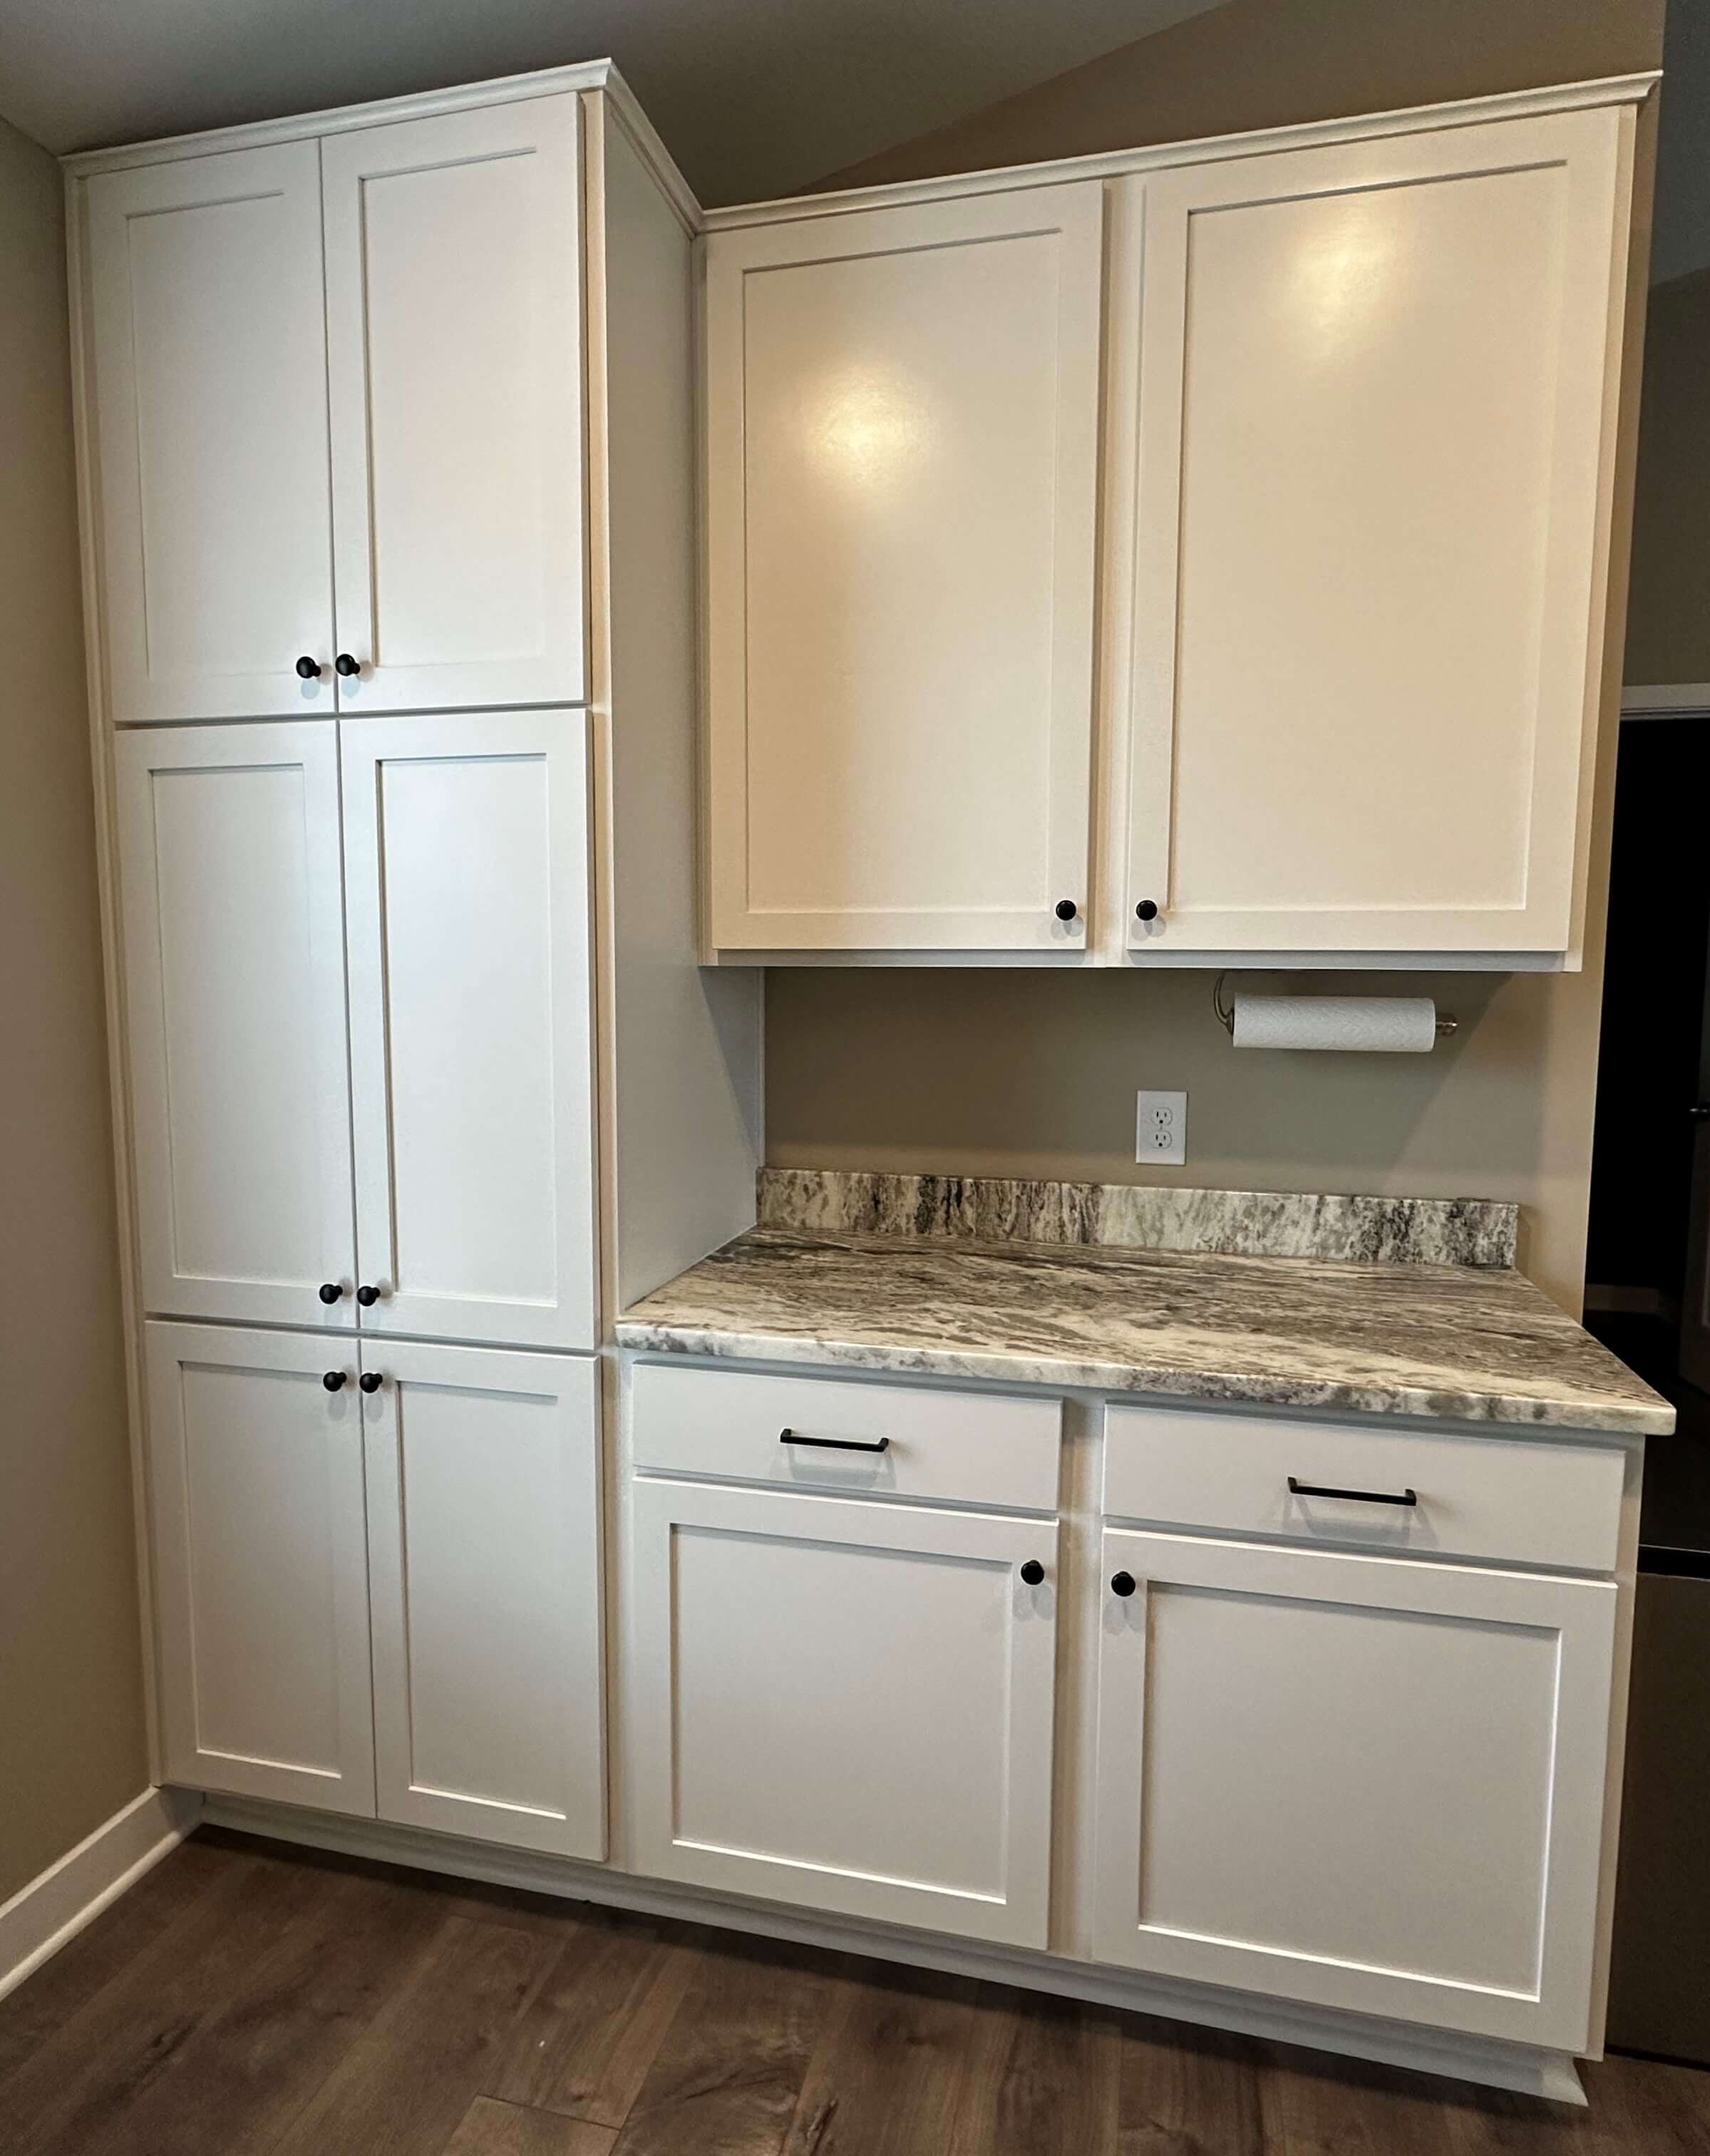
One of my must-haves for the new cabinets was an appliance storage area. I created this on the short wall with Dura Supreme’s Appliance Wall Cabinet which sits directly on the countertop. I also modified the doors to the appliance storage area to be Bi-fold so they swing towards the left, allowing for full access and ease of bringing heavy items like the stand mixer over to the open countertop on the right. I added a small light strip inside the cabinet that’s motion-sensor-activated.
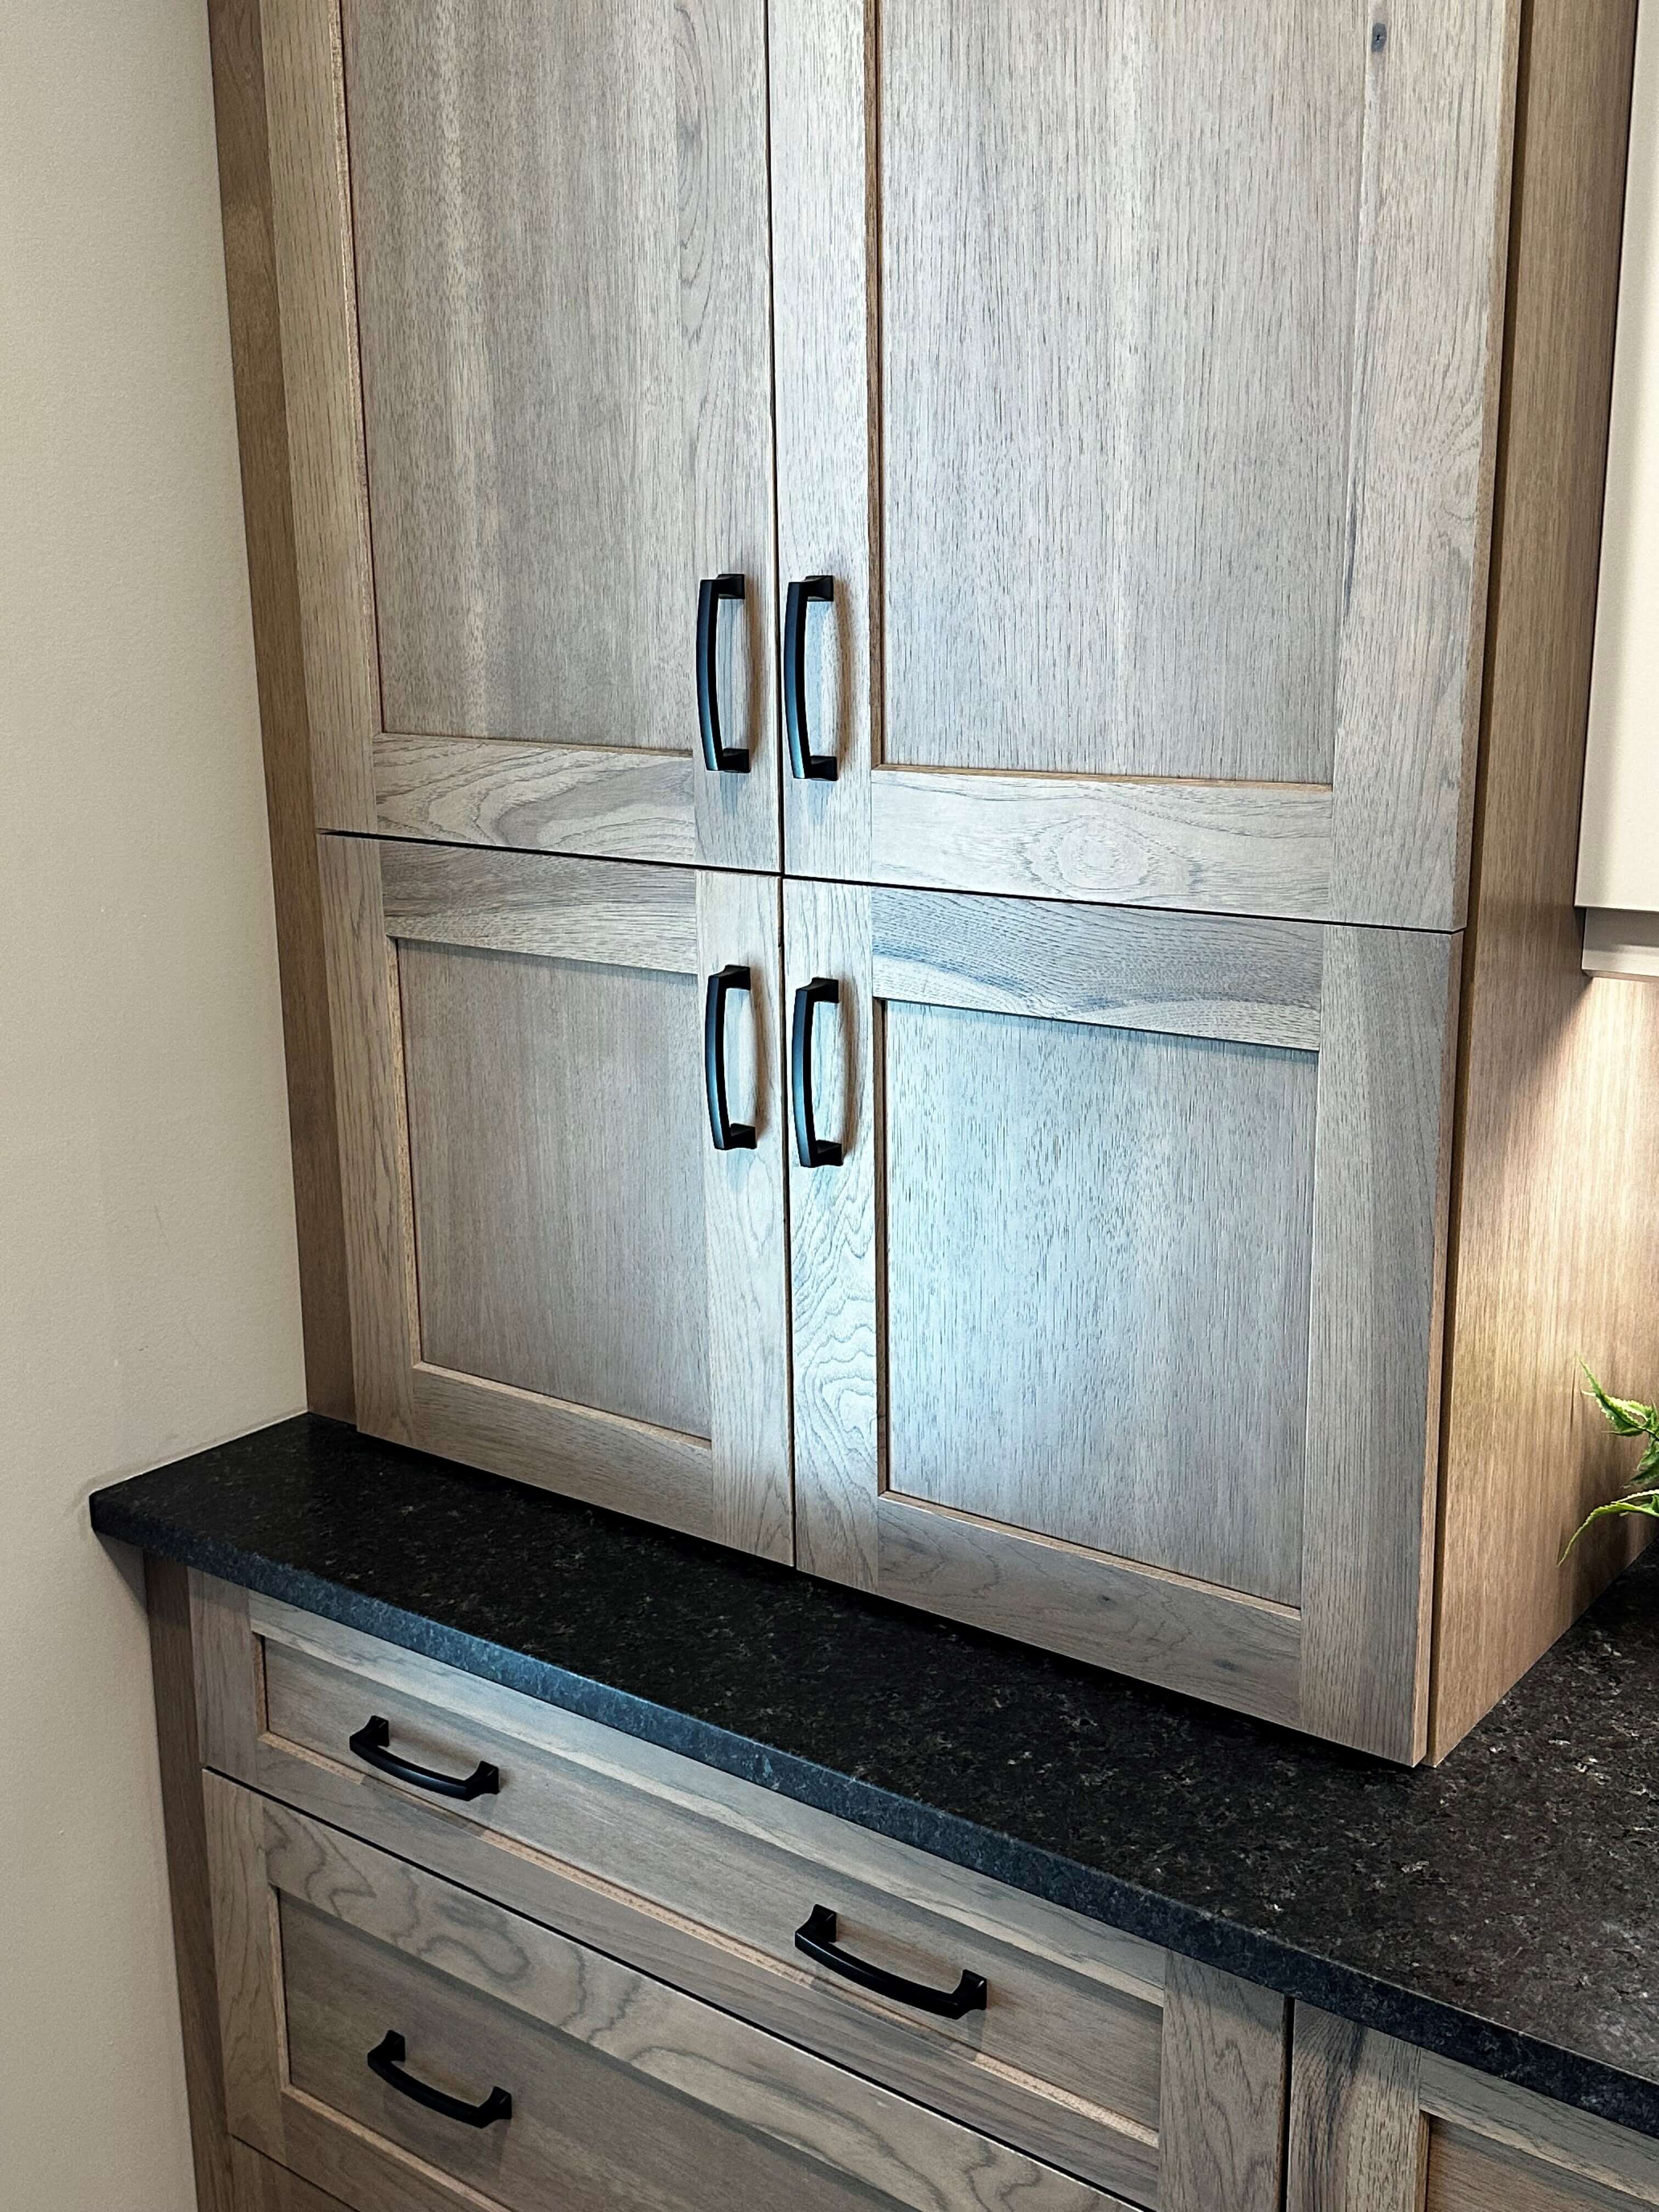
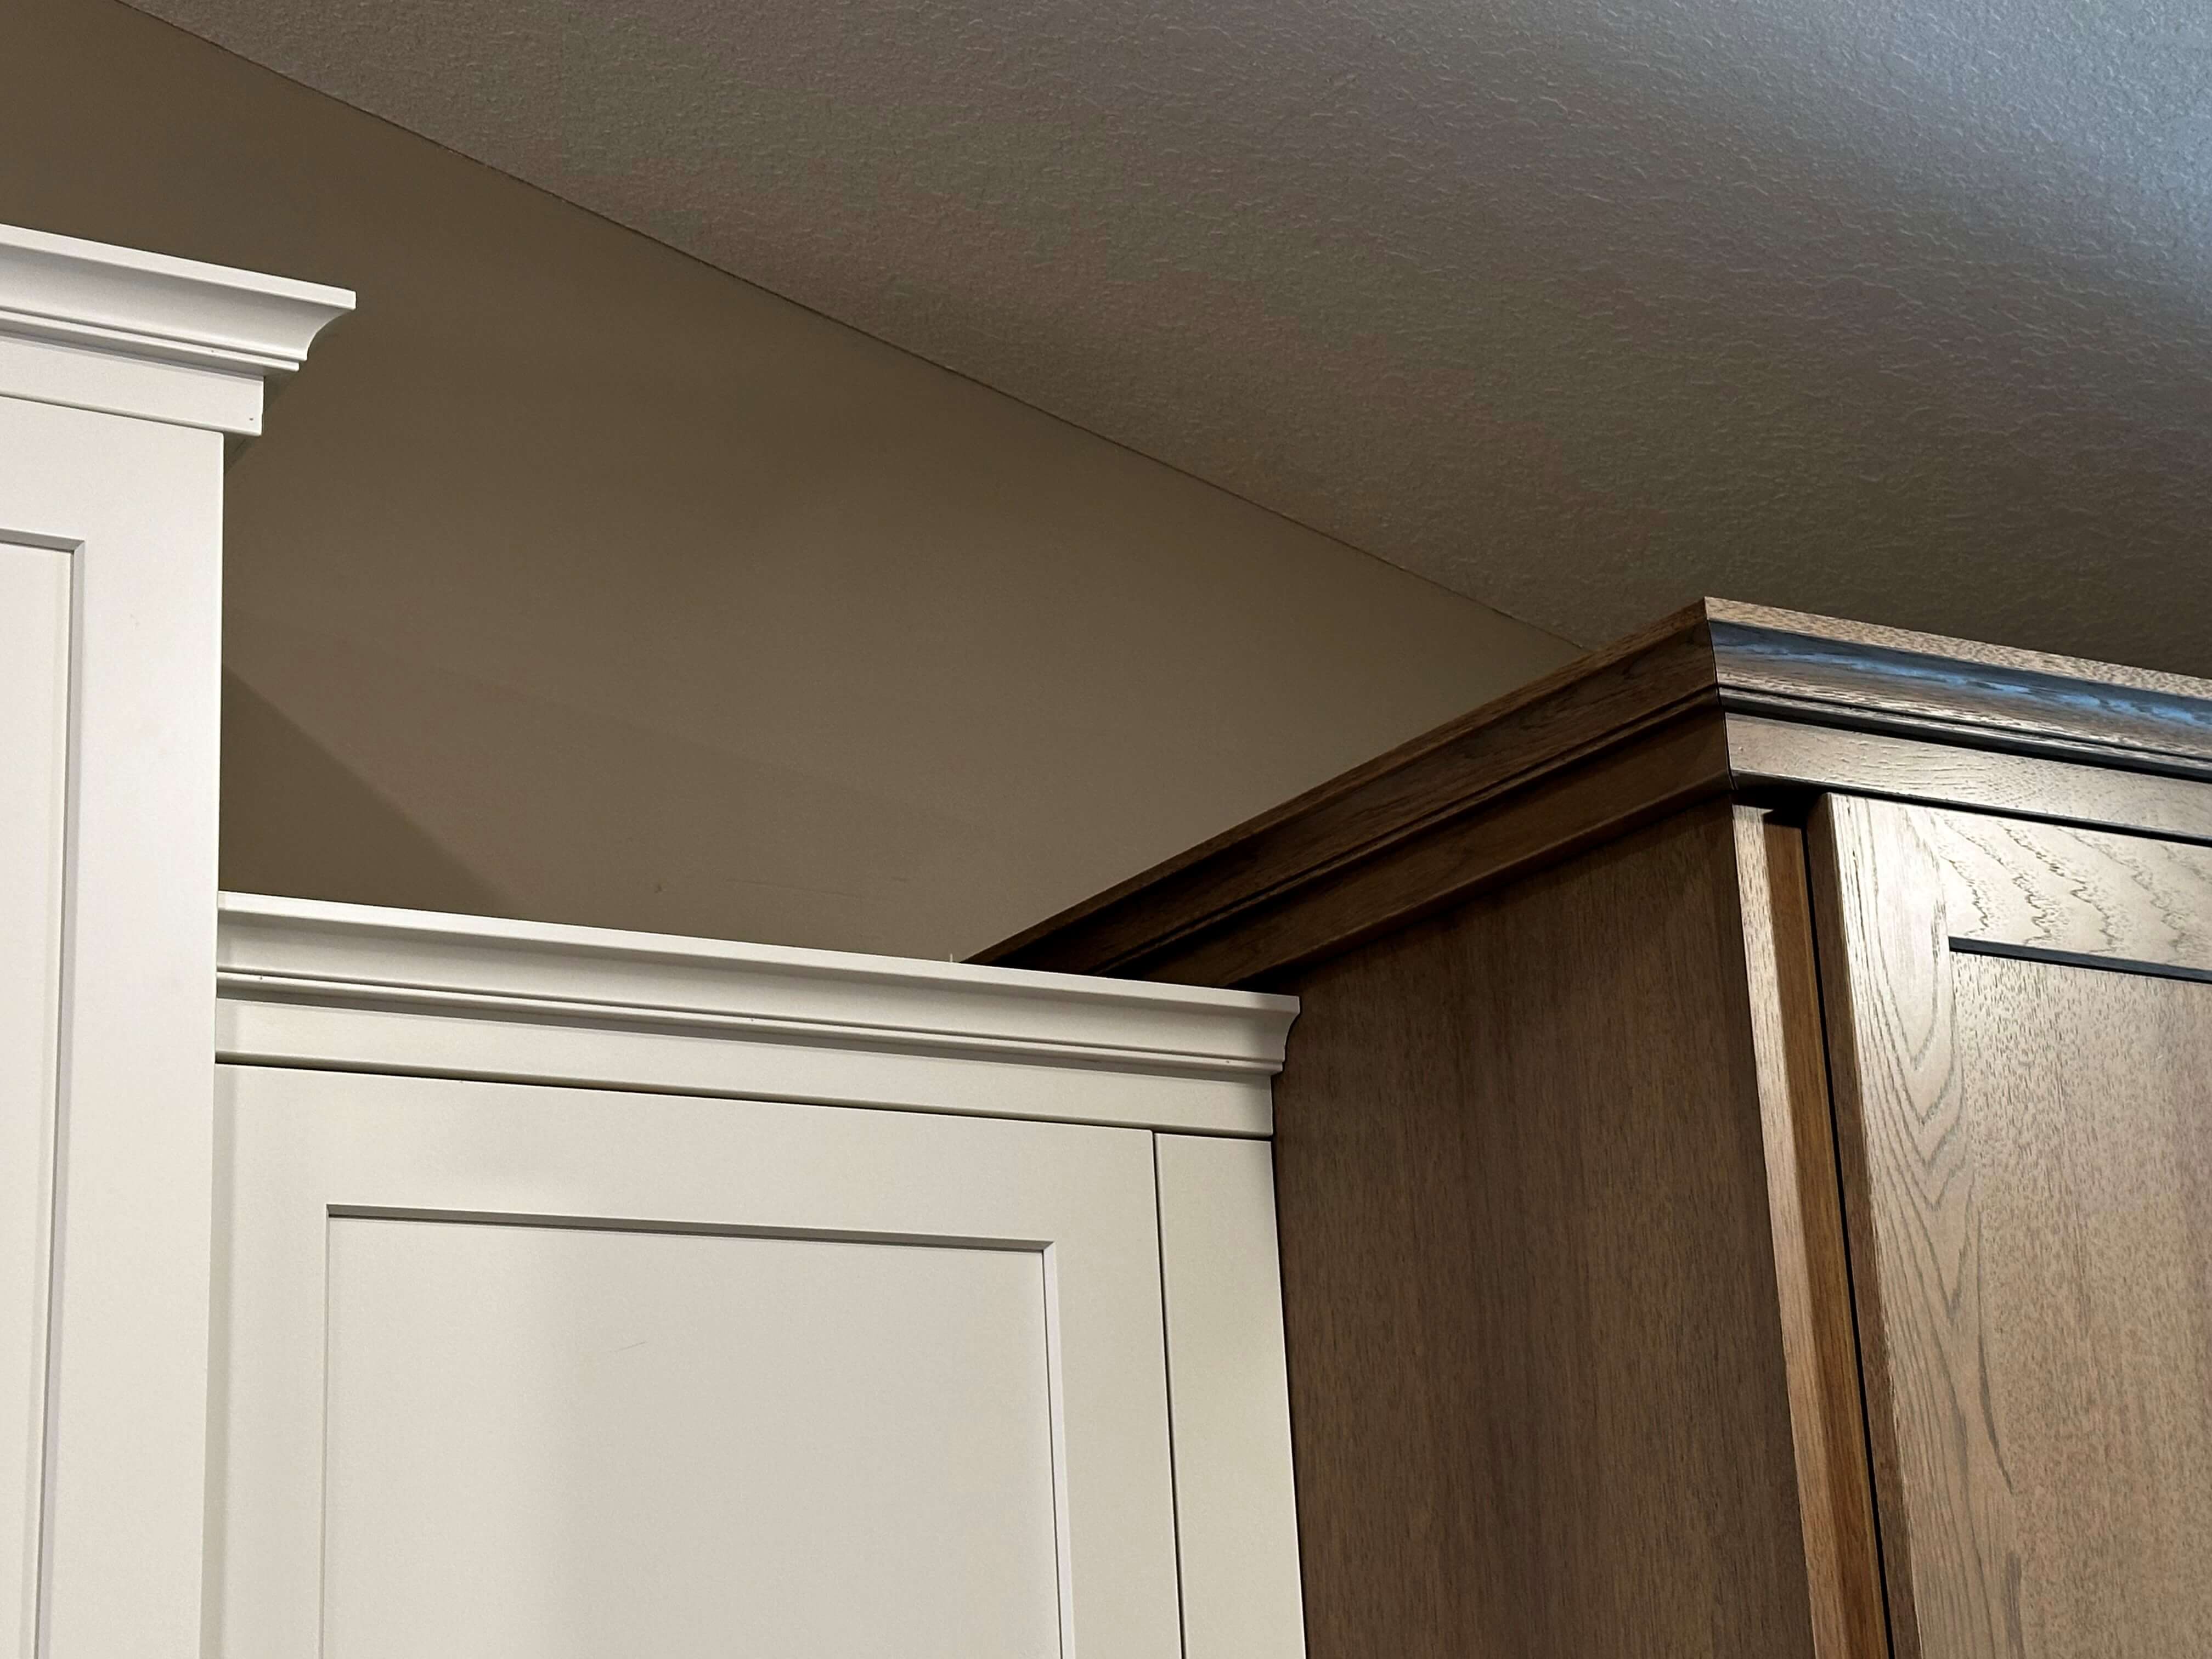
Full disclosure… I originally started with just starter molding (SMPF2) to top off my cabinets, but my own designer taste felt it was lacking and not complete. I ended up ordering the Extra Small Cove Molding for the finishing touch and installed it just in time for this blog! I love how it completes the look for me. The bottom light rail molding is Bevel Bottom Molding is installed vertically to hide the undercabinet lighting.
Fixtures
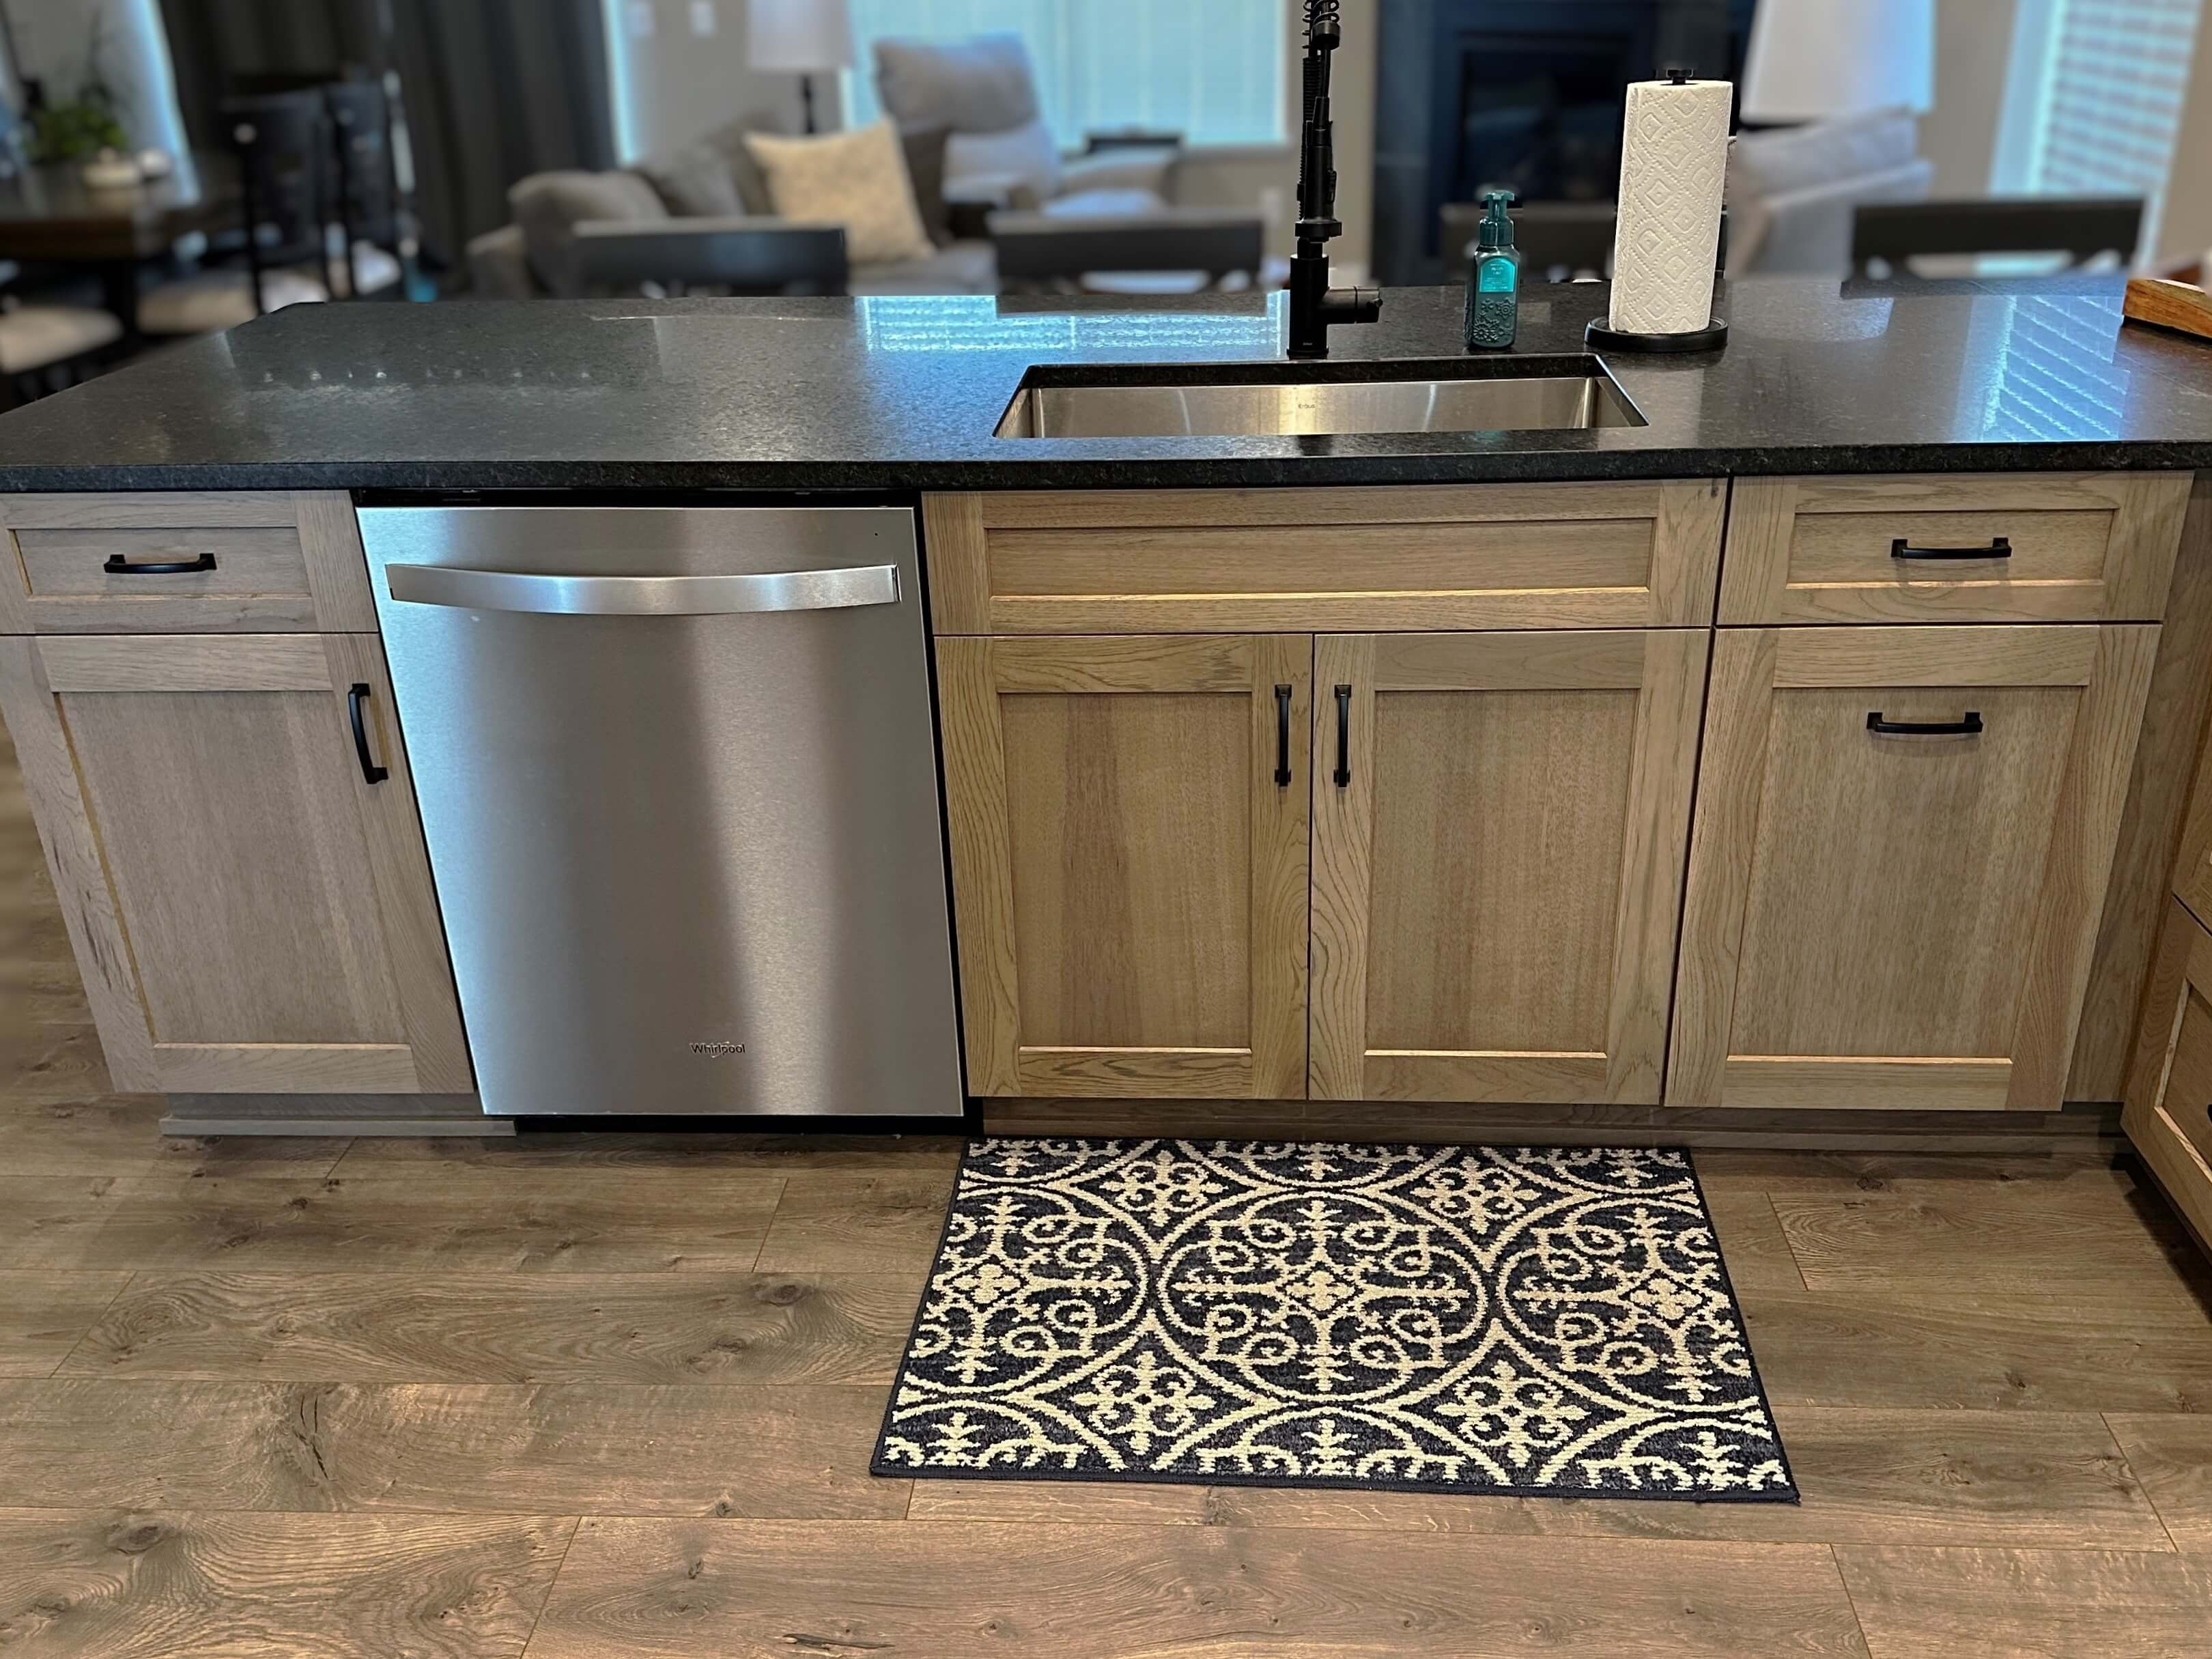
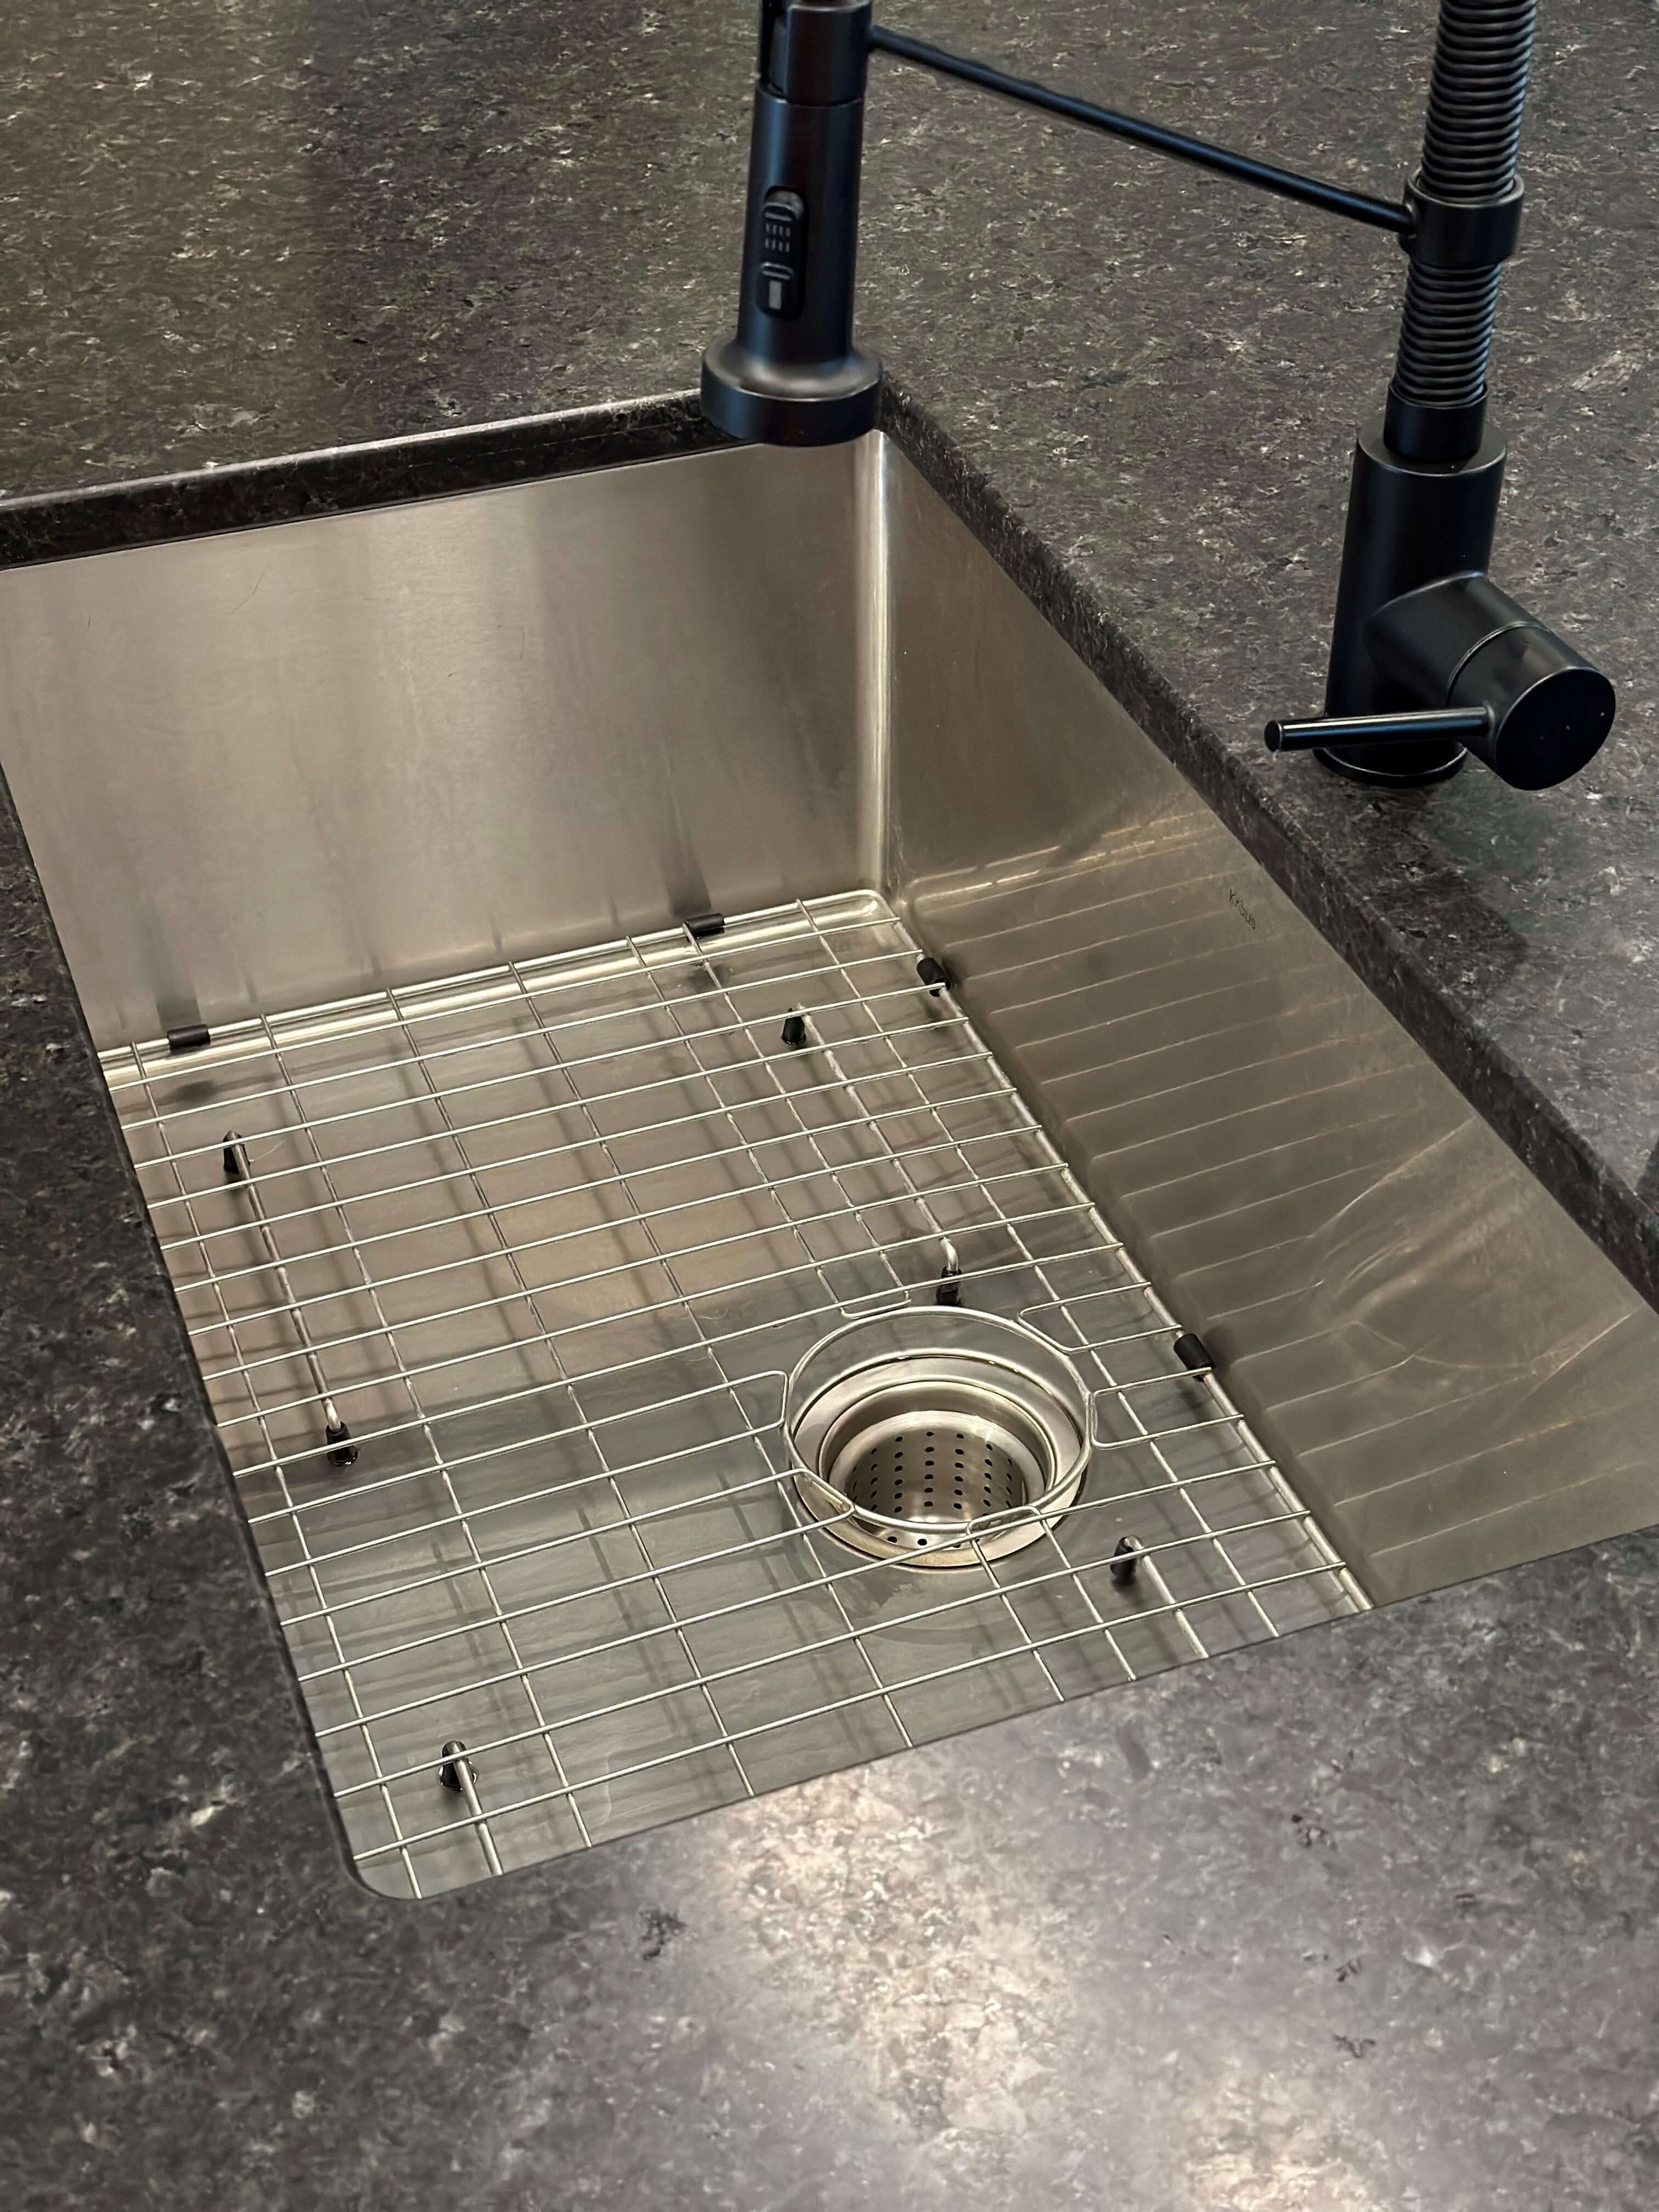
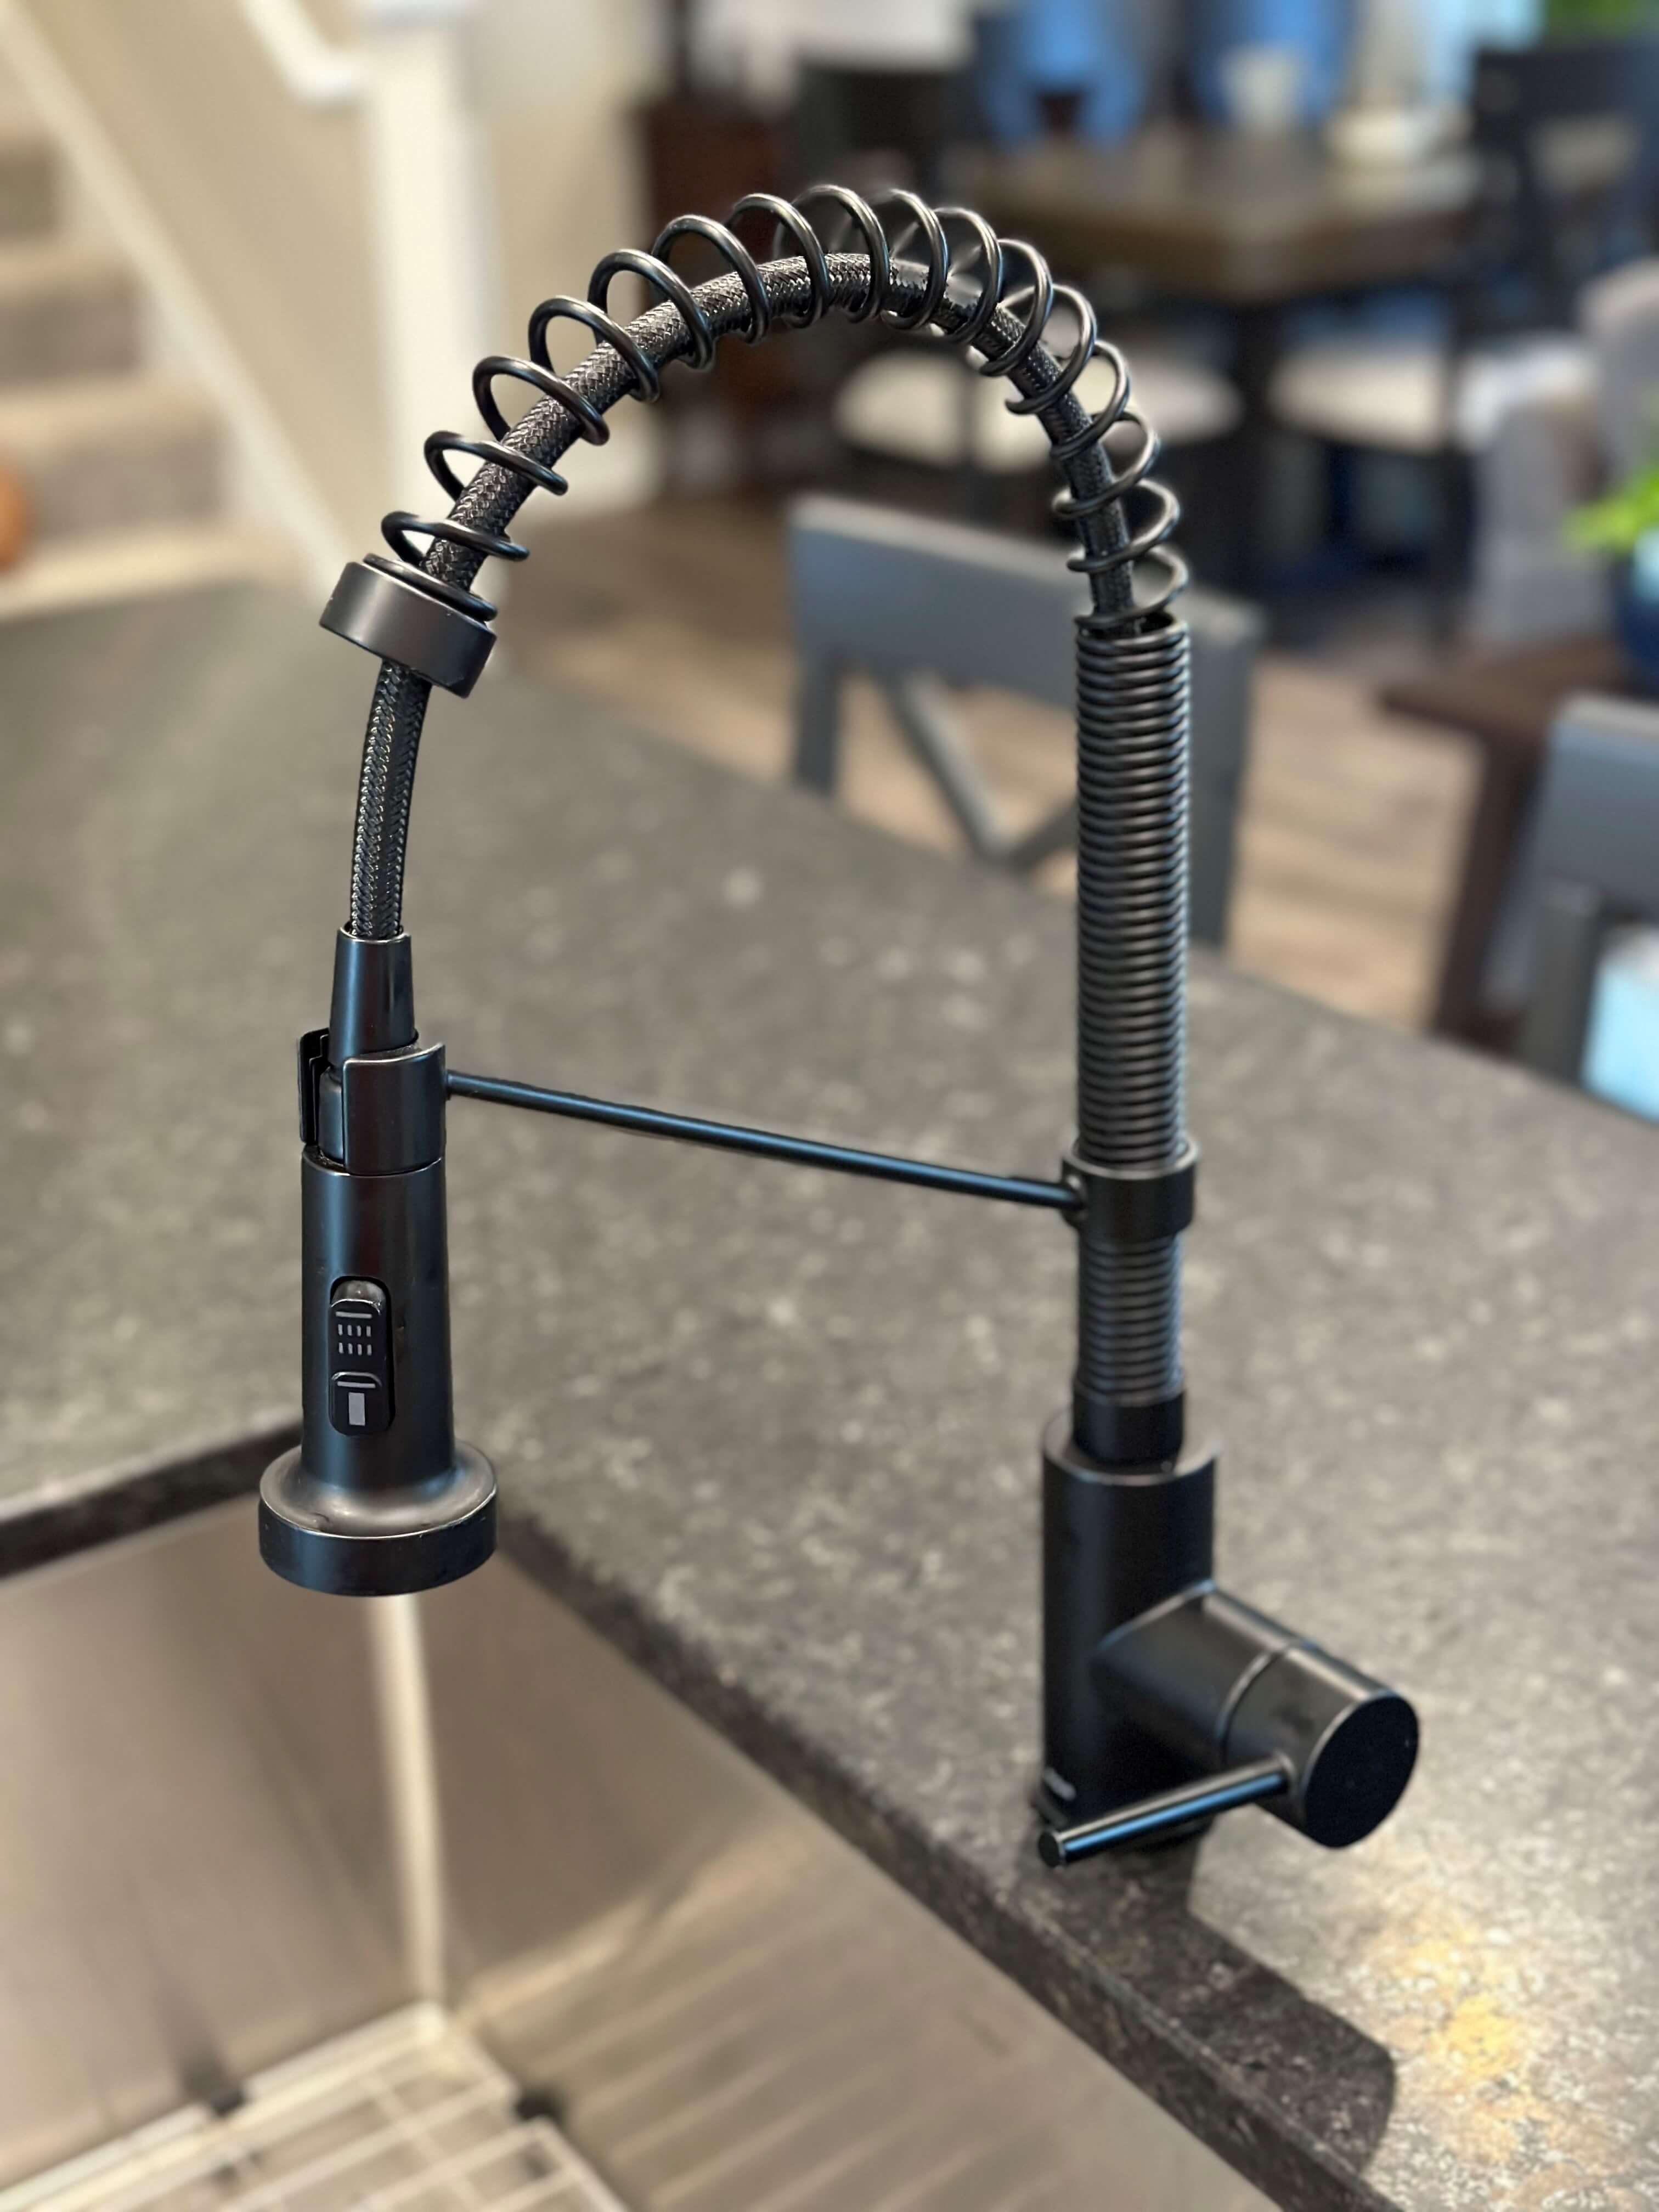
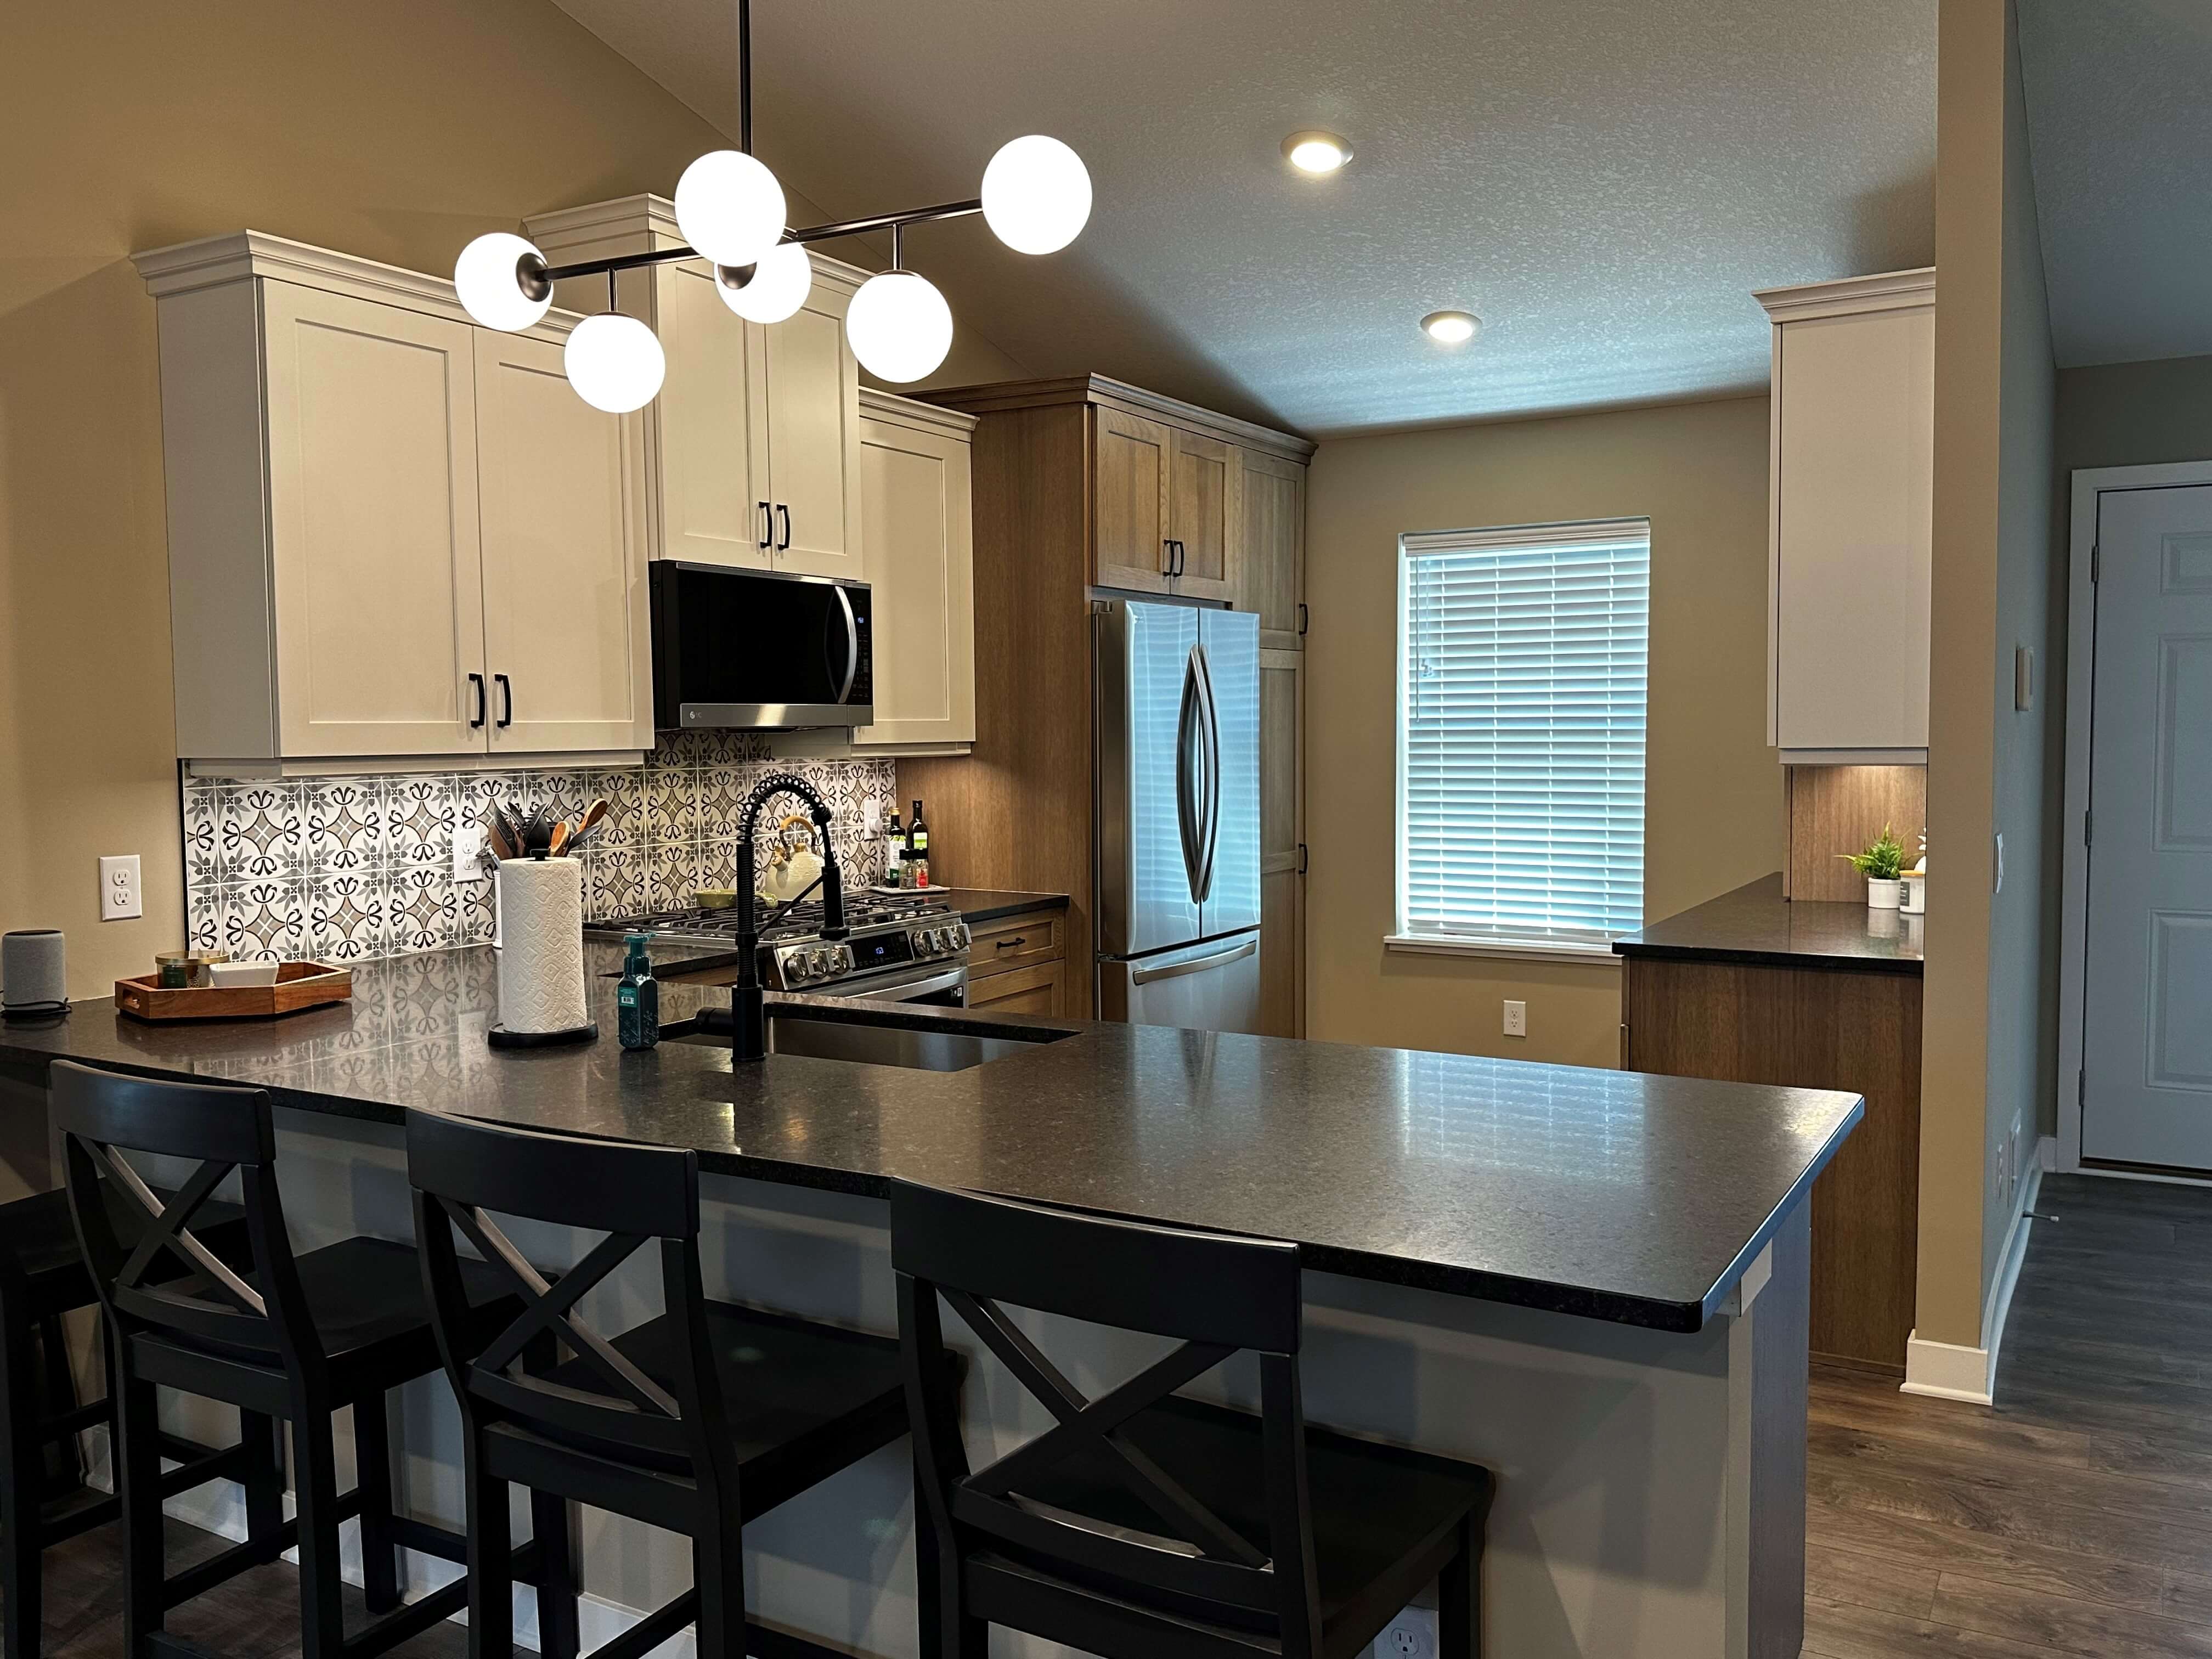
My Kraus sink and faucet are a combo that I have recommended at least 5 different times for other projects. (I’m still awaiting some sort of kickback…) If you want a go-to undermount single bowl sink, this is the one. The size is perfect for soaking large dishes and pans, and it comes standard with a bottom grid and deep bar strainer, which is perfect for when you don’t have a garbage disposal. The simple lines of the Bolden Pull-Out Faucet has that pseudo commercial look that is popular in kitchen design. It also comes in a variety of different finishes.
In keeping with the simple lines of the Carson shaker door style I choose door and drawer hardware that was also simple yet substantial. The matte black finish contrasts nicely with the stain of the cabinets, and the subtle curve of the pull softens the squareness of them. This 4″ pull was used on both the doors and drawers.
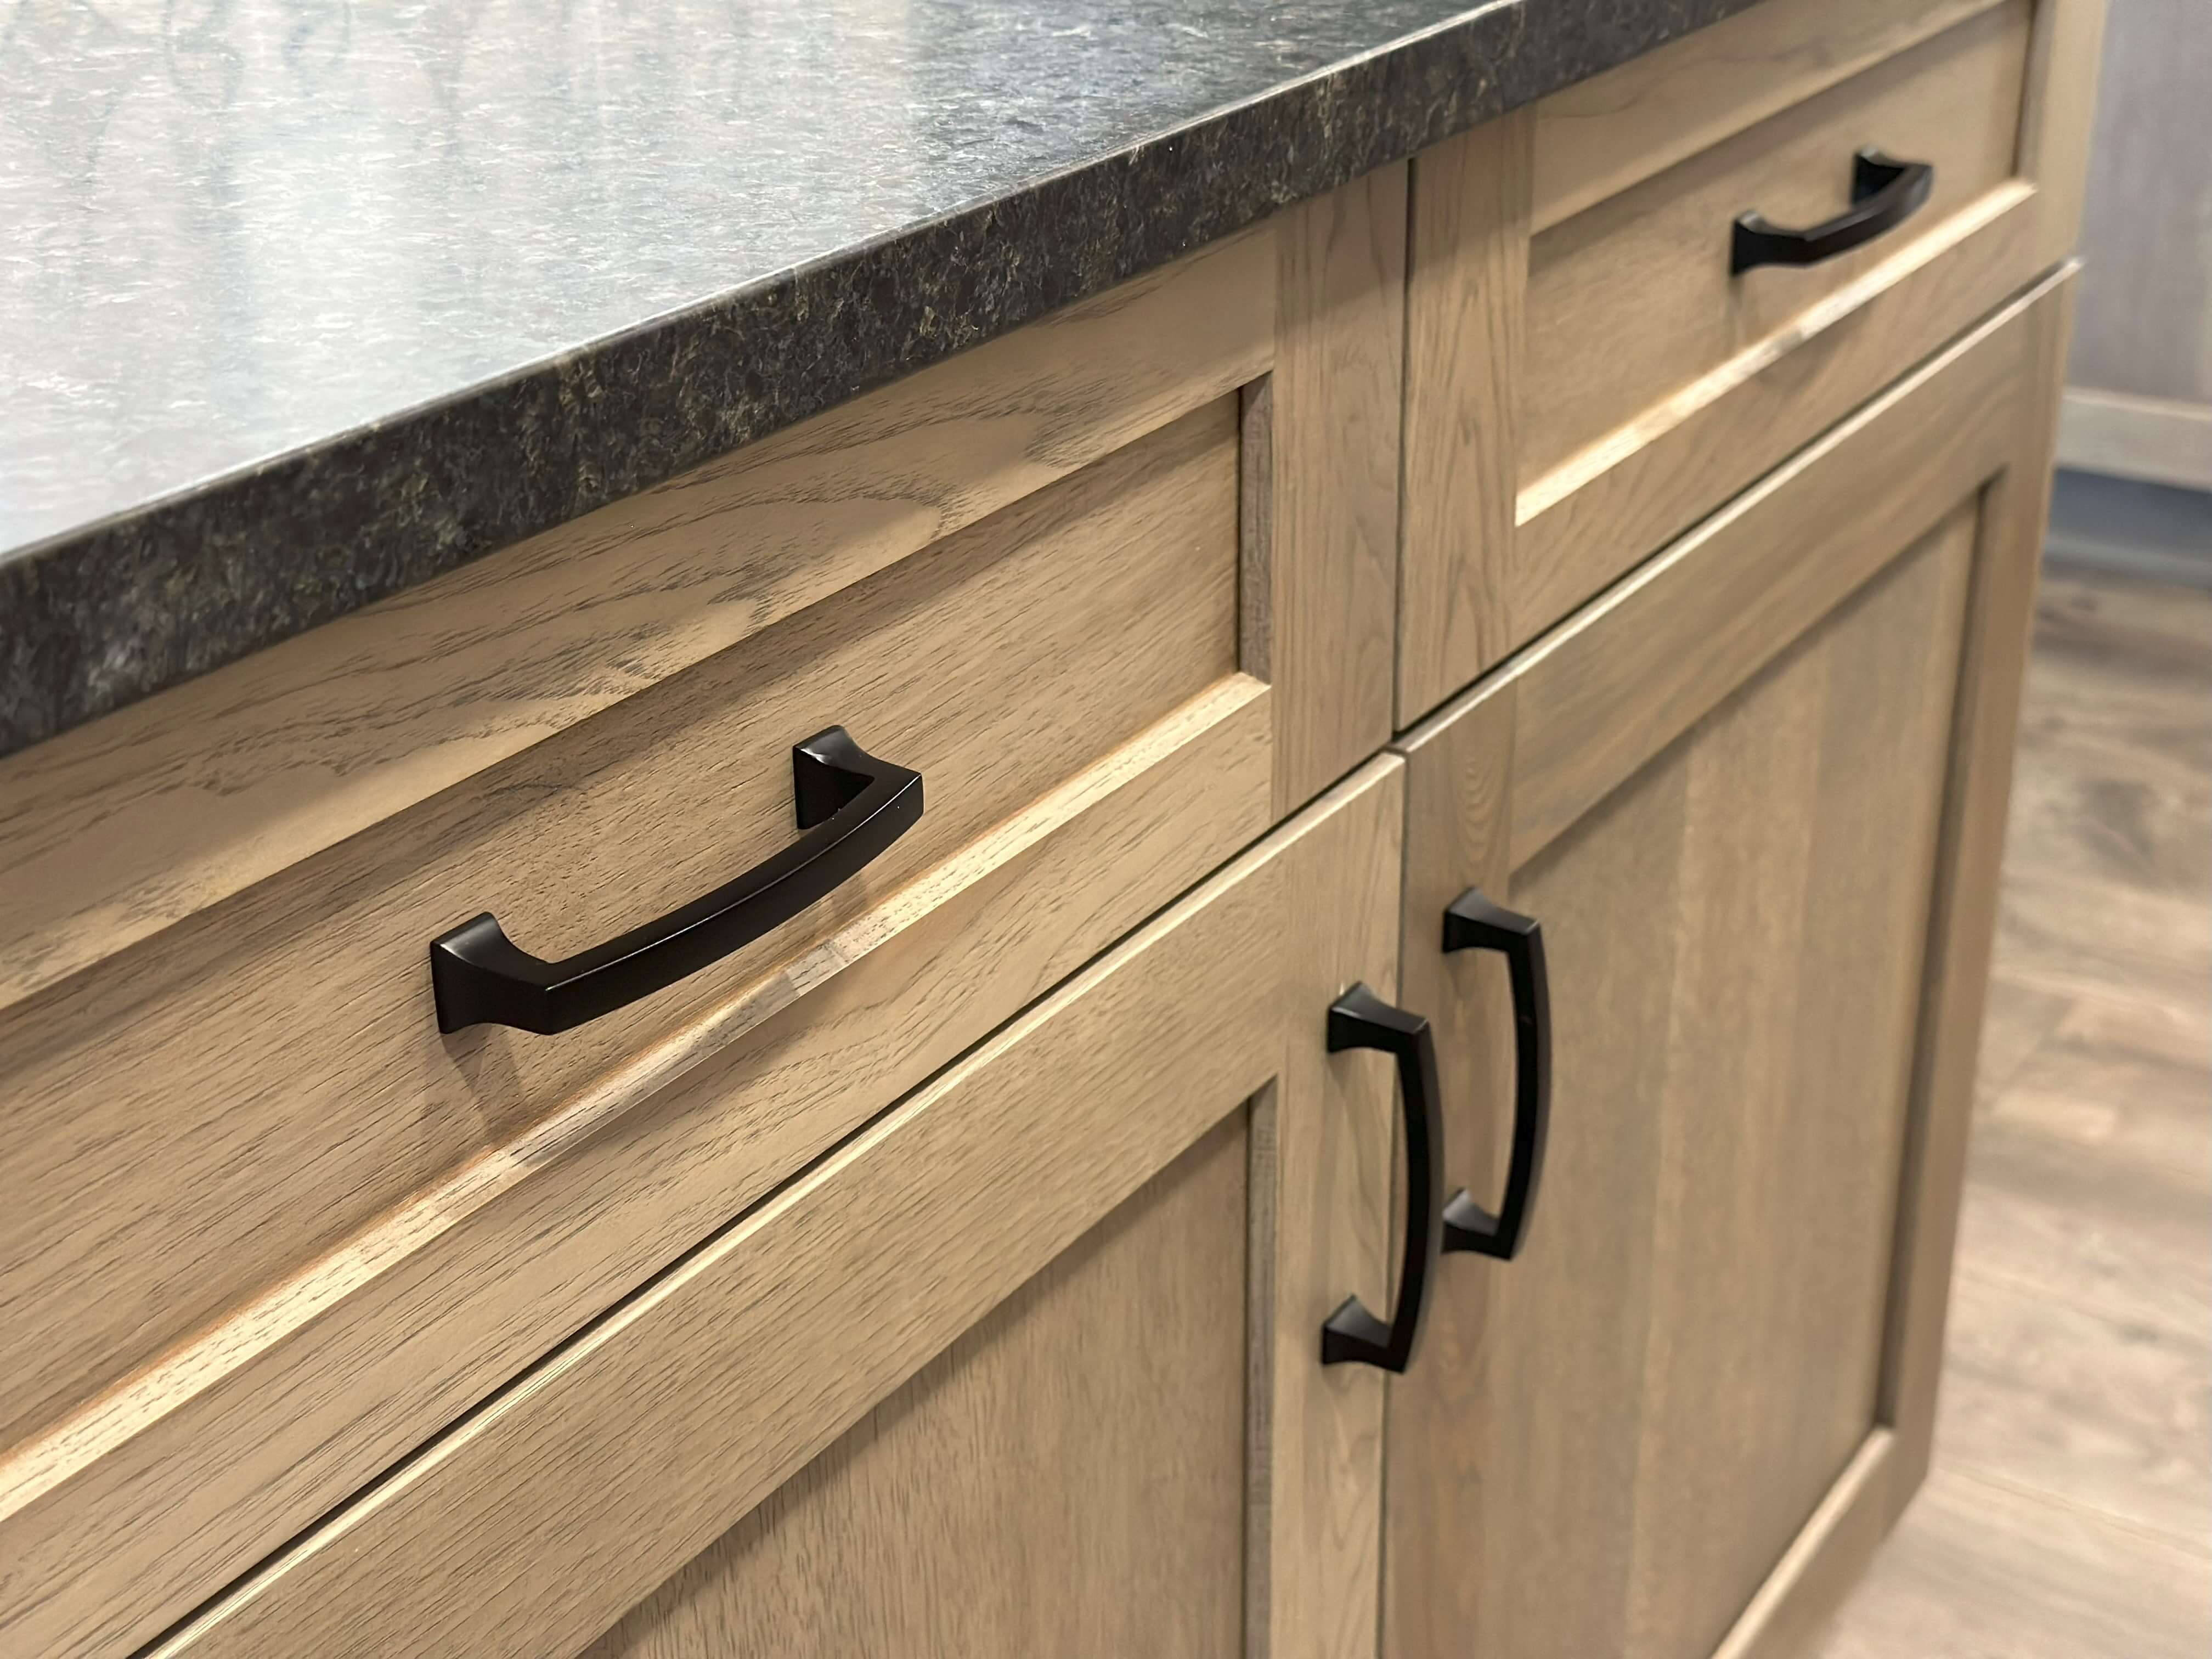
9BUILD Matte Black 4 inch Cabinet Pulls
Backsplash
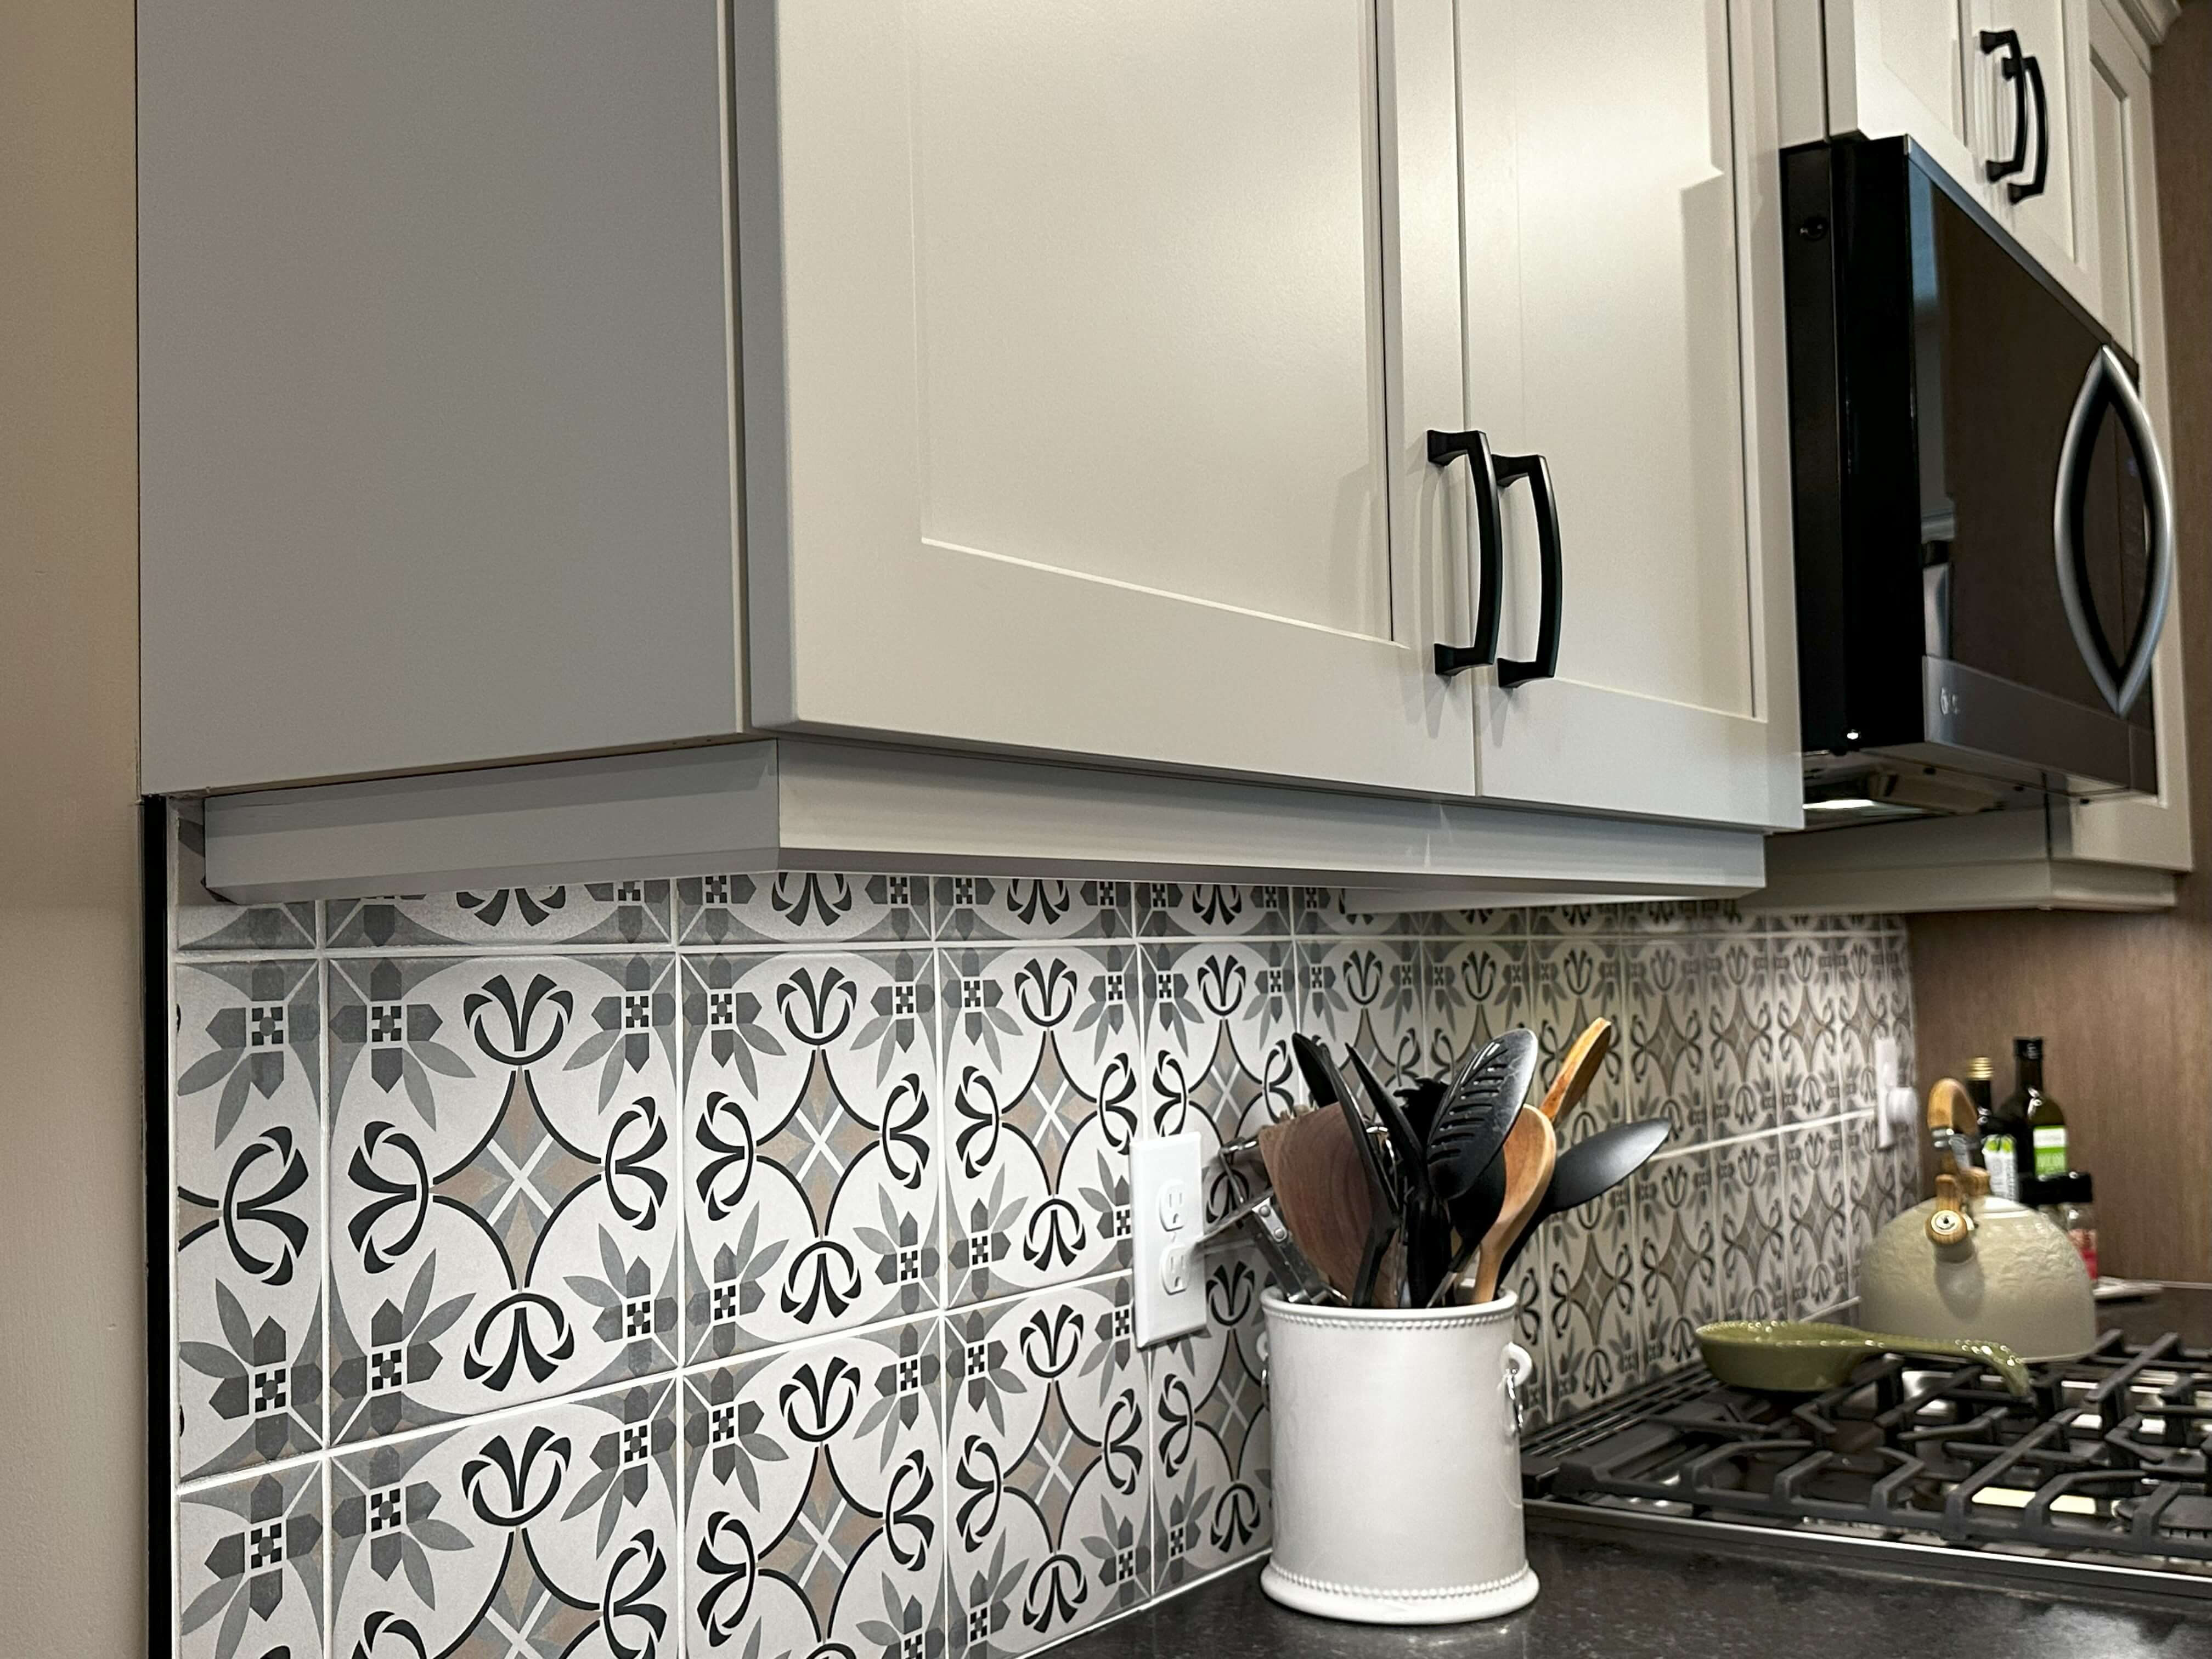
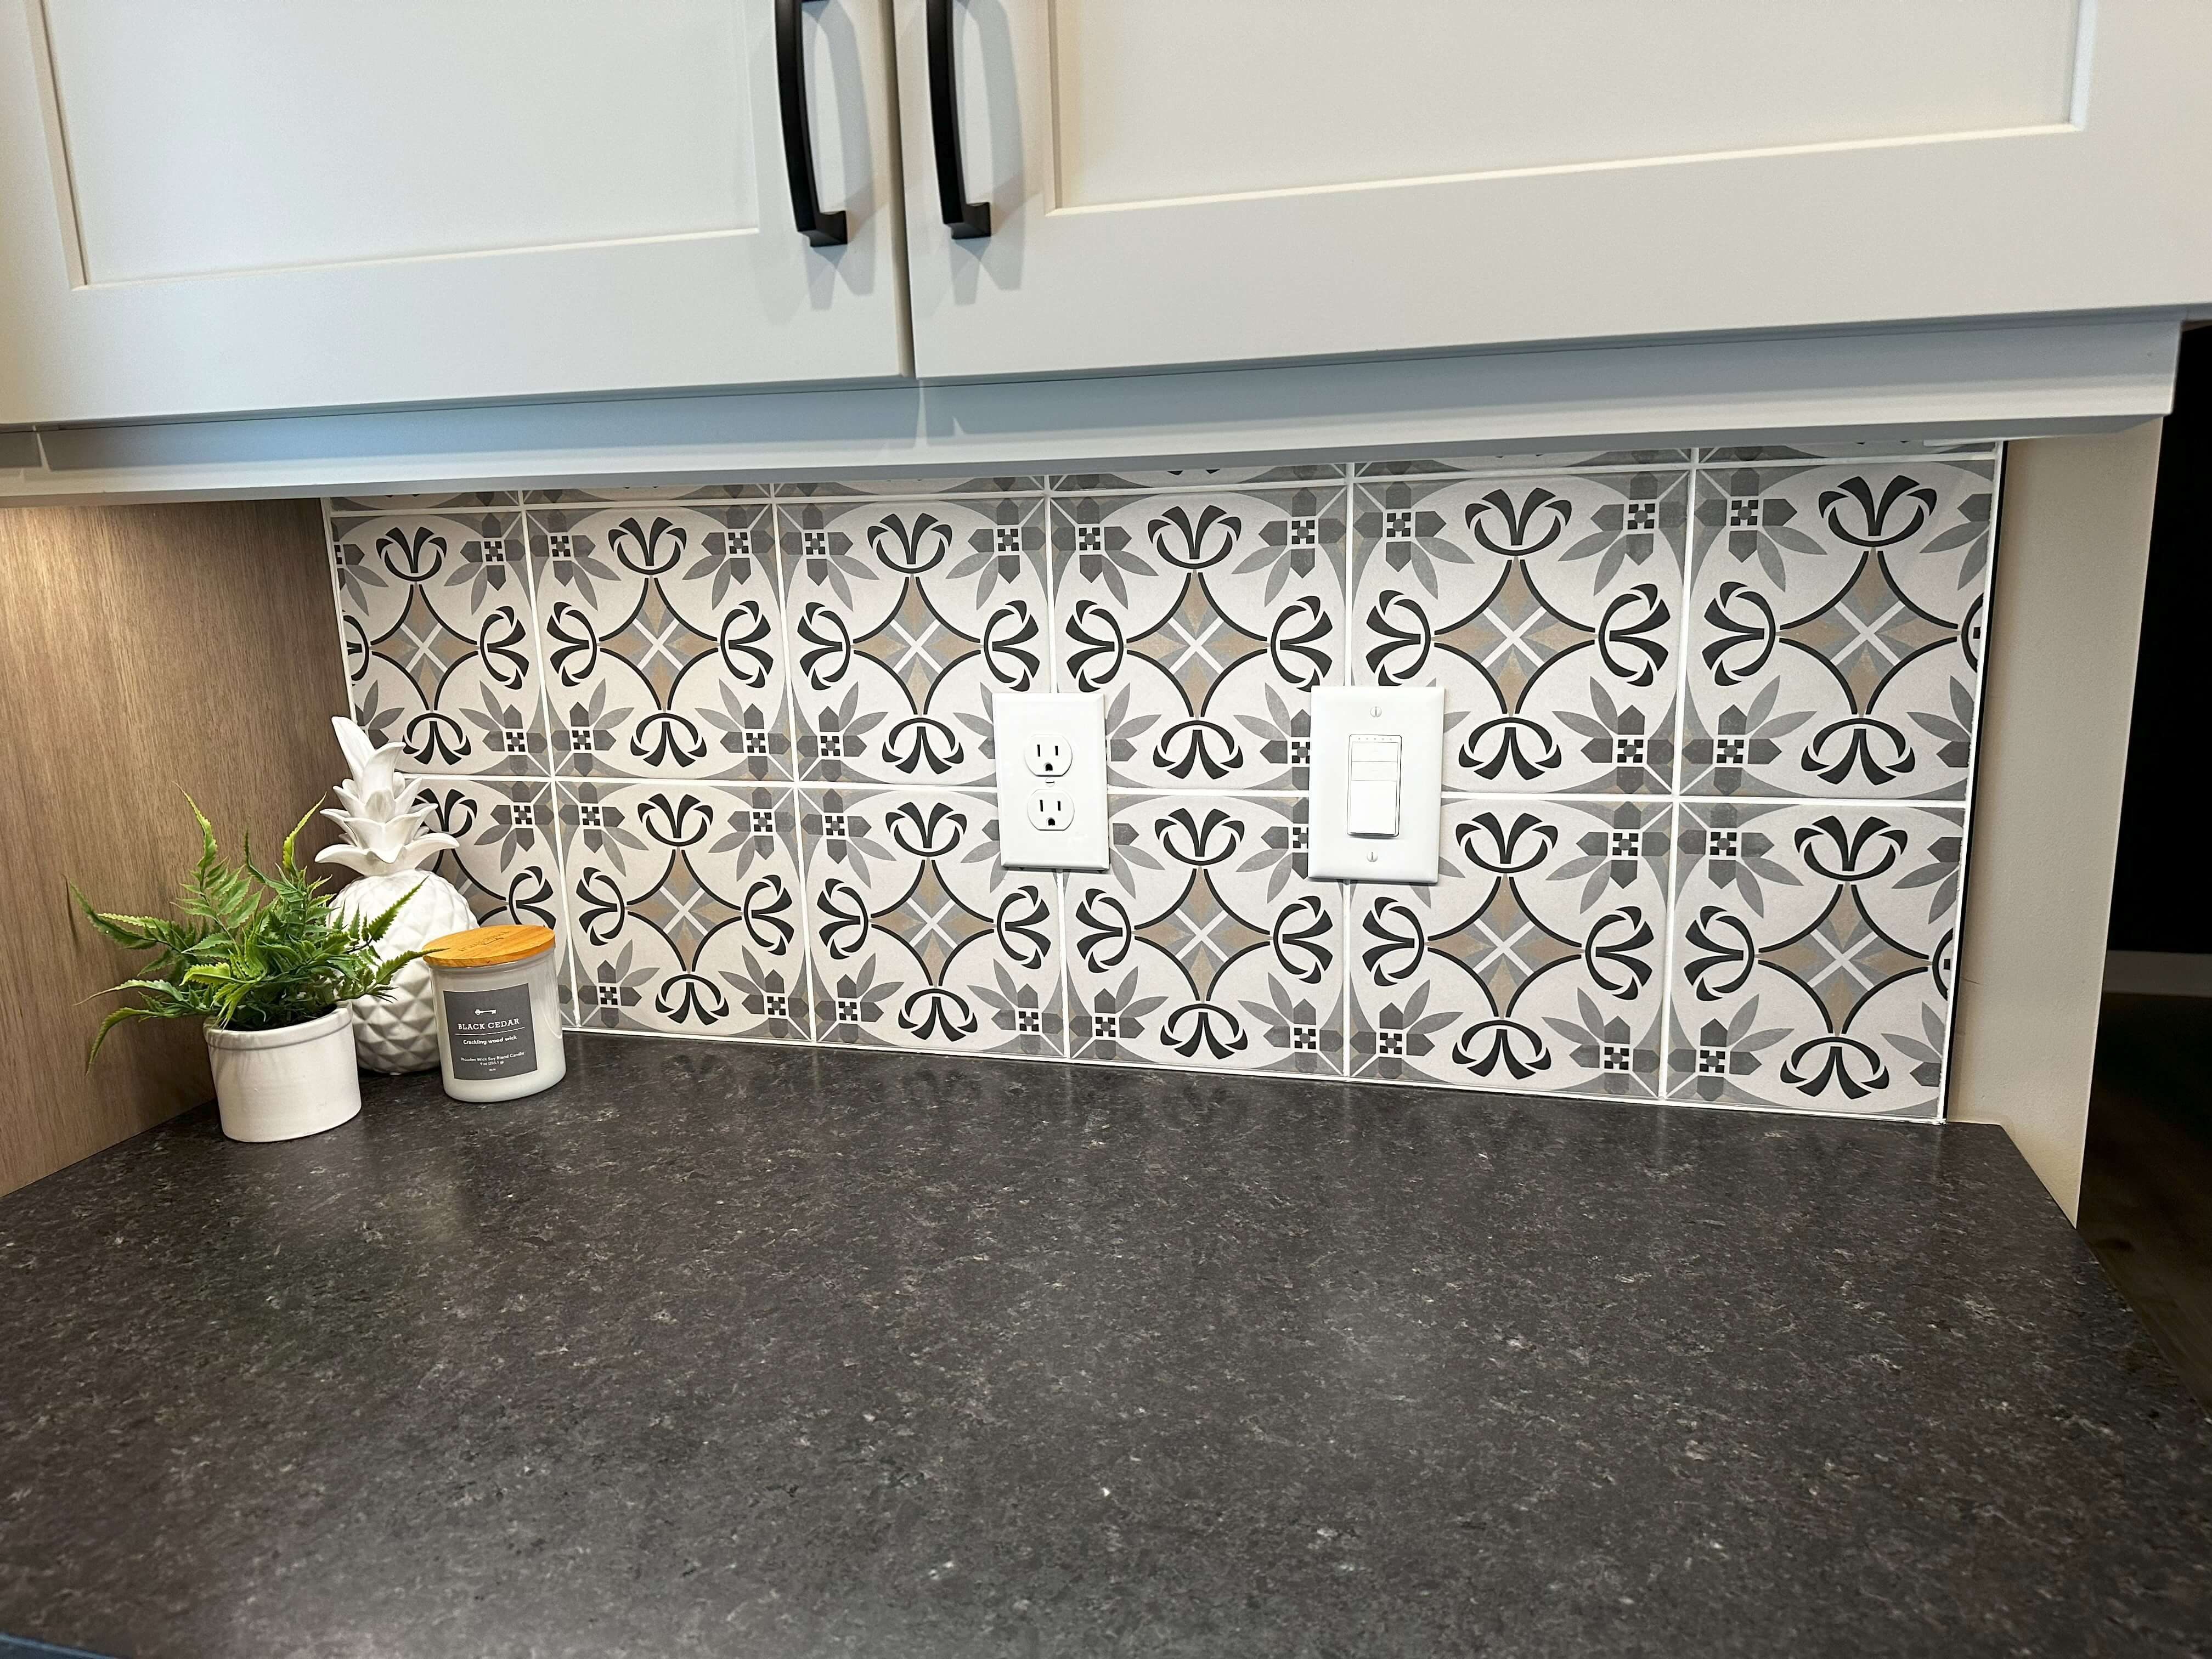
So, selecting the backsplash was almost as difficult as choosing the countertops. Once the granite had been installed it was time to go shopping for tile. Once again, I agonized about selecting the tile color, shape, and pattern I would do. There isn’t a lot of backsplash space that I needed to cover, so even though the cost would be low and the install fairly easy, I still wanted to make an impact with it. I went to several different tile shops with my little granite sample, thinking I would most likely go with a Zellige style in a soldier stack pattern. However, we came across a small vignette that had this patterned tile in colors that reflected the rest of the home. It also paid homage to our Scandinavian heritage. The biggest sell was the fact my beau liked it, which surprised me!

Lessons Learned
This was my first kitchen remodel where I used frameless cabinets. Dura Supreme’s Bria product line of cabinets can work with any one of their doors, and installation of the cabinet boxes was easy. All of the cabinets came with installation screws to secure it to the wall as well as to each other. Since there’s no face frame a screw with a sleeve is used to pull the cabinet boxes together securely. The drawer boxes also give you more storage due to the fact they are wider than framed cabinet drawers since there is no face frame to fit into. Also, frameless cabinets always have flush ends for a beautiful seamless look on all finished ends. I would highly recommend using frameless for any kitchen remodel due to these factors.
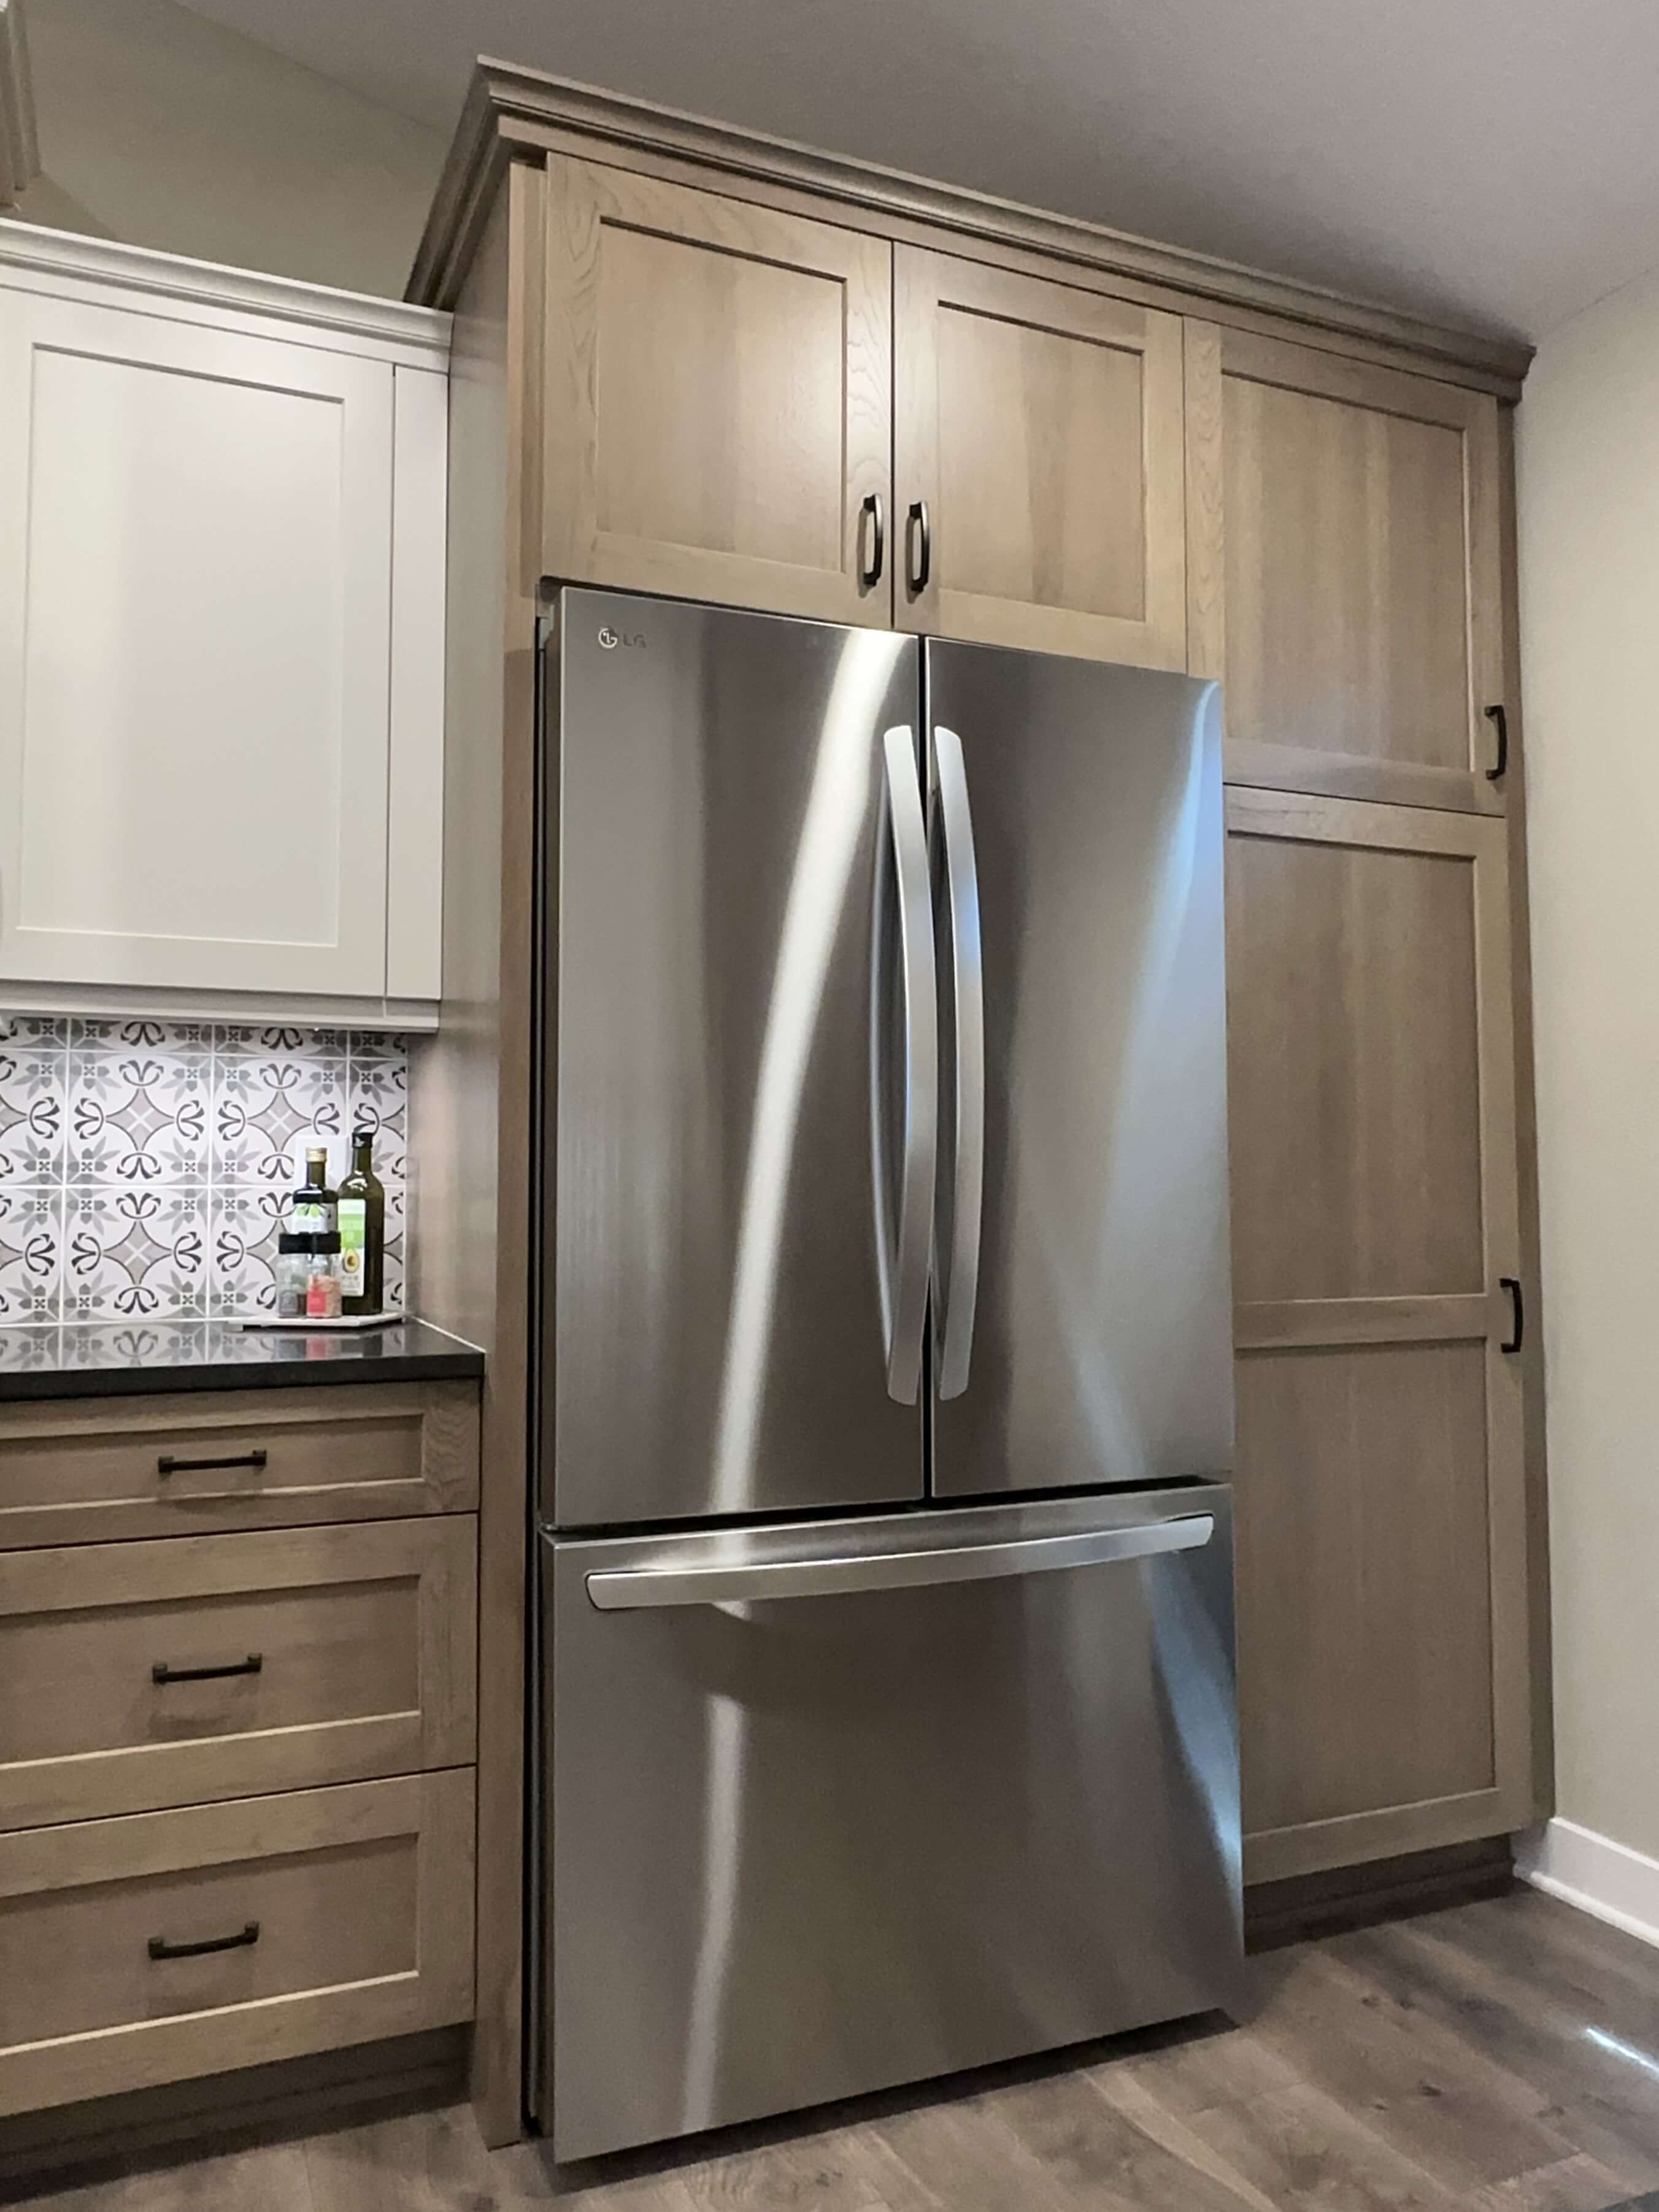
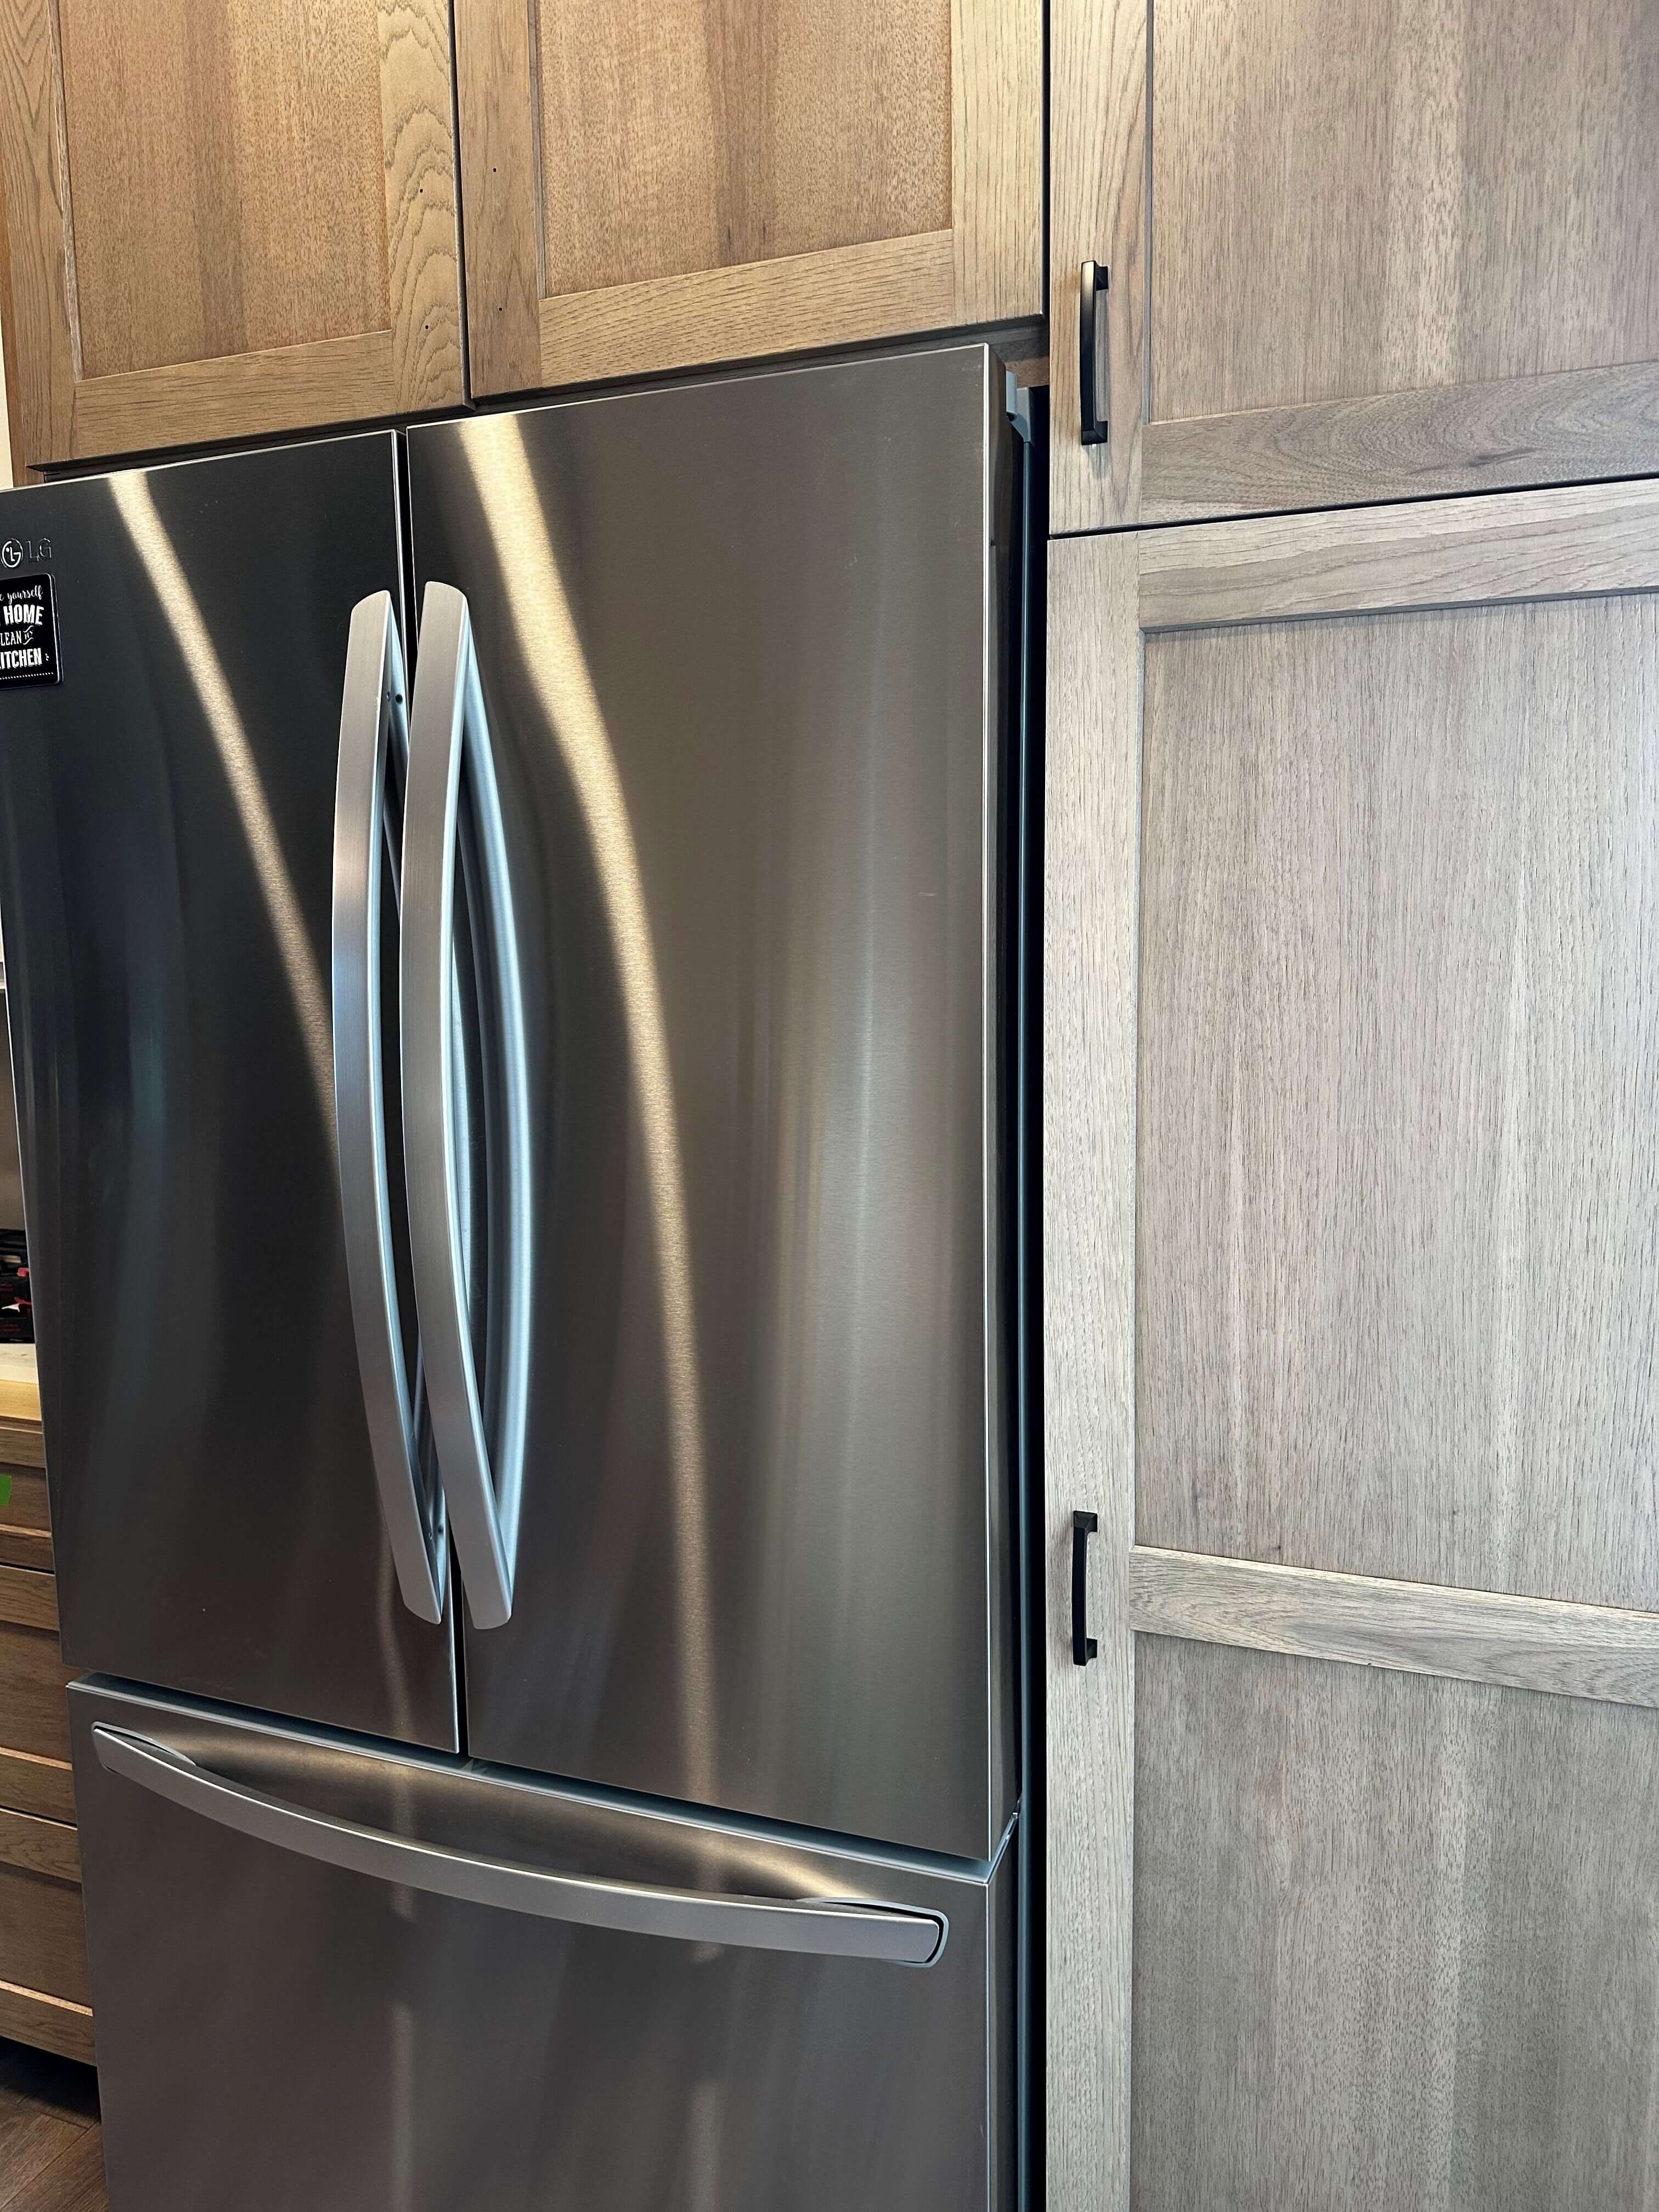
Another thing I learned… and I can’t believe this has not come up in my 30+ years of working in the industry… If you install a tall cabinet right next to a countertop depth fridge with the pulls on the hinge side of the fridge, the fridge door will not open fully. What?!?! I’m just learning this now? Of course, how the door of the fridge is hinged will determine this, but for a standard one, the door opens out and towards the pantry. Even pulling the fridge out a little more (which defeats the purpose of a countertop fridge, am I right?) didn’t solve the issue entirely.
To fix this we ended up flipping the doors around on the pantry and moving the hinges to the left side. Yes, I had to fill in the holes on that upper pantry door to reset the pull, but it’s high enough and in shadow that you don’t notice it. The hinging on the pantry is not ideal but as you can see from other photos I can still get into it easily, and the roll-out trays give full-access.
Looks great!
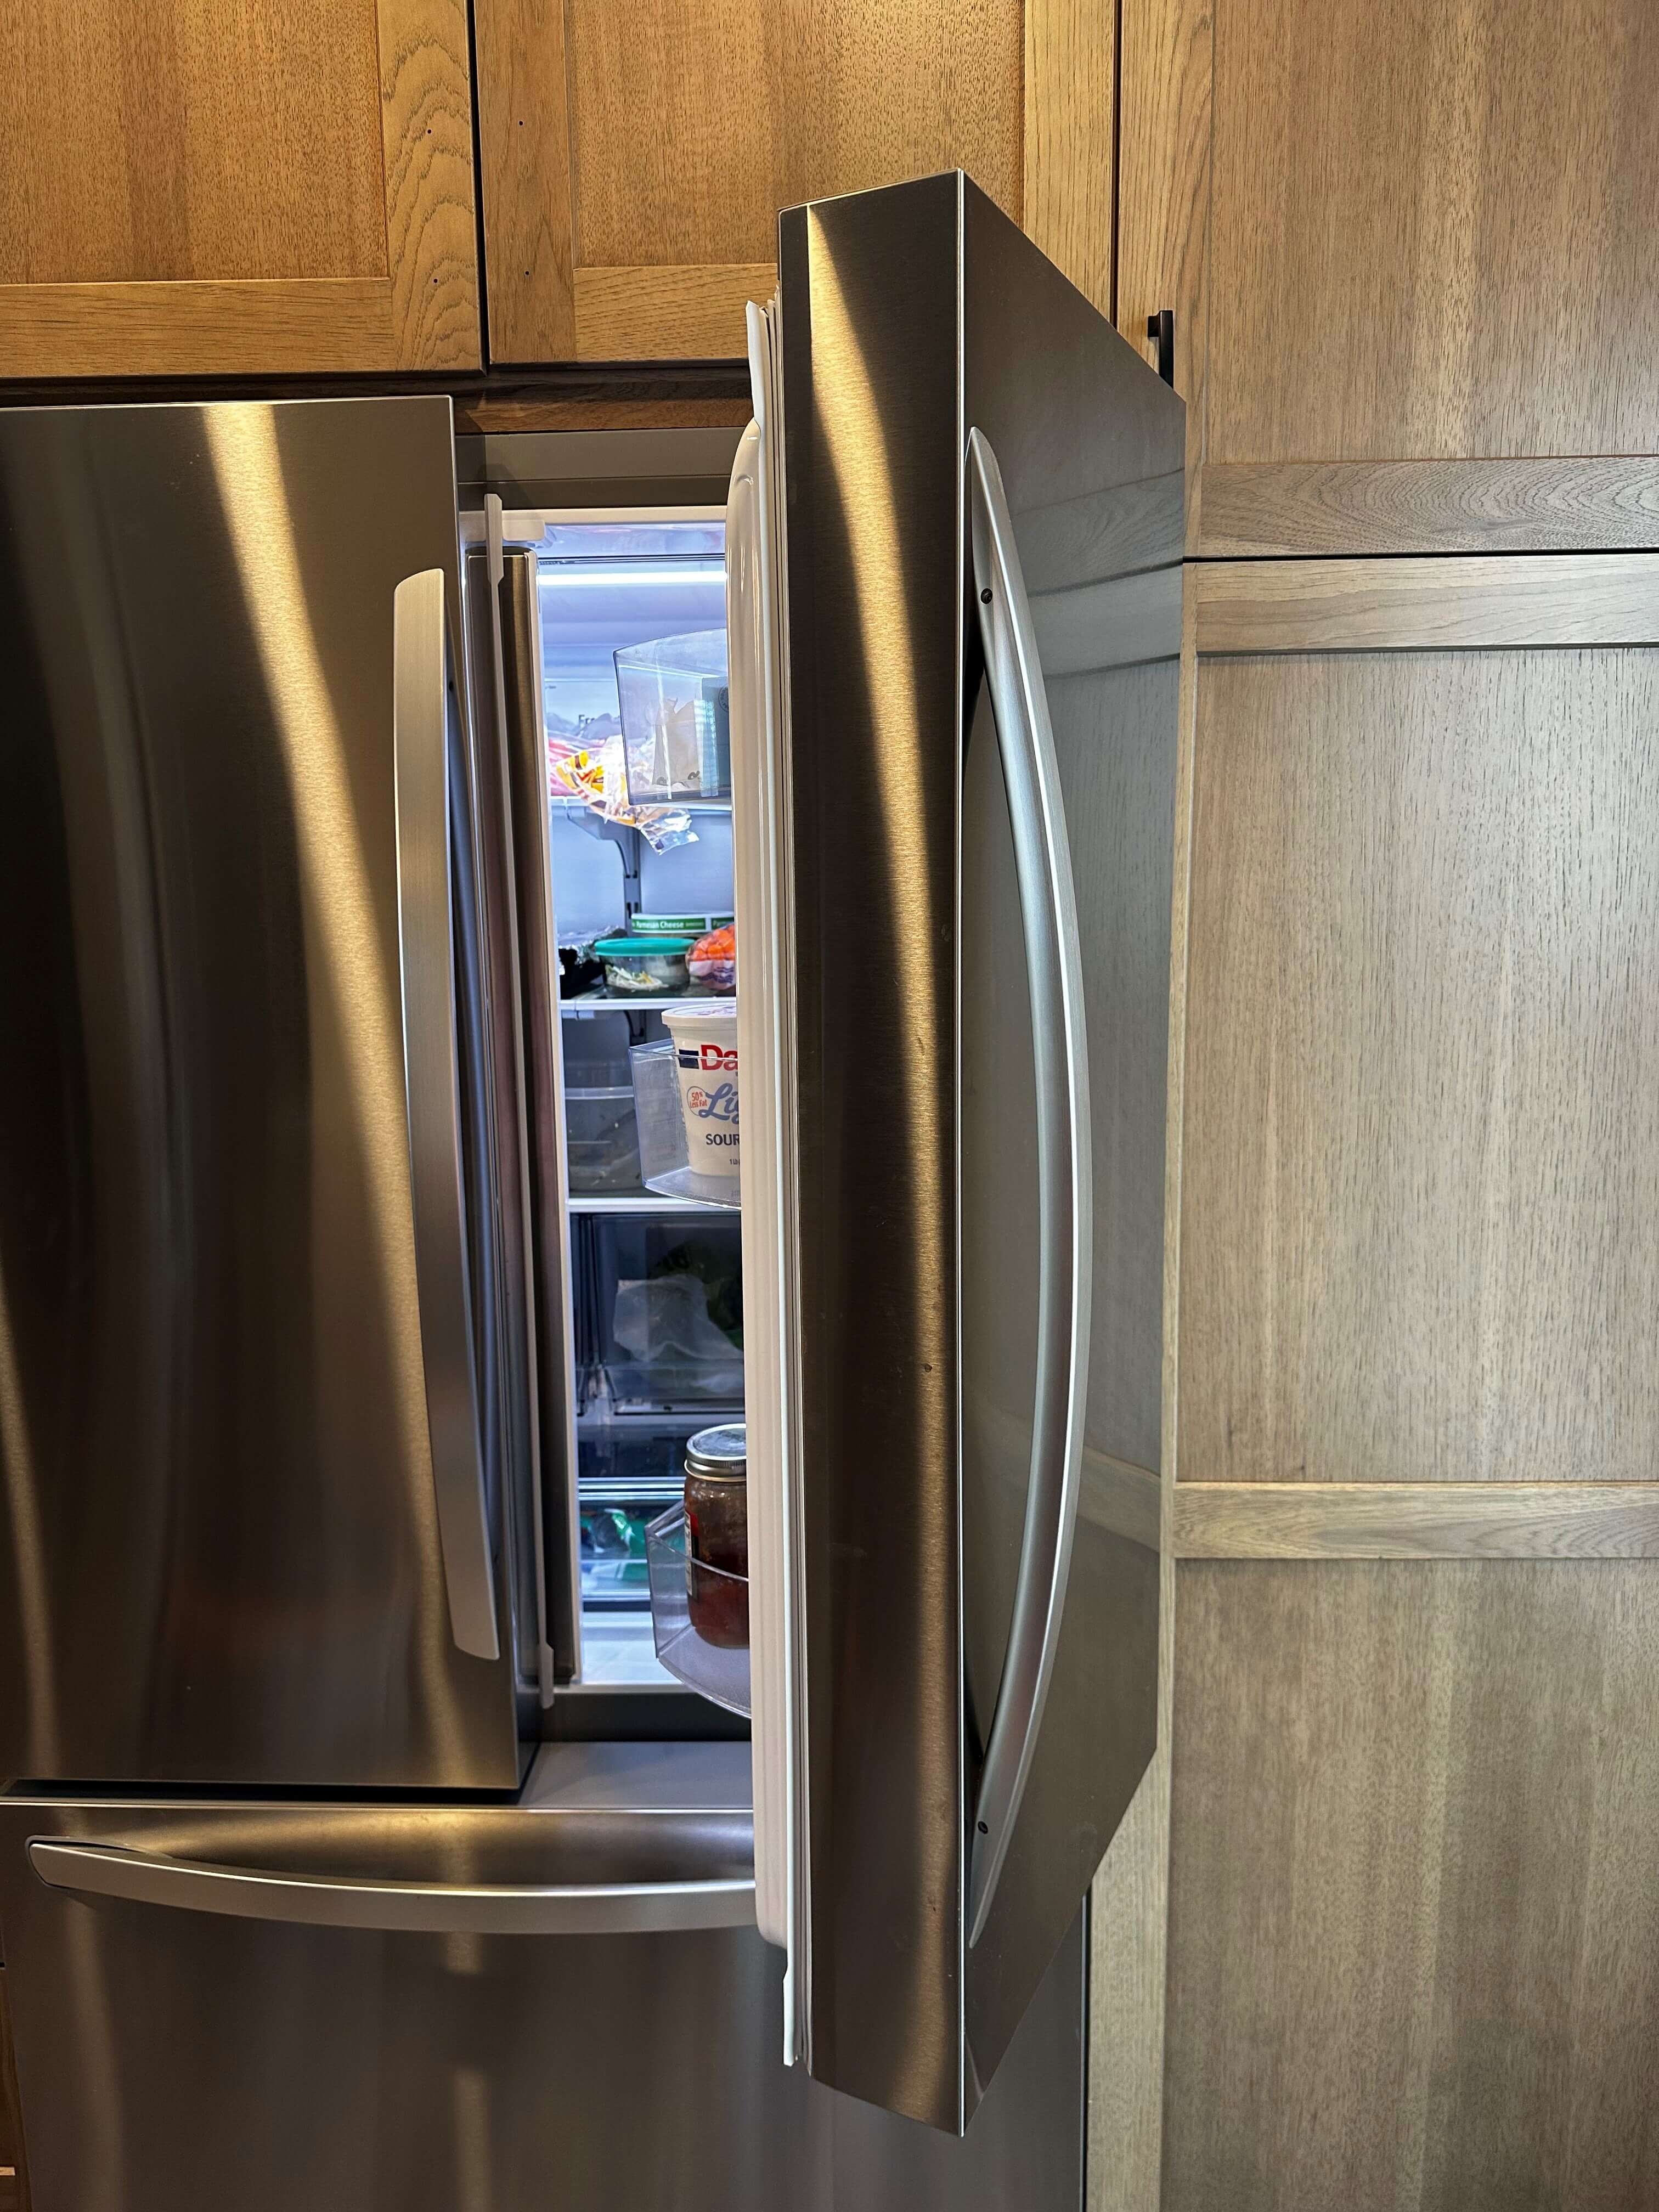
Wait! What’s happening?
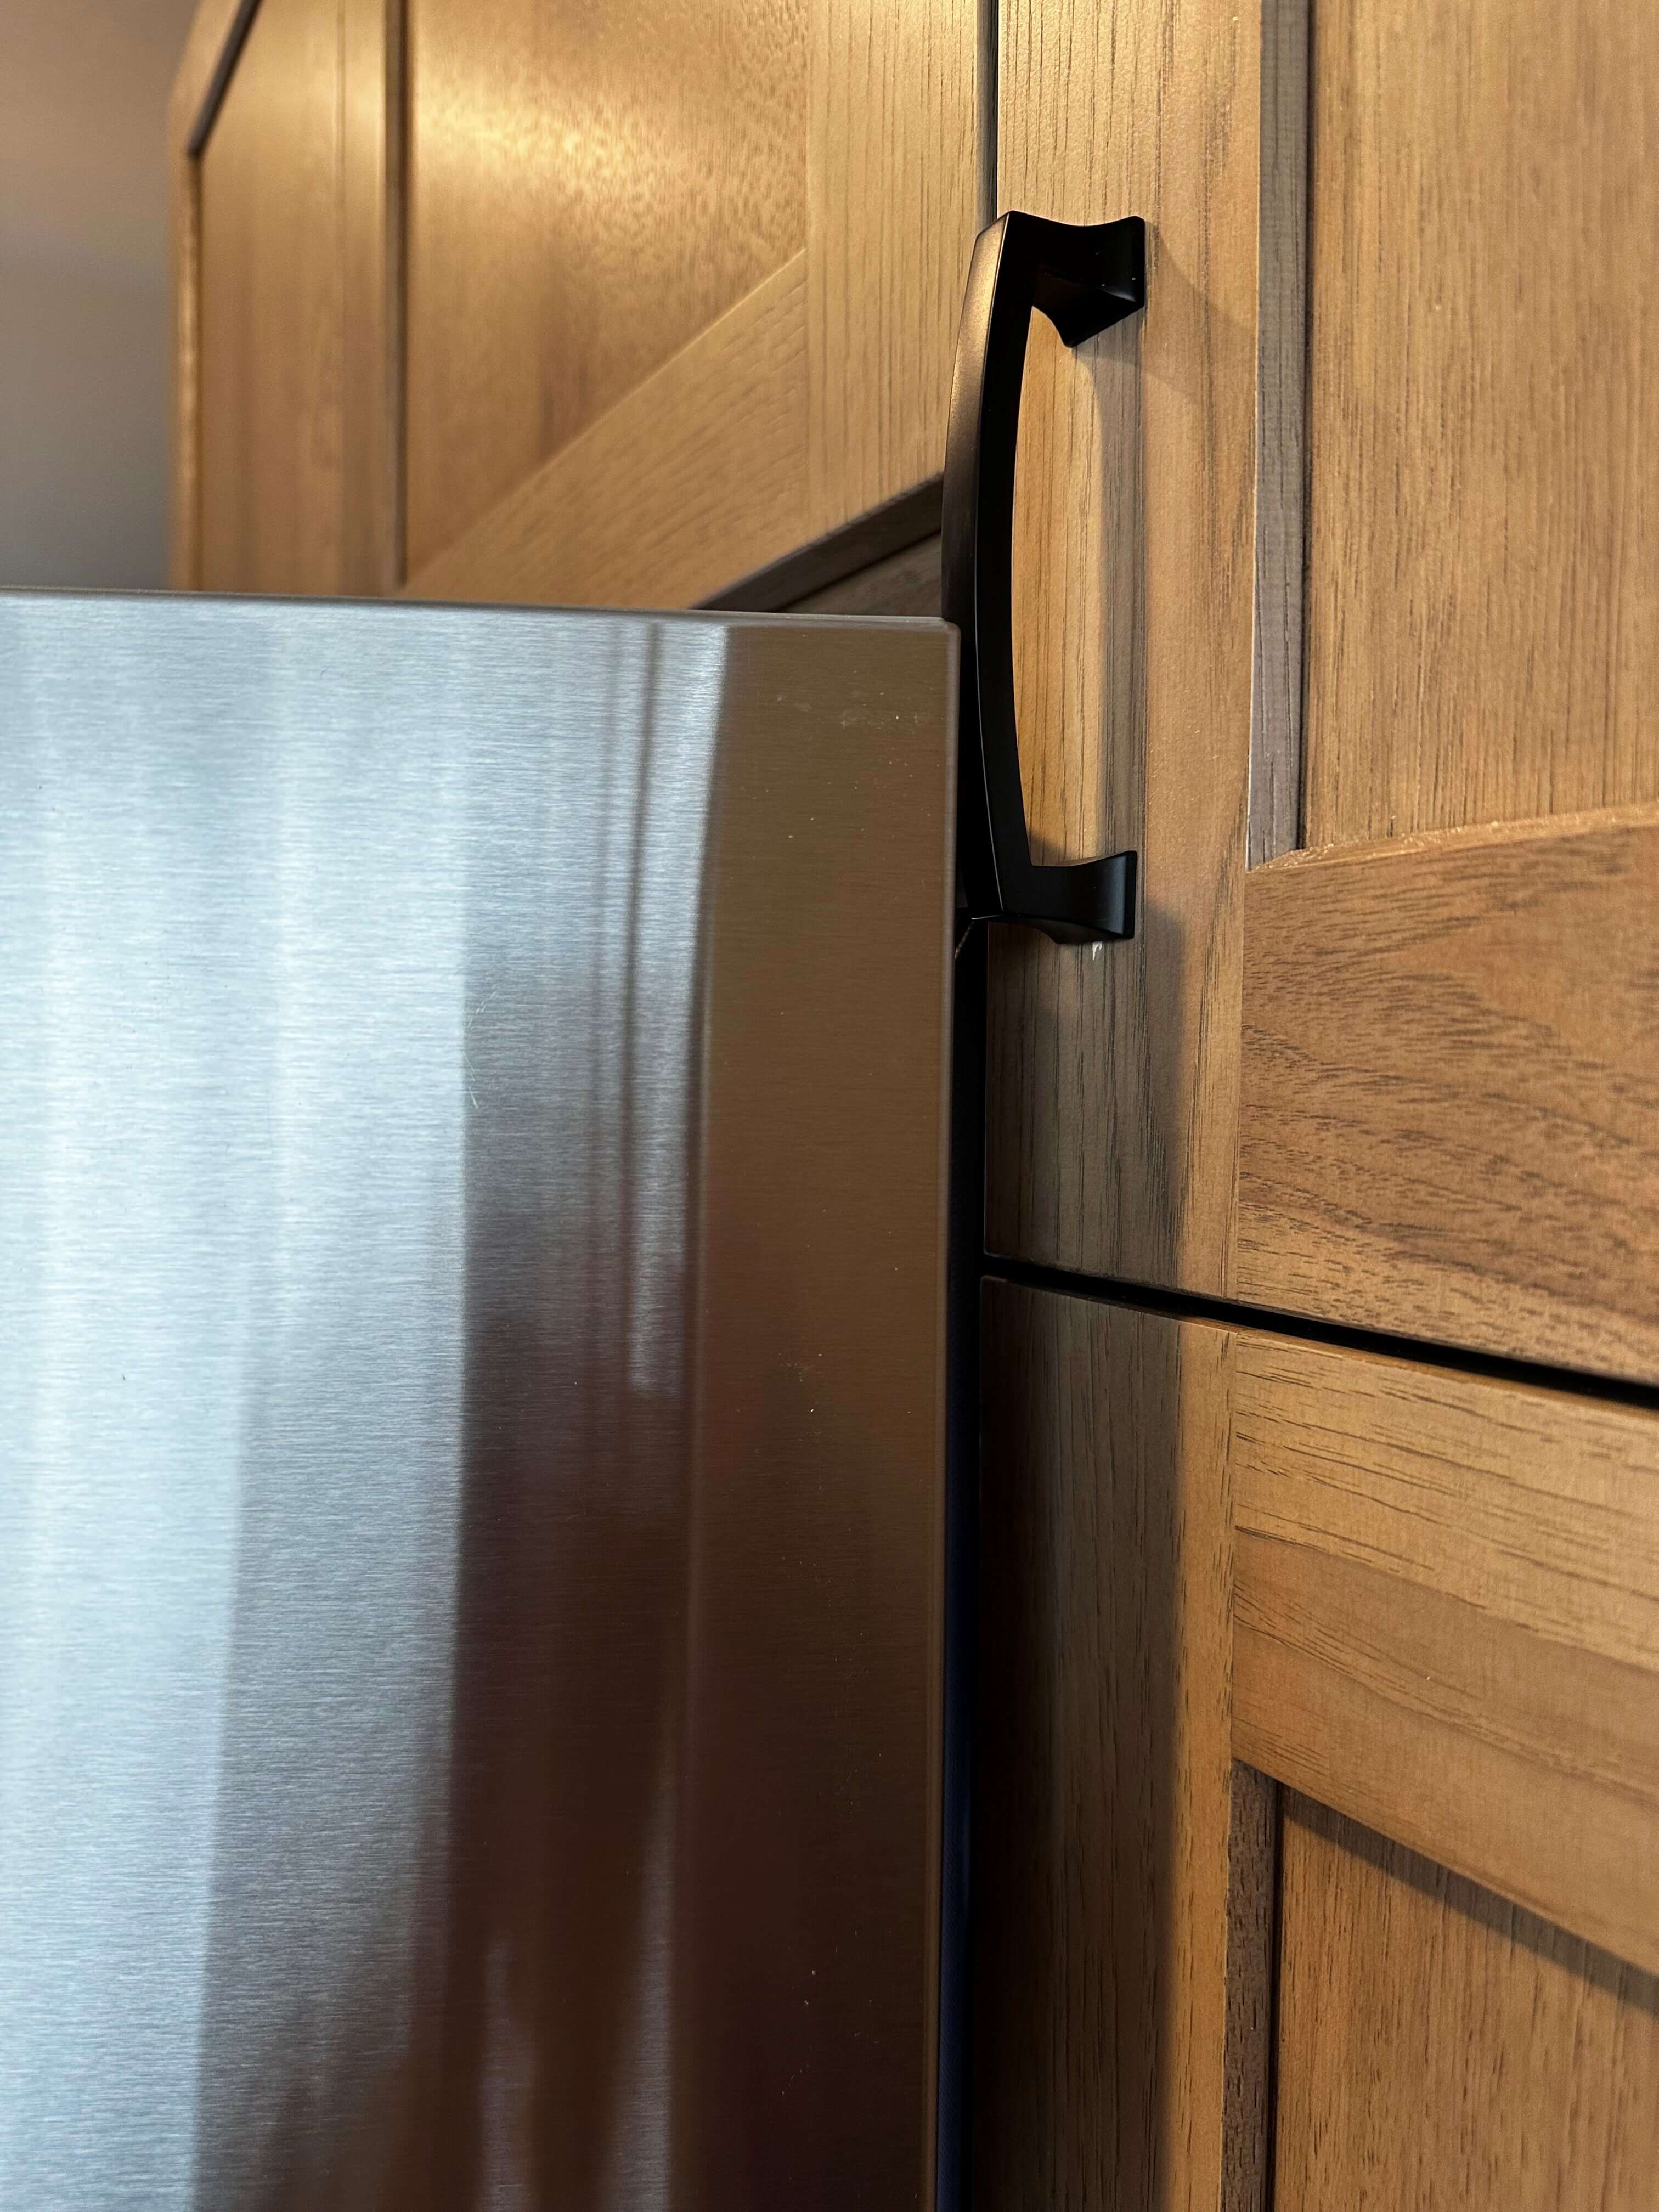
The fridge door hits the hardware!
In the future, if I’m working on a project where the fridge has pantries on both sides I will pay close attention to the hardware placement and possibly add J-End panels around the fridge to avoid this, especially if the fridge is countertop depth. If you already knew this, kudos to you!
Final Thoughts
As I’ve stated, as a designer, designing your own space can be extremely challenging. You second guess yourself over and over and wonder why you never have that problem when working with your clients. If you’re like me and a perfectionist, you will agonize over your decisions and have moments of doubt throughout the process, all the while forgetting that you should trust your instincts. Remember how I freaked out over the dark countertops? Well, I absolutely love them and can’t see the space without them. Also, adding the small Cove Molding was an easy fix that completed the overall space for me.
I am so pleased with how everything turned out, and I’m so happy I didn’t live in the original kitchen for a long time before ripping it out. It was money and time well spent to be able to enjoy my new kitchen now and into the future, with the finishes and conveniences that work for us, whether in the kitchen alone or entertaining family and friends.
I hope you enjoyed the journey with me and were able to get some ideas and inspiration for your own space. If you’ve already gone through a kitchen remodel of your own. Drop a comment on Facebook Messanger about what you love about your space or what you felt was the most challenging part of the process. I’d love to hear about it!
Until next time, be well!

Cabinetry: Dura Supreme’s Carson door style in a combination of “Dove” paint and “Cashew” stain on Hickory using Bria frameless cabinetry.
Sink & Faucet: Kraus
Backsplash: The Tile Shop’s Artisan Cardiff Porcelain 8×8 Wall Tall Tile
Hardware: 9BUILD Matte Black 4 inch Cabinet Pulls